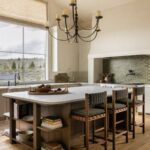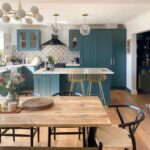
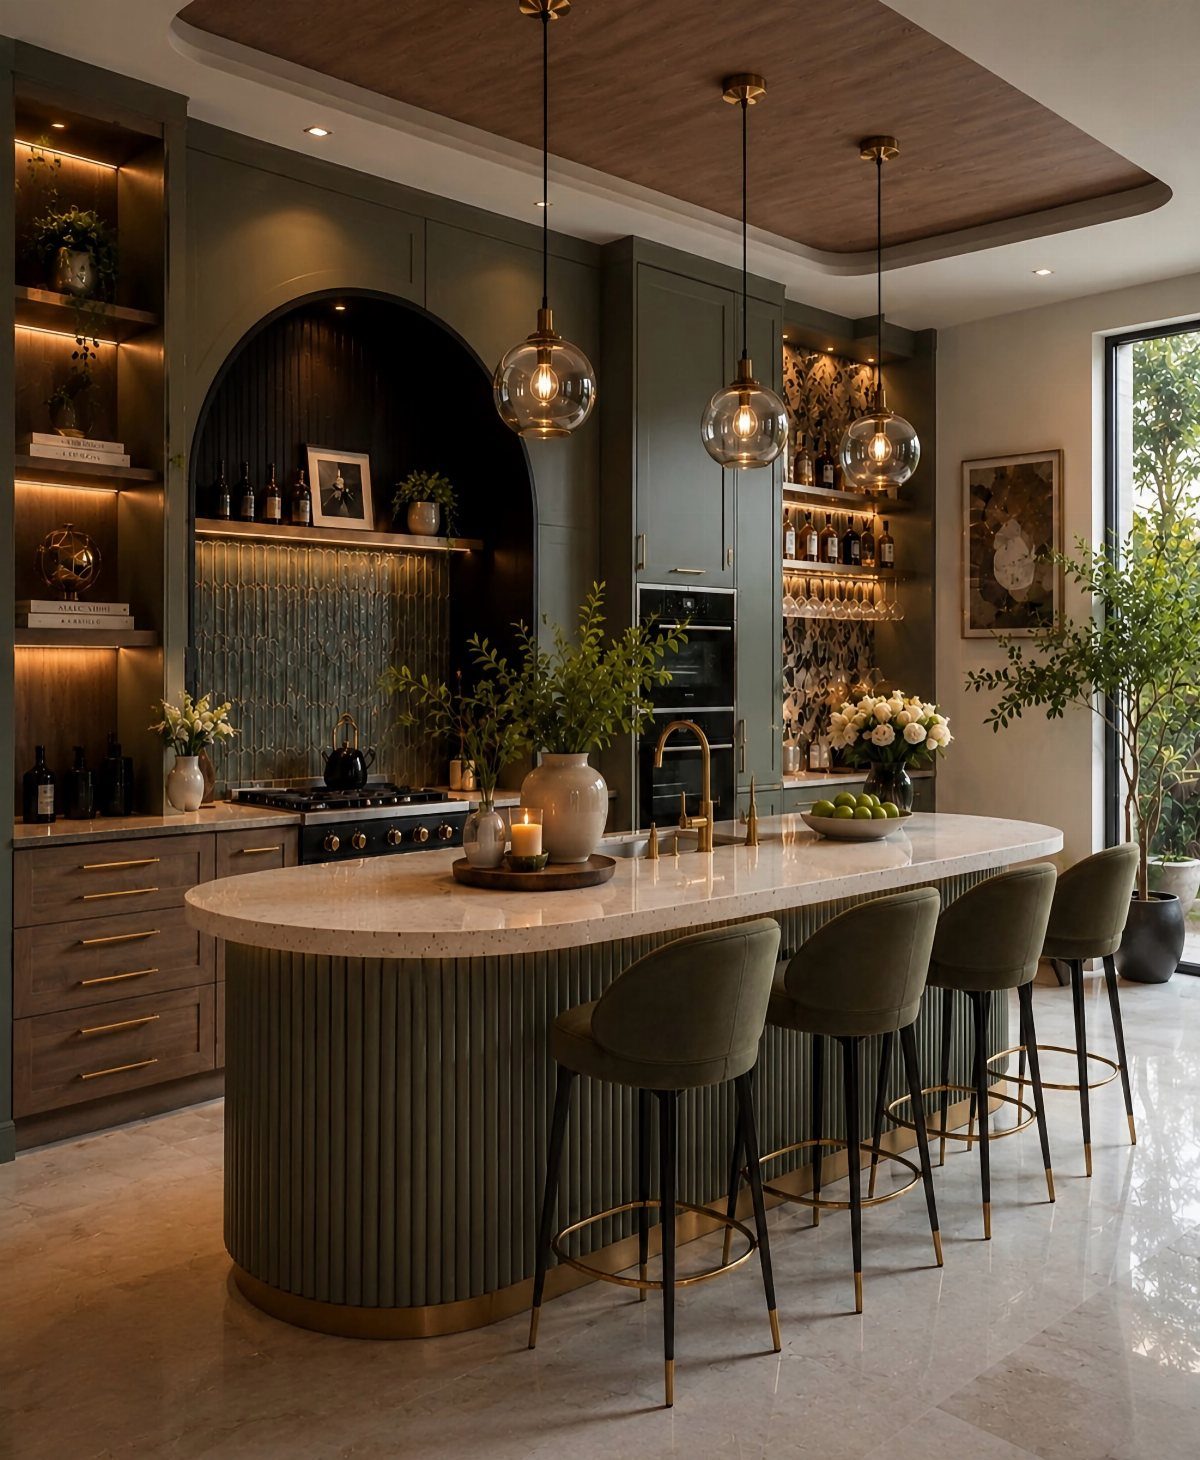
Seating layouts for a modern kitchen island split into three directions: one-side arrangements that keep traffic moving, wraparound configurations that seat six or more, and compact setups that fit two stools in a galley kitchen.
The choice comes down to how much clearance you have on each side of the island and whether the space needs to handle quick meals or longer gatherings.
1. One-Side Seating
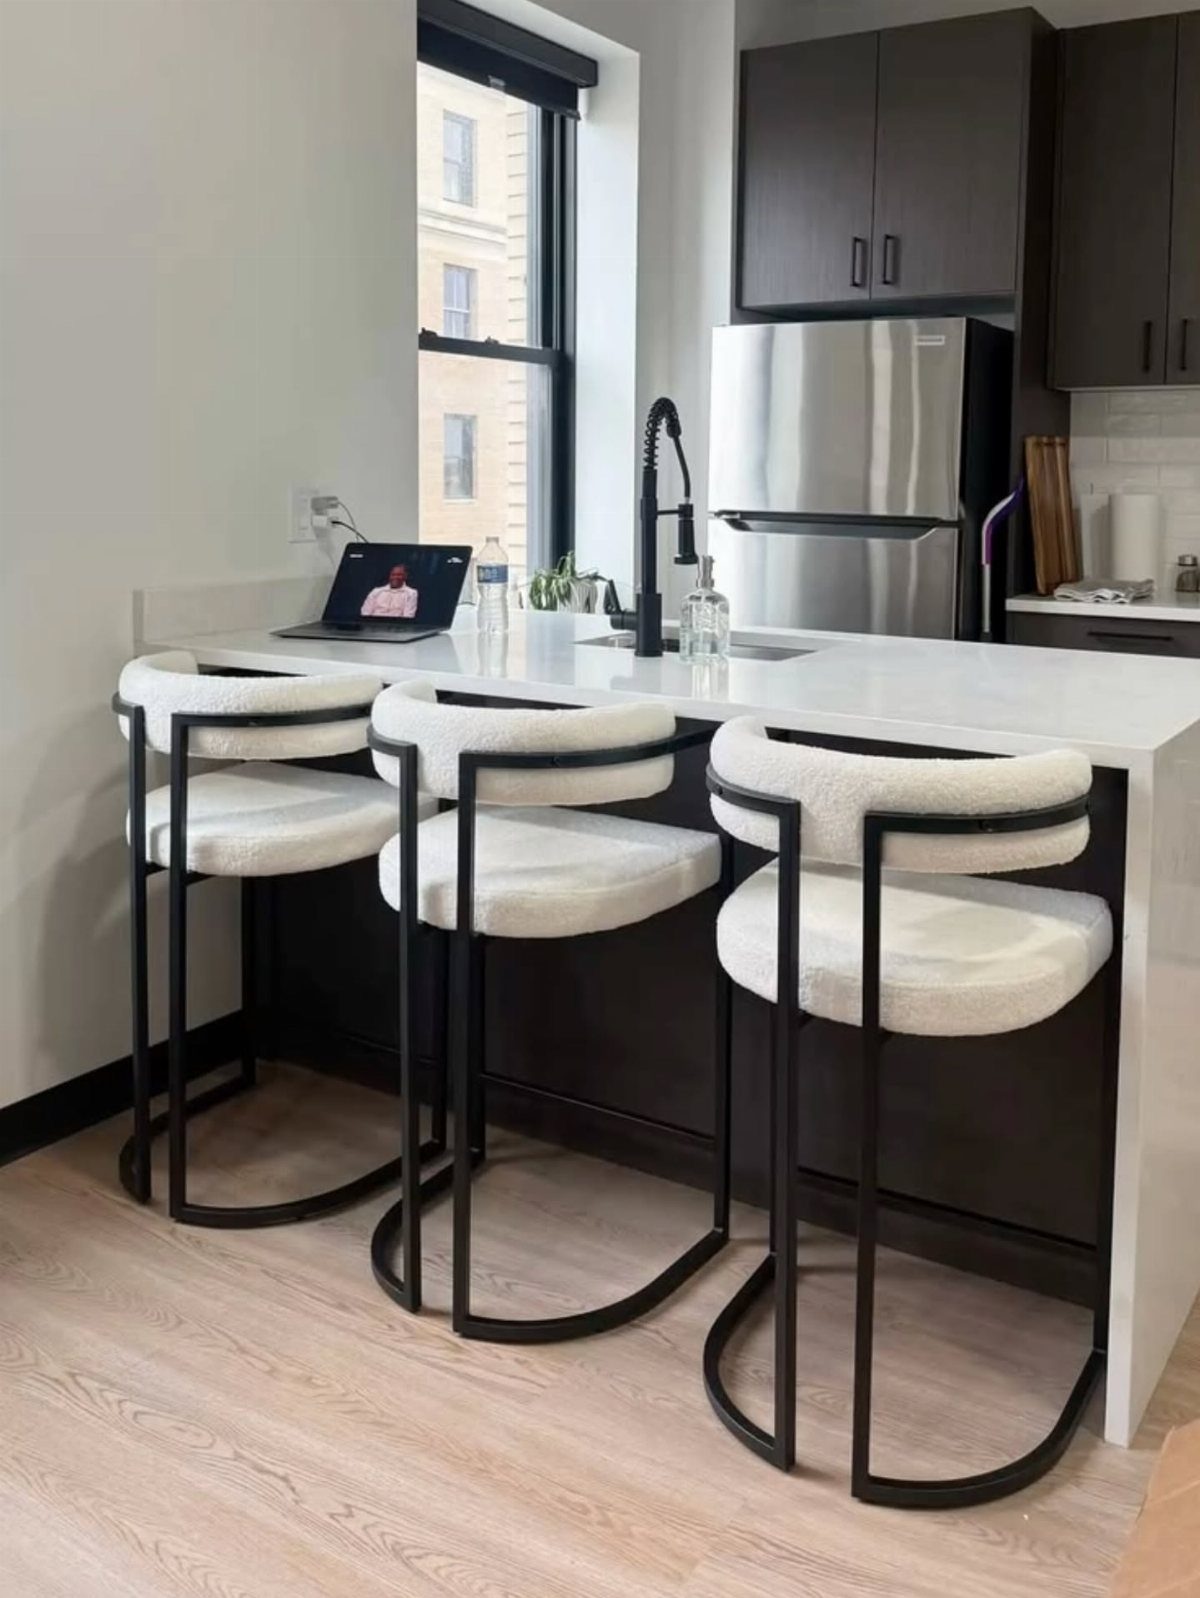
Stools on one side leave the opposite edge open for prep work and keep traffic flowing through the kitchen.
I use this layout when the island sits in the middle of an active zone and people need room to move past while someone is seated.
A standard island holds three stools; a longer run fits four. Give each seat enough room that elbows clear the neighbor without a fight.
If the island backs onto a wall or cabinetry, one-side seating is the only practical choice. The setup works equally well in open-plan kitchens where the island doubles as a room divider.
2. Waterfall Edge Island
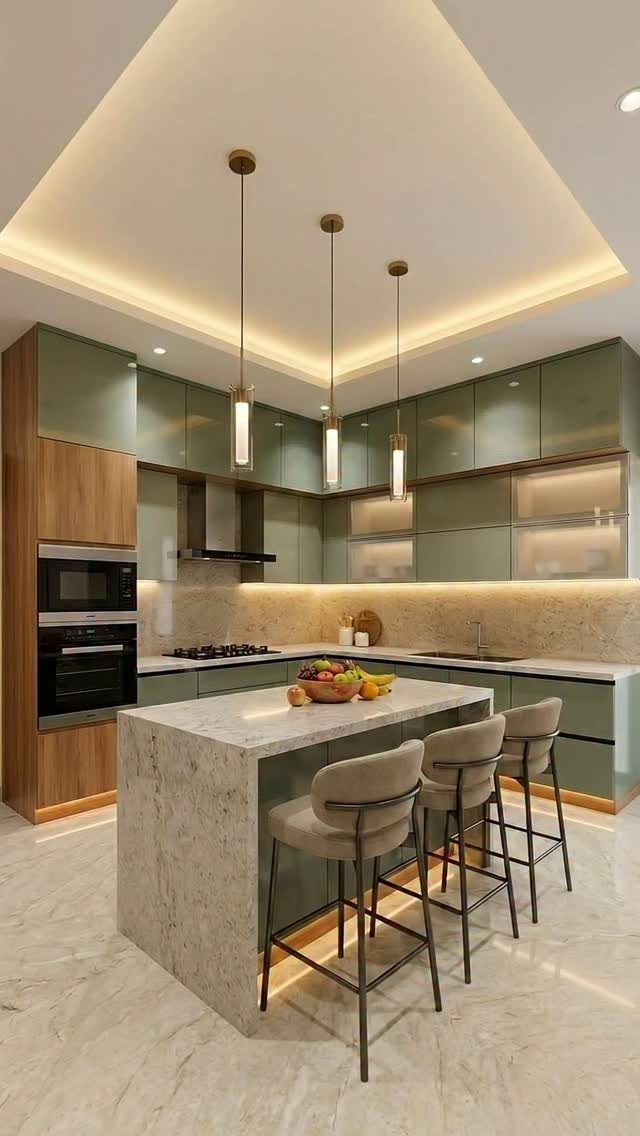
The countertop material runs straight down both short ends, meeting the floor without a seam or a trim piece.
I like this detail in kitchhenspaces where the island acts as a centerpiece, because the continuous surface reads cleaner than a slab that stops at the edge.
Quartz and solid surface materials are easier to fabricate this way than natural stone, which requires book-matching if you want the veining to mirror on both sides.
The extra material and labor usually raise the countertop cost by a third or more.
Waterfall edges work best on islands that stand alone in the room. If the island butts up against cabinetry or a wall on one side, the effect loses its symmetry.
If you don’t want anyone to know that you’re storing things within the island, hide the cabinet doors under the lip of the countertop where the barstools are.
— Domino
3. Wraparound Seating
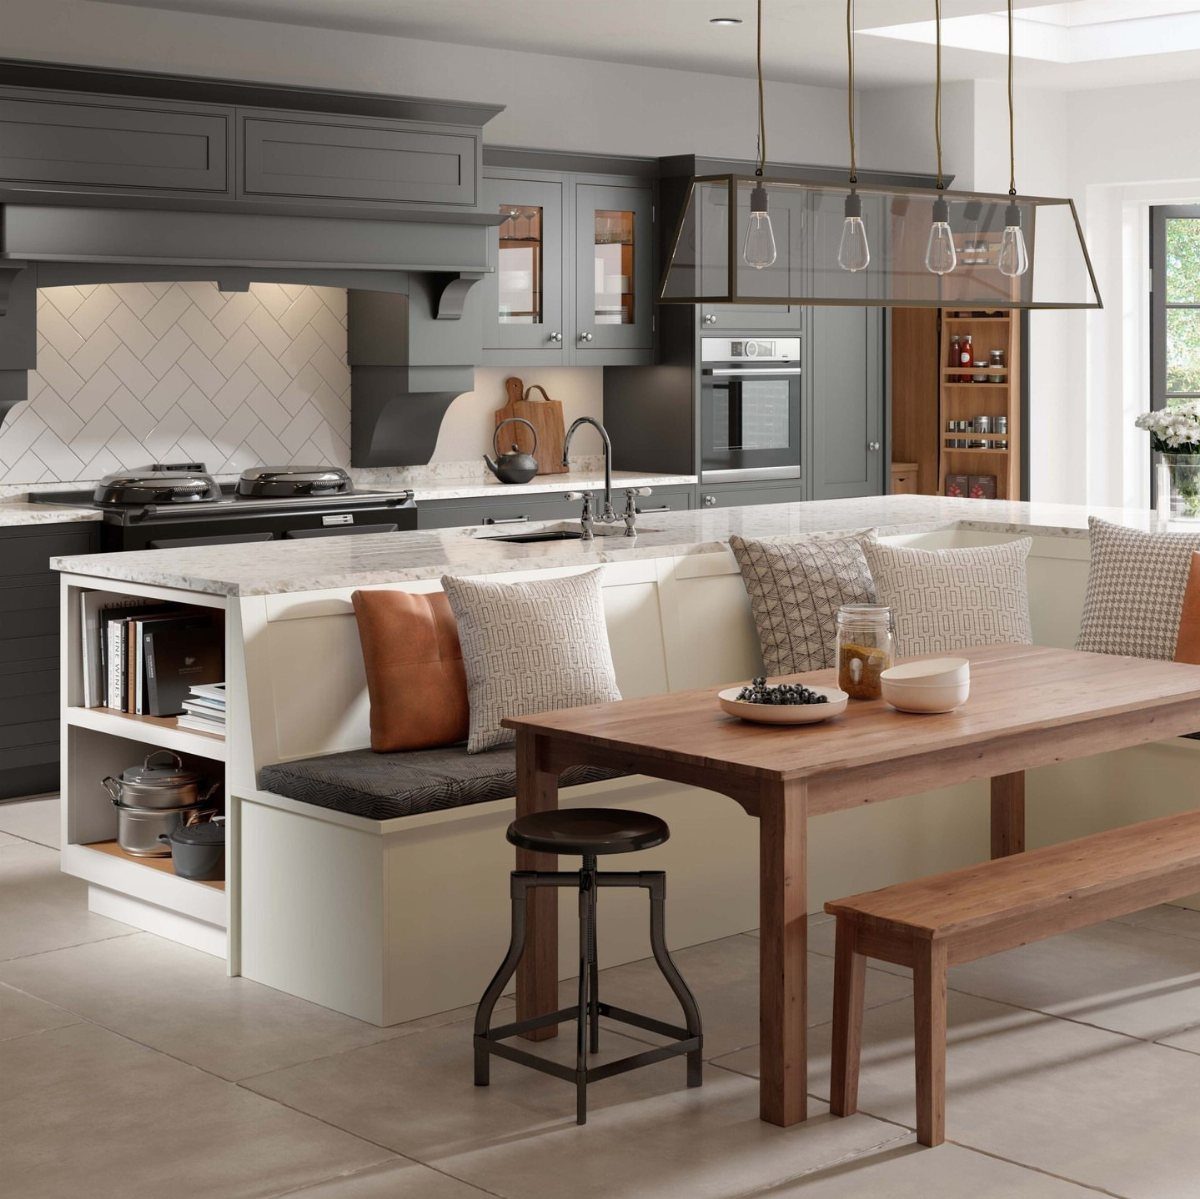
Seating wraps two or three sides of the island, turning it into a gathering spot that handles more people without adding separate furniture.
I specify this when clients want the kitchen to double as the main socializing space and the room is large enough that the island won’t block circulation.
An L-shaped arrangement is common: stools along the long side and a bench or additional stools along one short end.
The corner seat is always the hardest to use comfortably, so I leave that spot open or keep it for kids.
This layout demands a larger island and enough clearance on all working sides. In a tight kitchen, wraparound seating crowds the cook.
4. Bench Seating
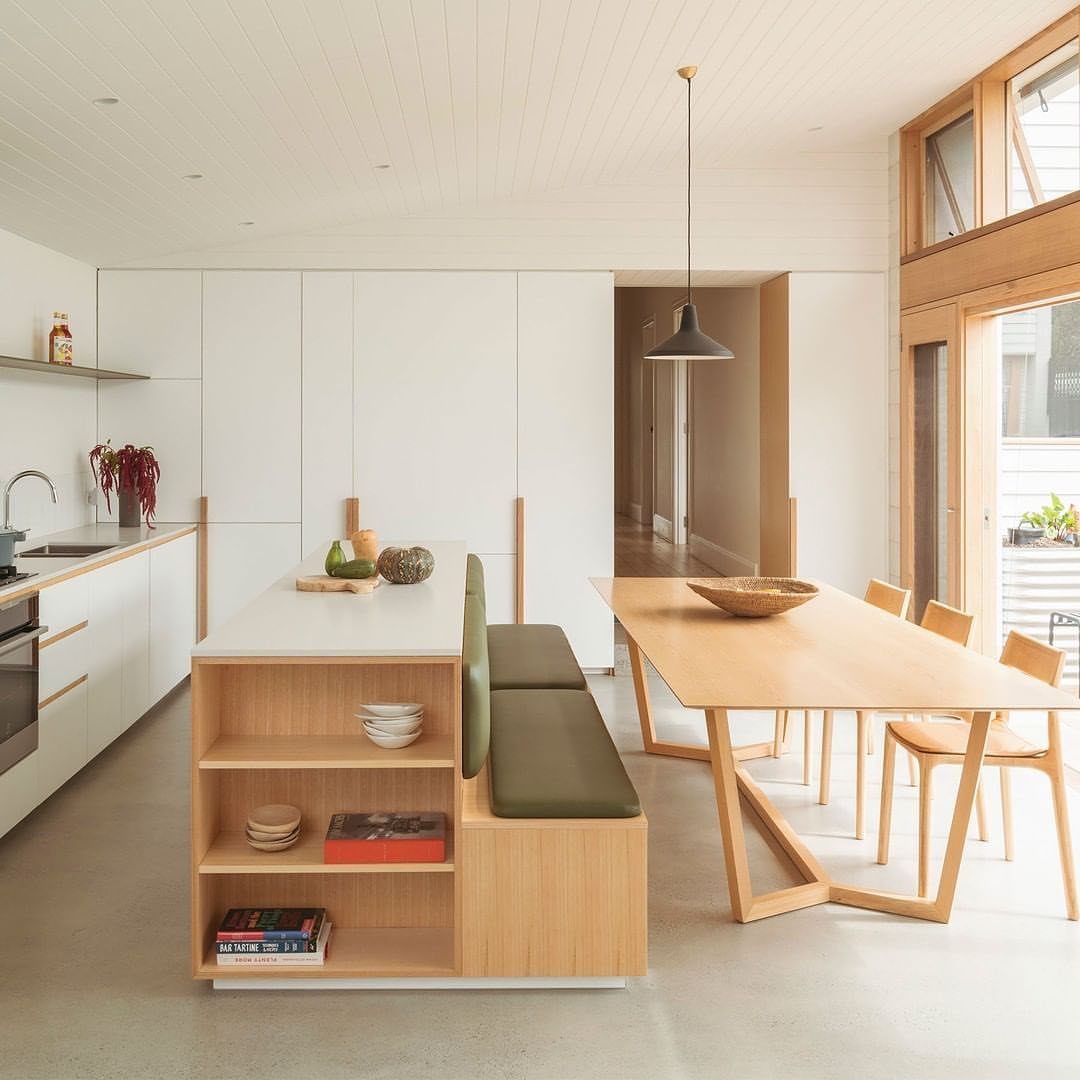
A bench takes up less visual space than a row of stools and seats more people when needed, which matters in kitchens where the island is the only table.
I’ve used benches in families with young children because they’re easier for kids to climb onto and harder to tip.
The bench sits fixed to the island or the floor, so plan the placement carefully.
Once it’s in, moving the island becomes a larger project. Built-in seating like this pays off only if the island stays put and the layout is final.
Cushions make the bench more comfortable for longer meals. Without them, a bench reads modern and minimal but isn’t where anyone will sit for an hour.
5. Open Shelving
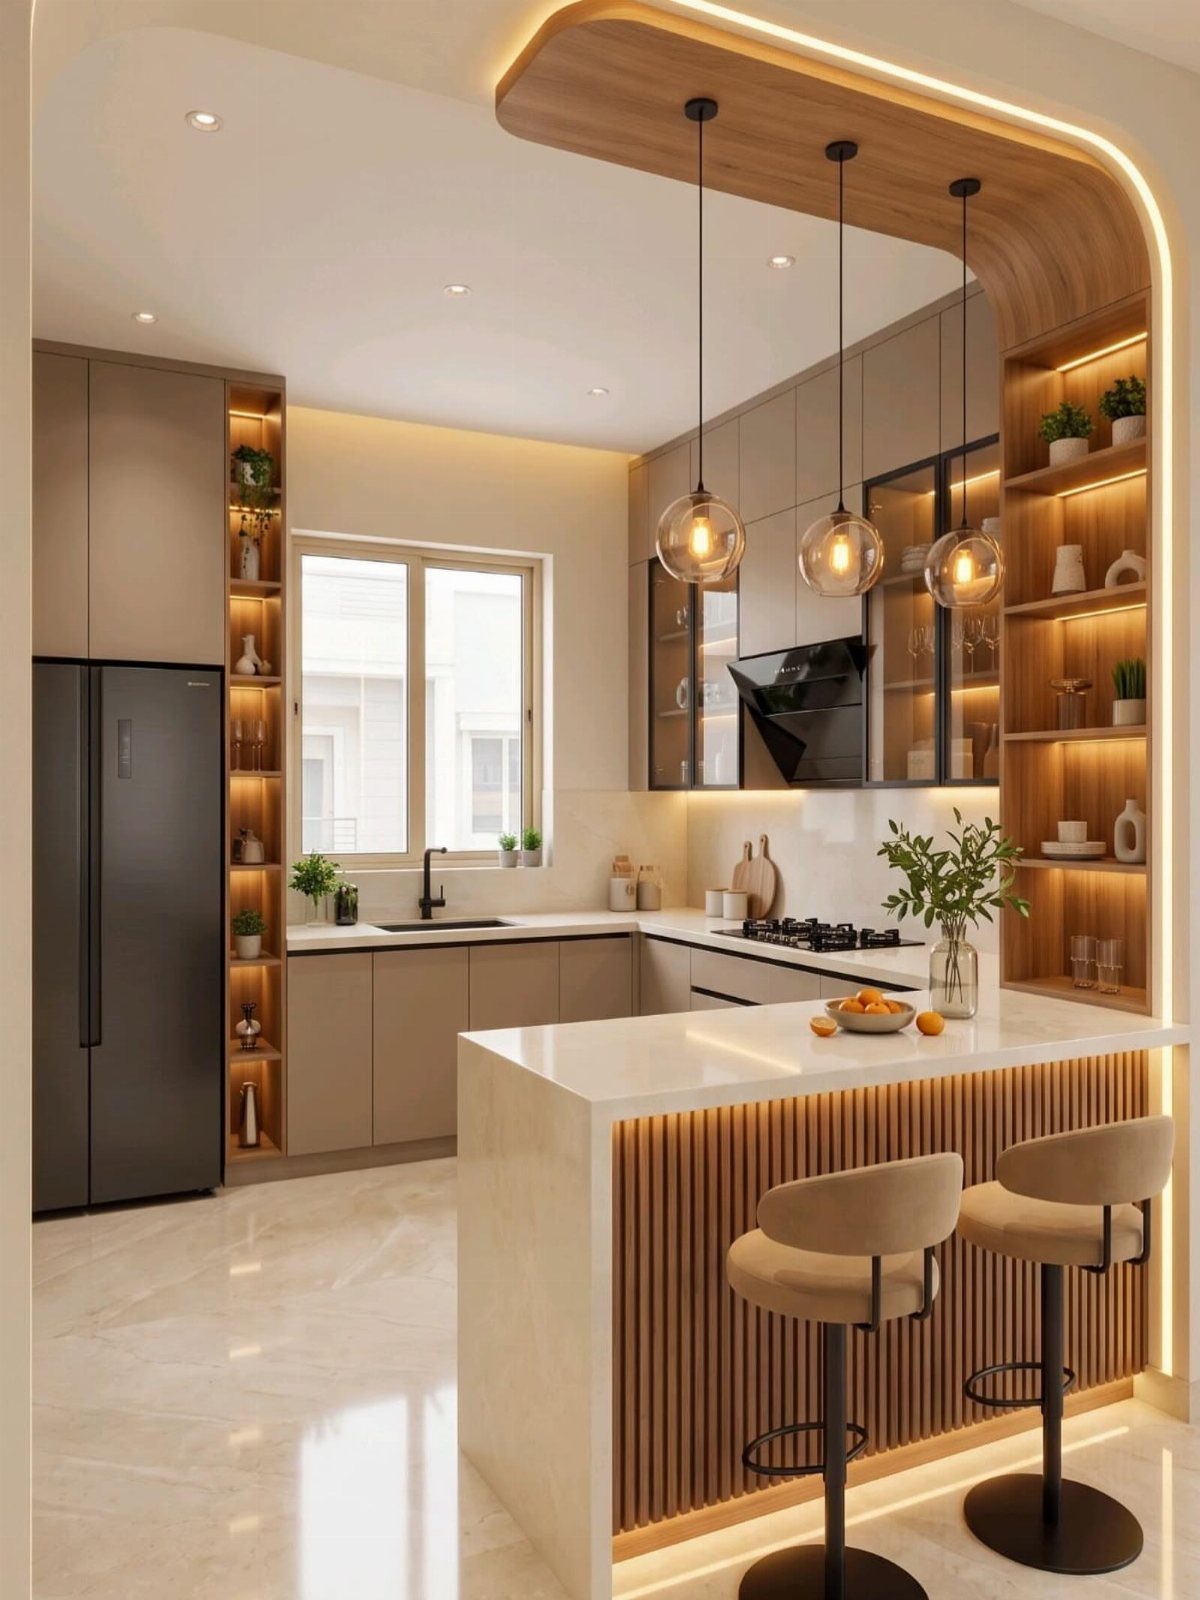
Open shelves on the island keep cookbooks, bowls, and everyday dishes within arm’s reach while you’re working. I use this idea when storage matters more than a completely smooth look and the client is comfortable with items on display.
The shelves work on the side facing the seating area or on the ends if the island is freestanding. Shallow shelves hold enough without pushing into the walkway.
This setup requires more upkeep than closed cabinetry because the contents stay visible.
If the items on the shelves look cluttered, the whole island feels messier. I tell clients to edit what goes there and keep it to things they actually use daily.
6. Two-Level Island
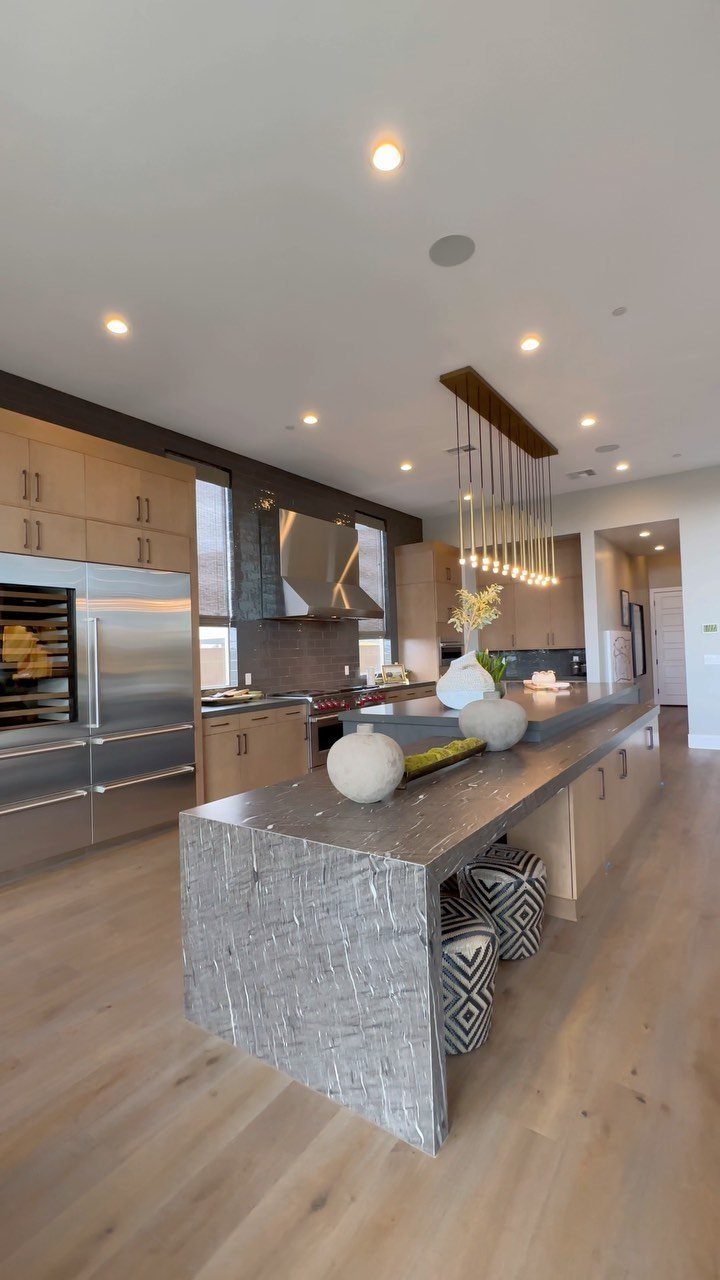
The eating surface sits higher than the prep area, usually at bar height—42 inches instead of the standard 36-inch counter. The 2 levels separate tasks and keep the working side cleaner when guests are seated.
I recommend this layout when the island is large enough to give each level its own zone without cramping either one. A 4-foot-wide island can handle it; anything narrower and the raised section starts to feel like an afterthought.
The higher side faces the seating, so dirty dishes and cutting boards stay out of view on the lower work surface. Bar-height stools cost slightly more than counter-height versions and suit taller adults better than children or shorter users.
7. Island with Open Shelves
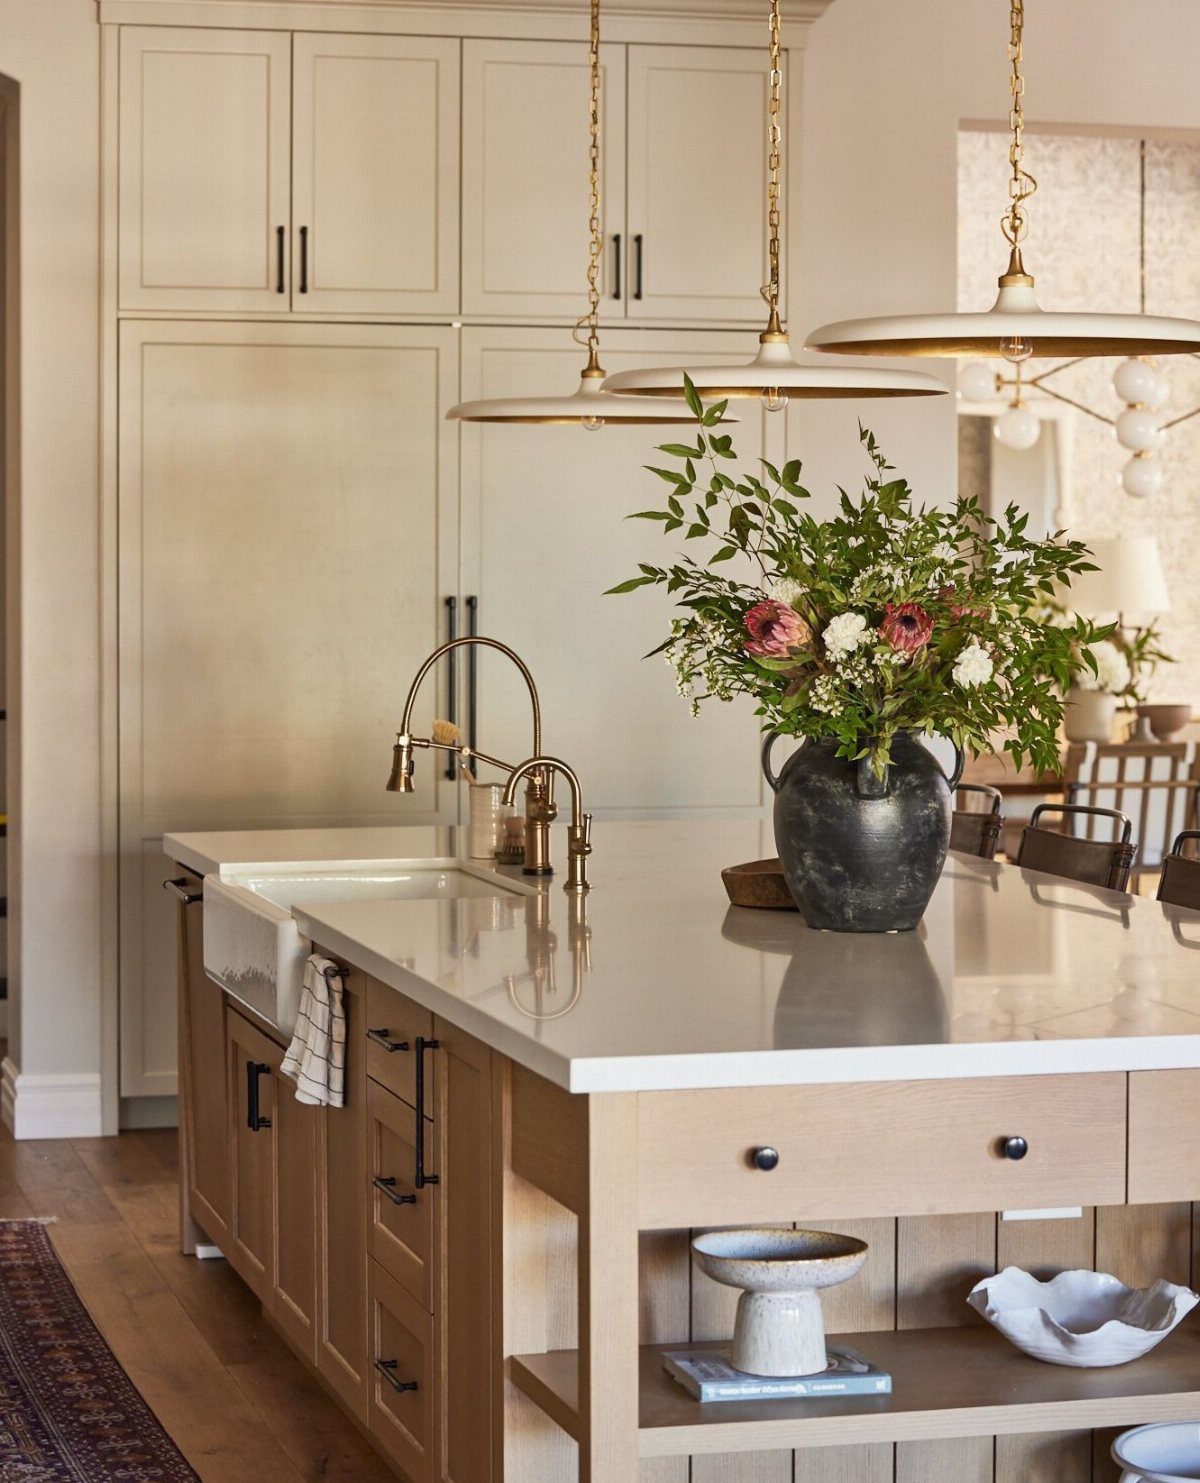
Open shelves at the end of the island put serving pieces and everyday dishes where you can reach them without walking back to the wall cabinets.
The arrangement works when the island stands free in the room and both ends are visible.
The shelves hold enough that the space earns its keep without looking crowded. Bowls, a few cookbooks, and a basket for napkins are about the limit before it starts to feel messy.
This idea suits kitchens where the island is part of the active zone and you want storage that stays accessible from both sides.
Closed cabinetry hides more, but it also takes longer to open and close when your hands are full.
8. Kitchen Island Table
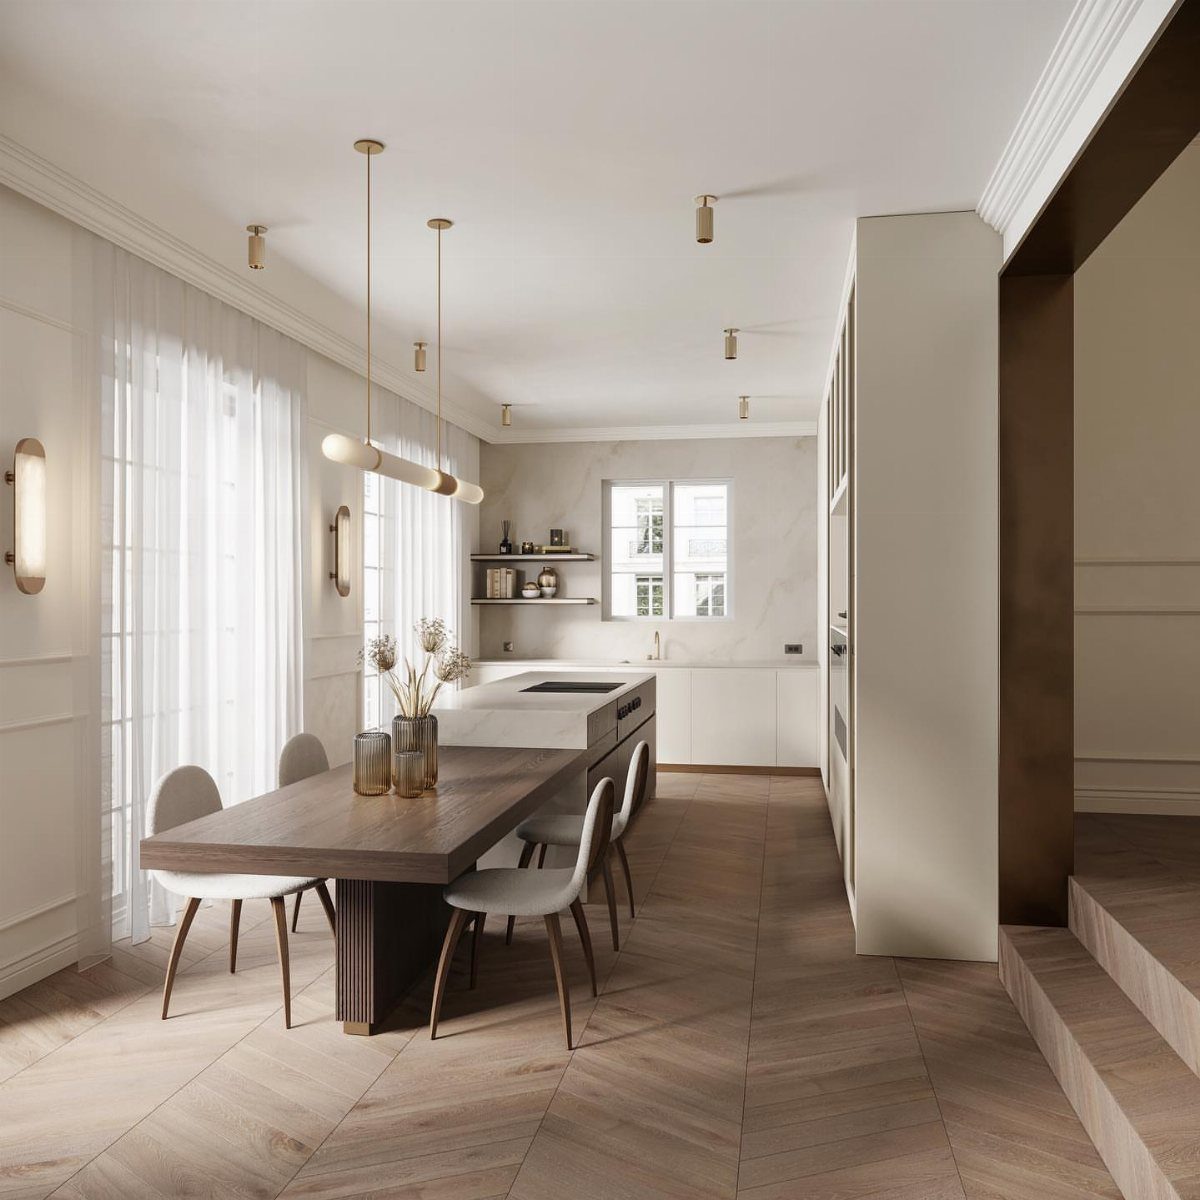
The island runs straight into a dining table, combining both functions in one piece of furniture. I use this when the kitchen is the main gathering space and there is no separate dining area.
The table portion seats four to six, depending on its length.
The island side holds the sink or cooktop, and the table end stays clear for plates and elbows. The join between the two can be flush or stepped, depending on how the cabinetry is built.
This layout takes up less floor area than an island and a separate table, which matters in open-plan spaces where every piece of furniture competes for room. Once it is installed, you cannot move the table without moving the island.
9. Compact Kitchen Island
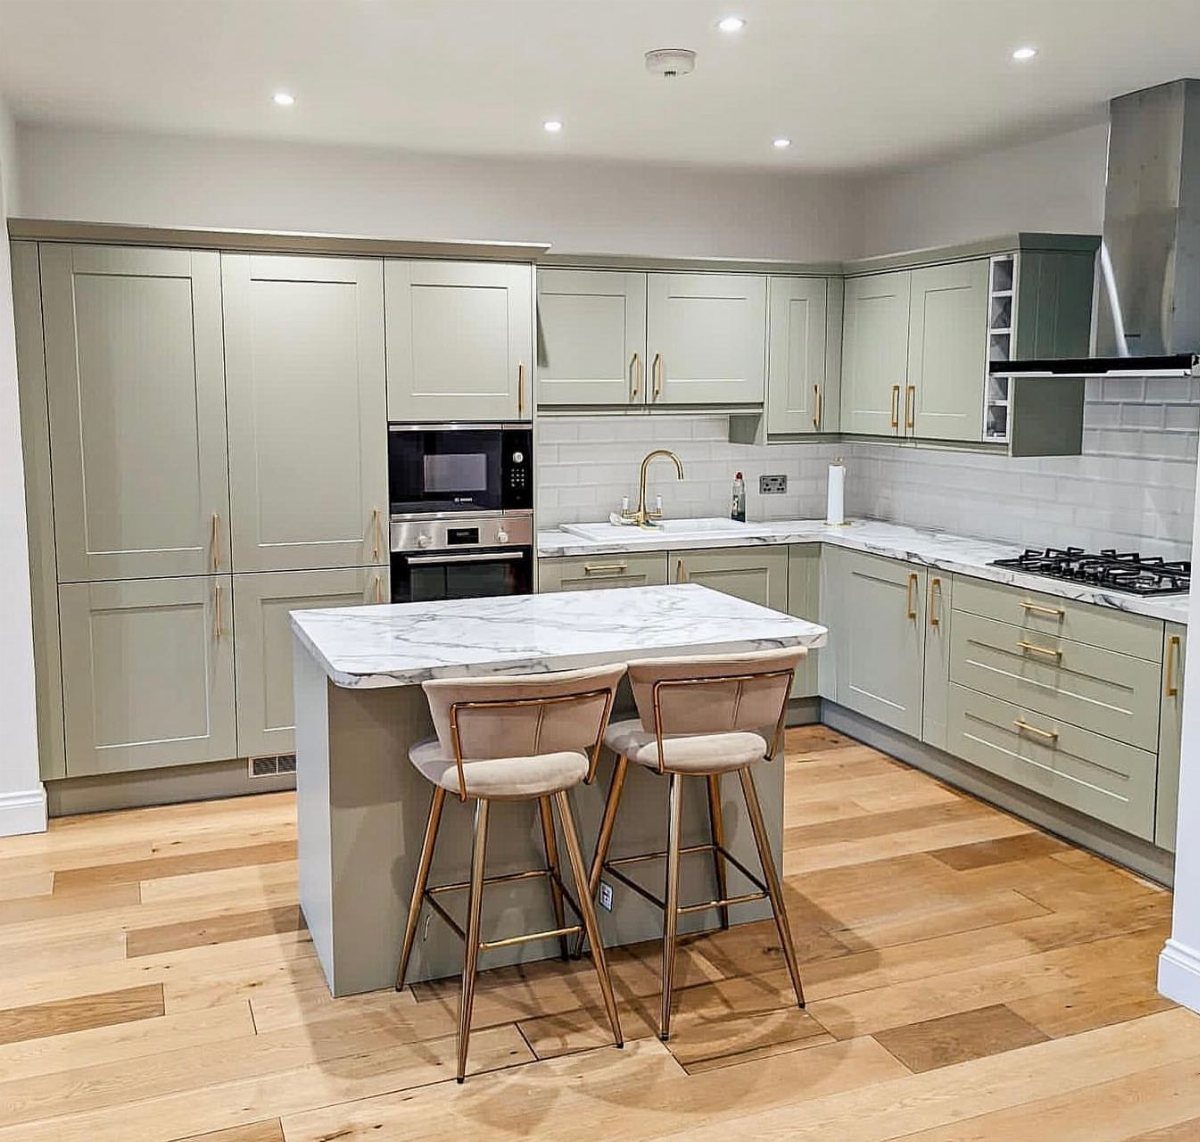
A smaller island fits 2 stools and keeps enough clearance for traffic in kitchens where a full-size island would block the work triangle. The narrow footprint matters when the room is tight and every foot of aisle space counts.
2 seats are enough for quick meals or homework while dinner is cooking. More than that and the island starts to push into the walking path or the cabinet doors.
This size works in galley kitchens or L-shaped layouts where the island sits between 2 runs of cabinetry. If the kitchen is large enough for a bigger island, this version leaves too much empty floor in the center.
10. Island with Built-In Sink
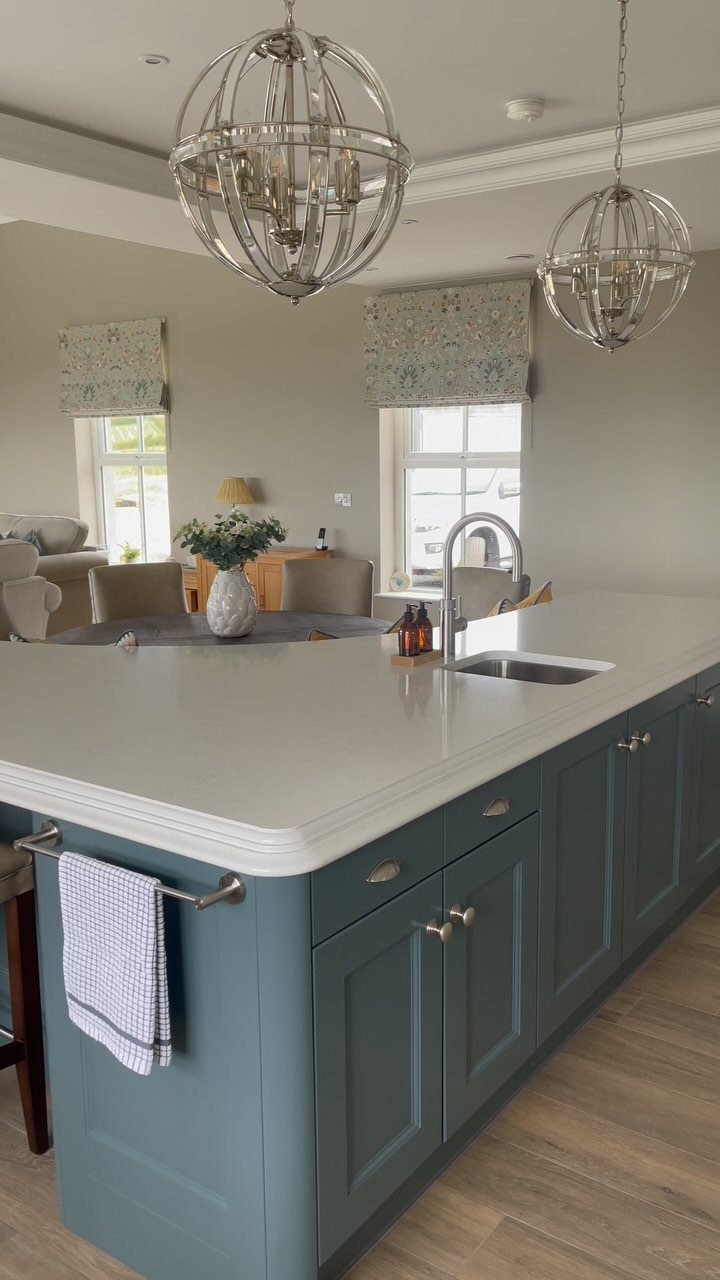
The sink sits in the island instead of against the wall, which opens up counter space and keeps the person washing dishes facing into the room.
I recommend this when the kitchen is part of a larger living area and the cook wants to stay part of the conversation.
Plumbing runs under the floor to reach the island, so the drain needs a clear path and enough slope.
In a slab foundation, cutting the concrete raises the cost. In a basement or raised floor, the install is simpler.
The sink takes up prep space, so the island needs to be large enough that losing basin width still leaves room to work on both sides. In a compact kitchen, a wall-mounted sink frees up more usable surface.
11. Table Extension
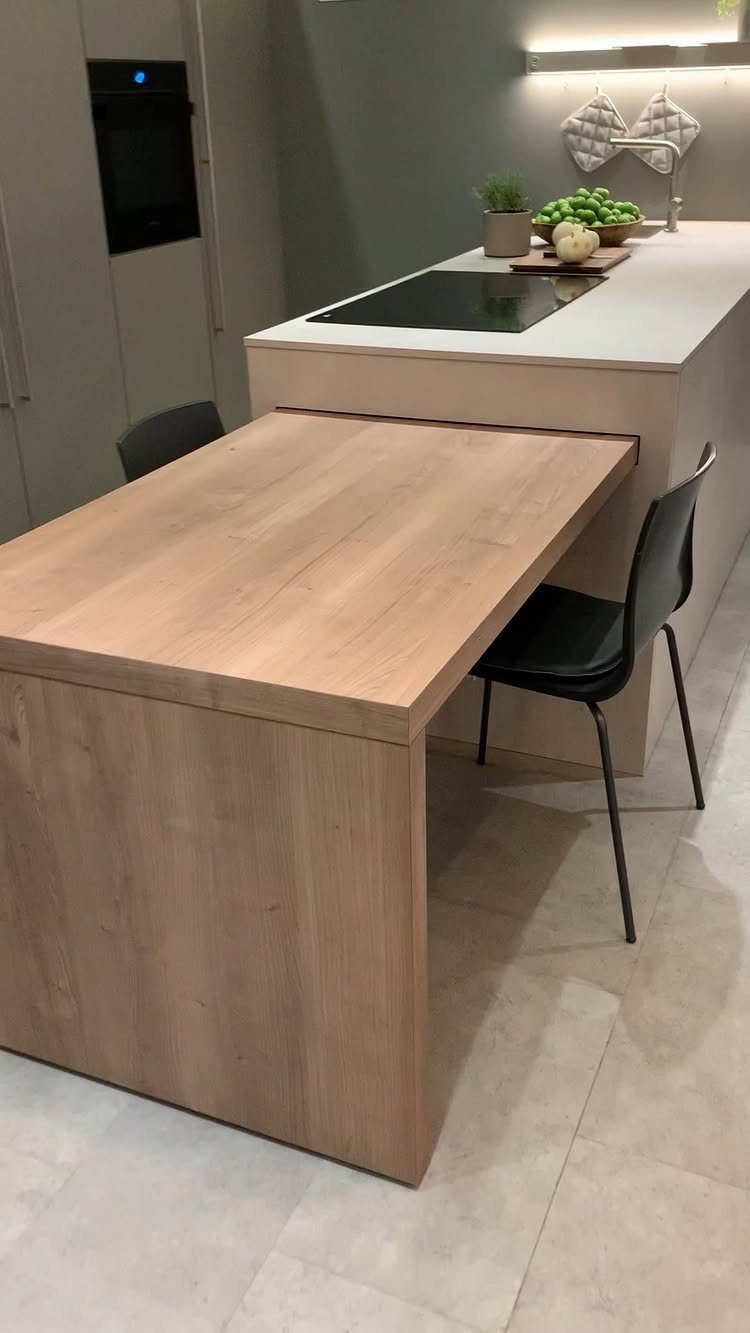
A table attaches to the island at counter height or lower, adding dining space without requiring a larger island footprint. The table portion extends out from one end, creating a dedicated eating area that stays separate from the working surface.
The table can be built in or bolted on after the island is installed. A lighter wood tone or a different material sets it apart visually and marks where the prep zone ends and the dining zone begins.
This idea works when the kitchen lacks room for a separate table but the island is not wide enough to seat people along its length. The table adds seating without blocking circulation on the working sides.
12. Bar Seating
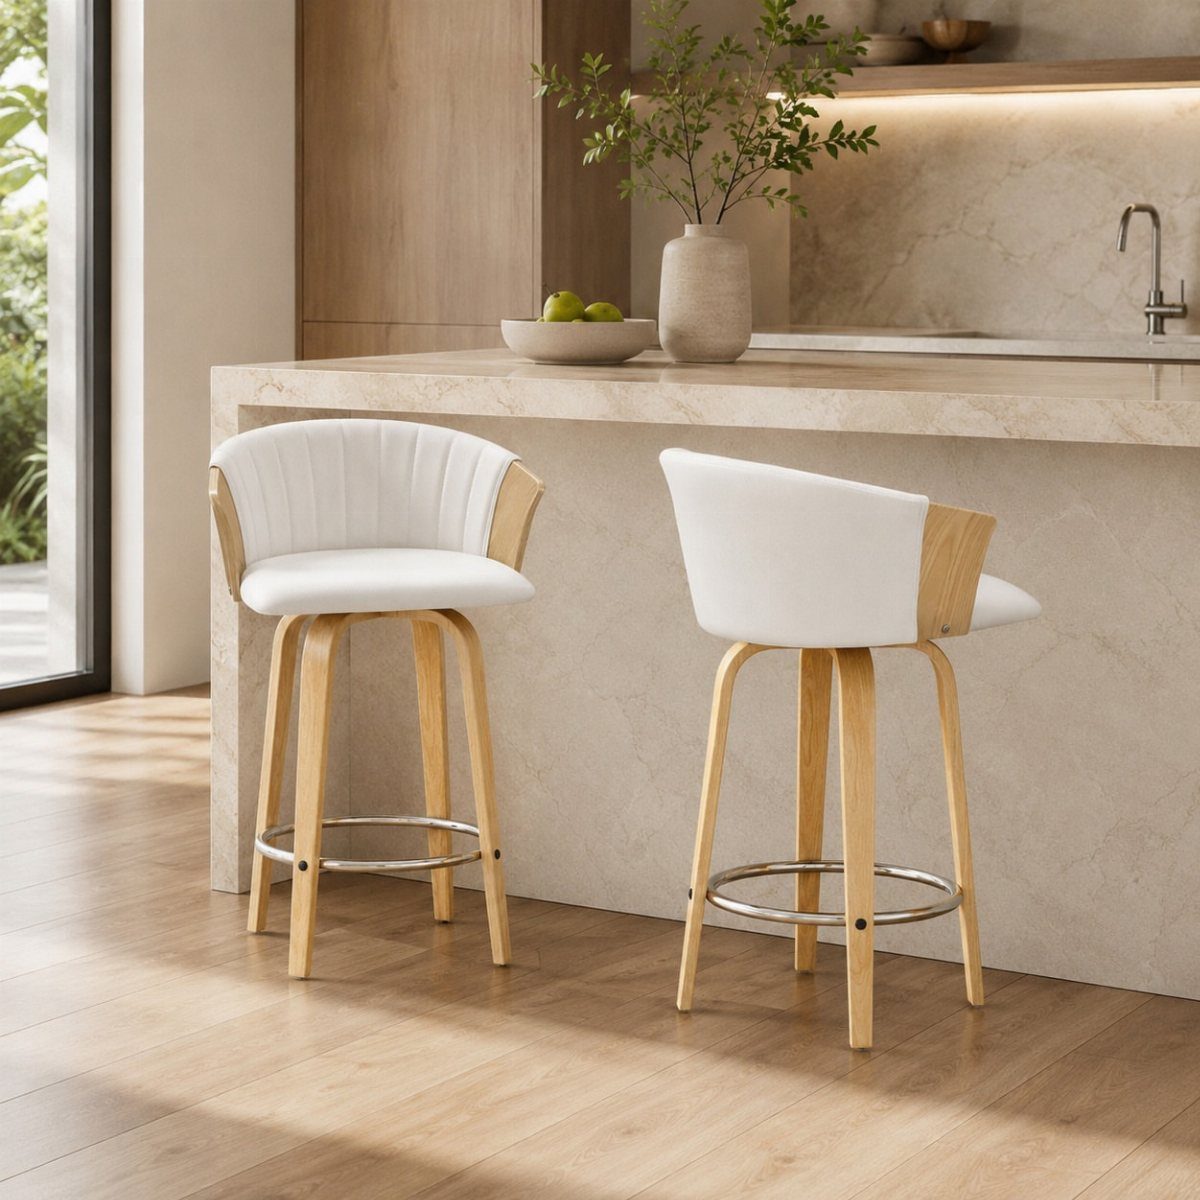
Stools line the island at bar height, turning it into a spot for quick meals or drinks without setting a full table.
Bar stools sit higher than counter stools, so the island top needs to be at bar height to give enough clearance for legs. Counter height pairs with counter-height stools instead.
This arrangement suits households where most meals are casual and the island gets more use than a dining table. If formal sit-down dinners are common, a separate table handles that better.
13. Integrated Seating
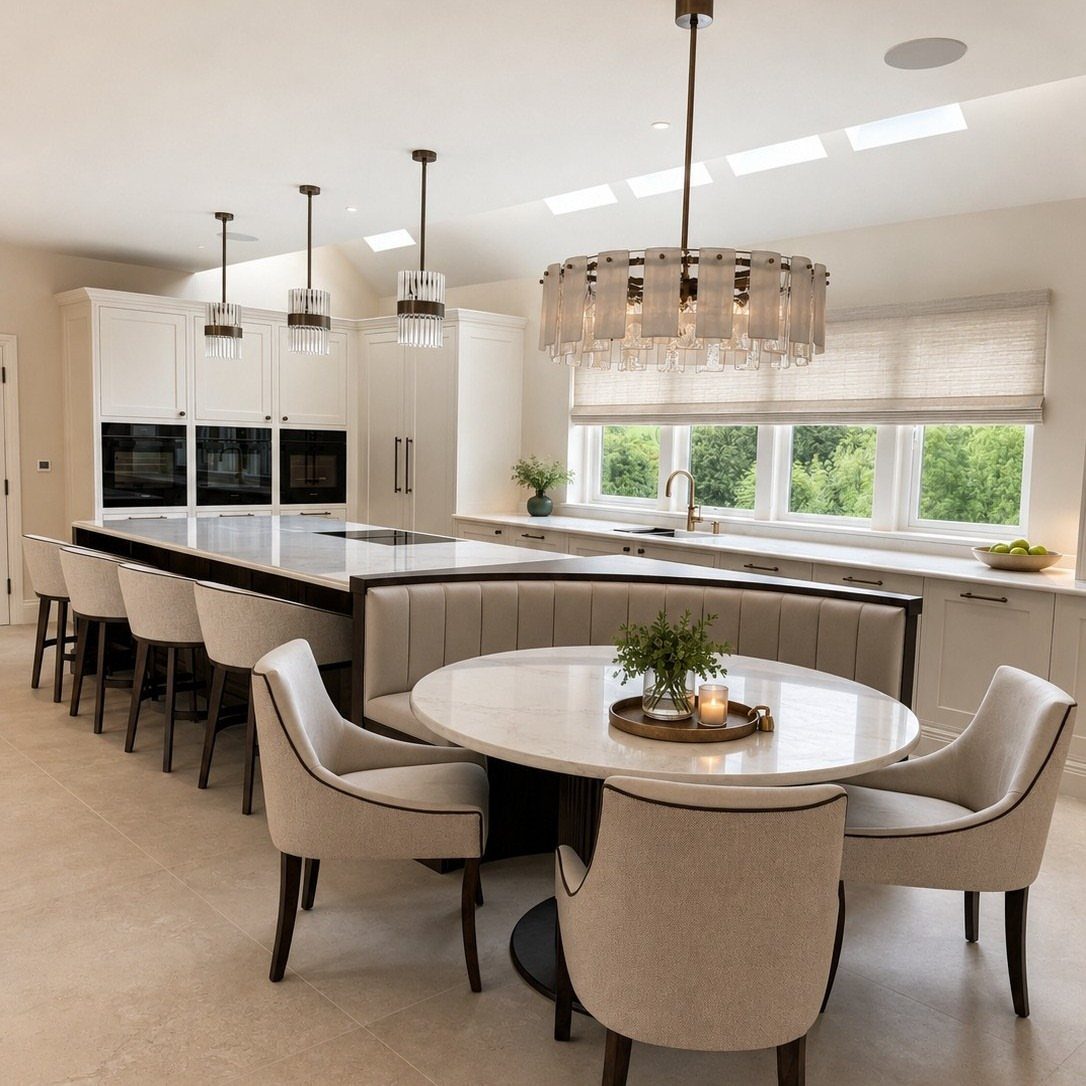
The seating attaches directly to the island structure instead of standing free, creating a single piece that handles both prep and dining without extra furniture.
This layout puts the bench or banquette where it won’t move and frees up floor space that stools would otherwise claim.
Integrated seating works when the island is large enough to hold both the eating area and a working surface on the opposite side.
The bench portion needs to stay out of the cook’s path, so the island should be long enough to separate working and sitting space.
Once the seating is built in, the arrangement is permanent.
14. Island with Inset Lighting Strips
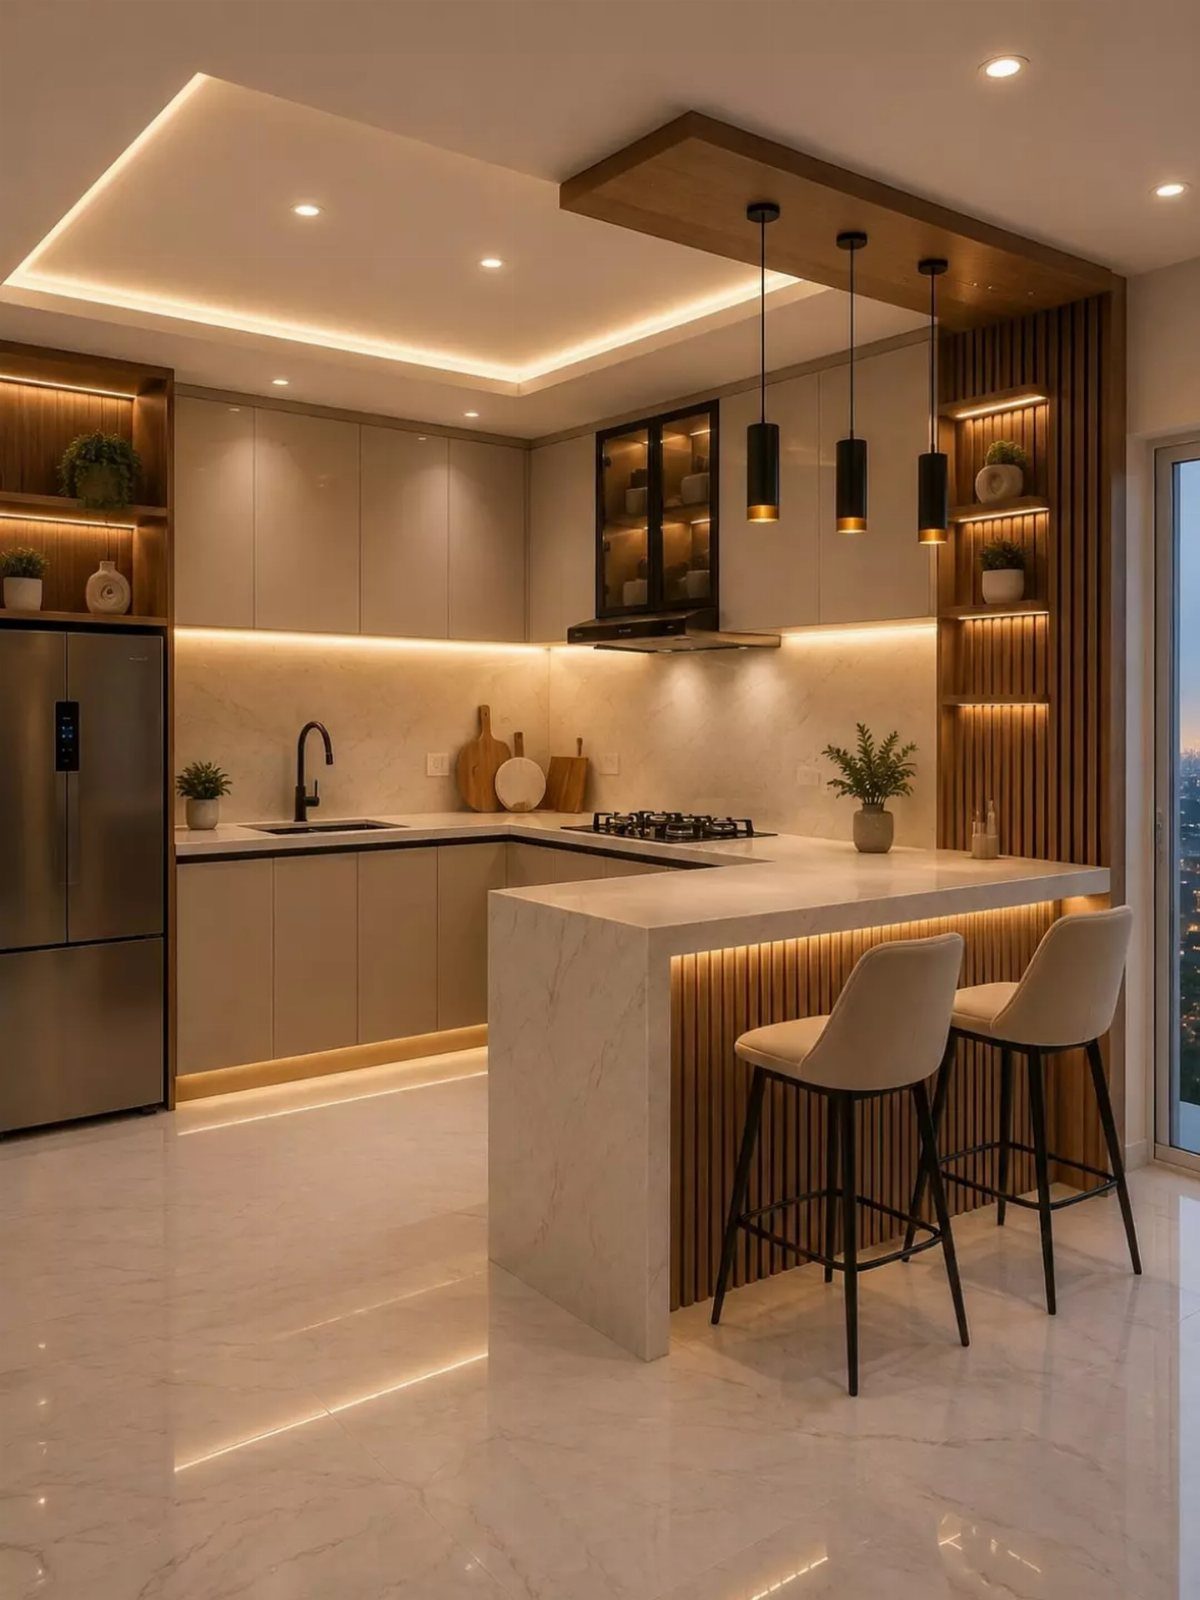
Lighting strips recessed into the island base or countertop edge throw light down toward the floor, marking the island’s footprint and adding task light without overhead fixtures. The strips sit in a shallow channel cut into the material before installation.
LED strips are the simplest option because they run cool and last longer than other bulbs. Warm white reads softer in a kitchen with wood or brass details; cool white pairs better with steel and concrete.
This detail suits islands that stand in the center of the room where the light will be visible from multiple sides. The effect is strongest at night when the recessed glow shows up against the floor.
15. Dog Bowl Storage
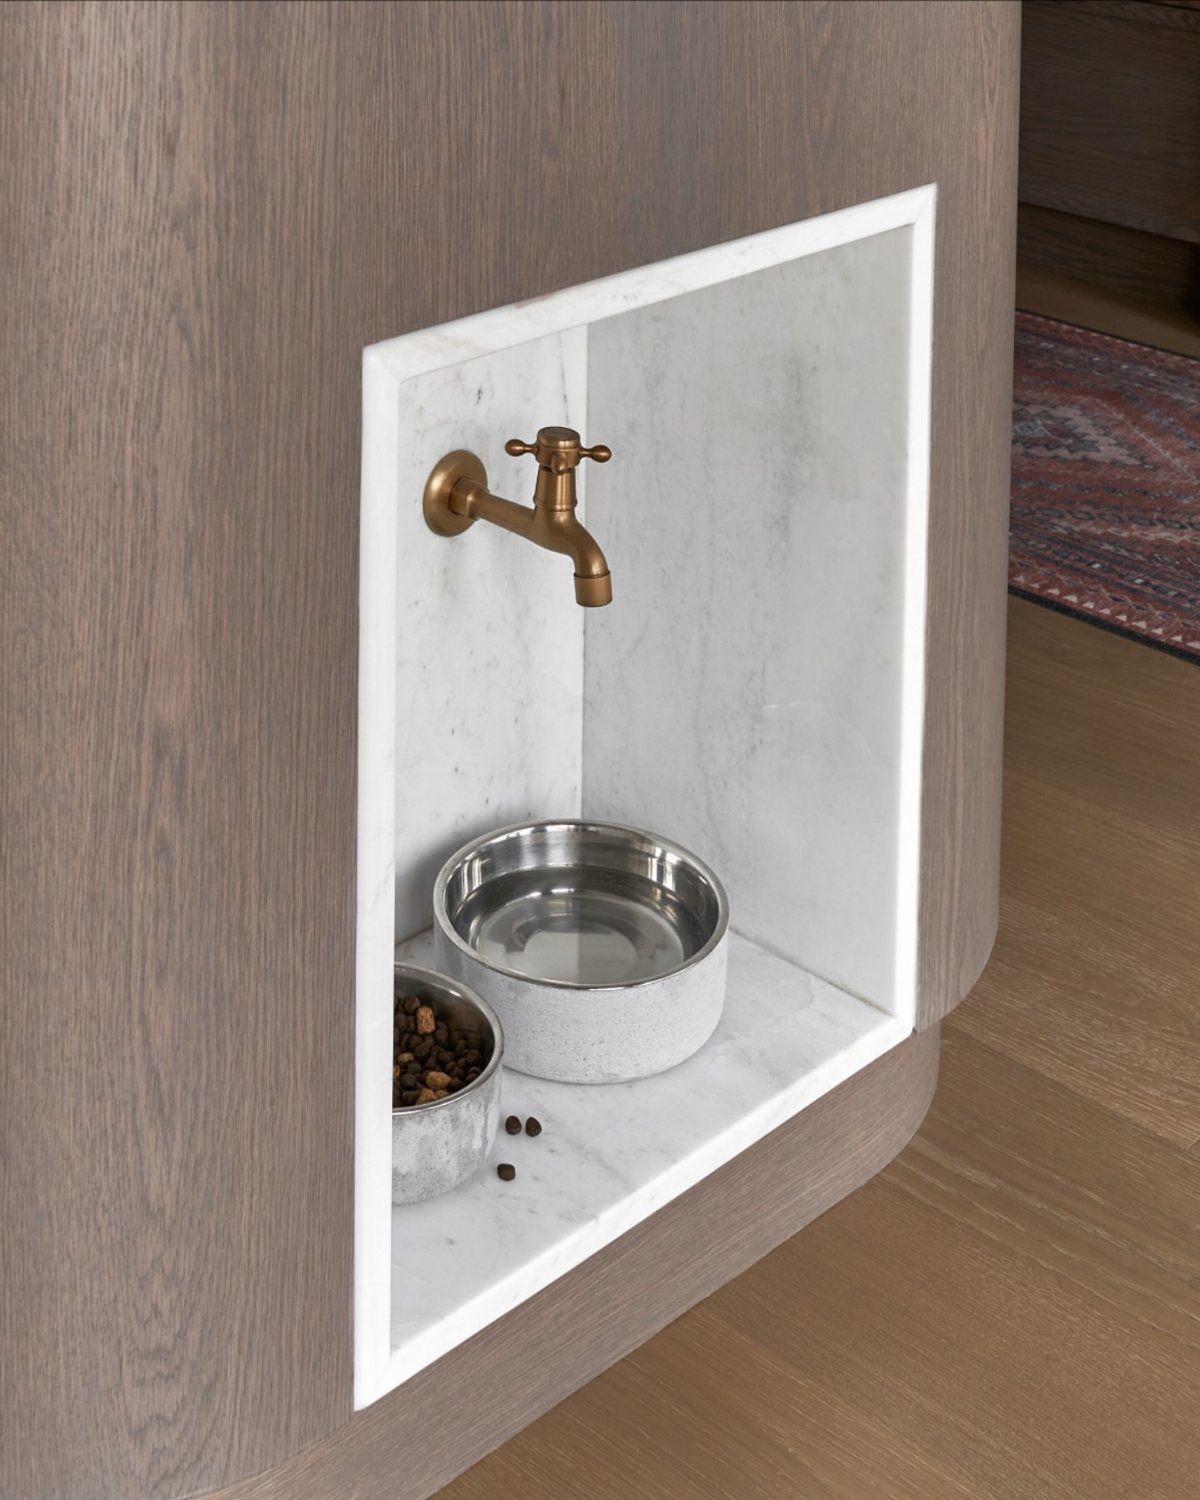
A recessed niche in the island holds food and water bowls at floor level, keeping them out of the walkway and off the main prep surface.
A small faucet mounted inside the niche fills the water bowl without carrying it to the sink.
The niche sits low enough that a large dog can reach it comfortably. Tile or stone lining makes cleanup easier when water spills.
Dog bowl storage makes sense for households where the dog eats in the kitchen and the island is large enough that carving out a section won’t crowd the cook.
The bowls stay in one place, so the dog learns where to find them.
16. Modern Leather Stools
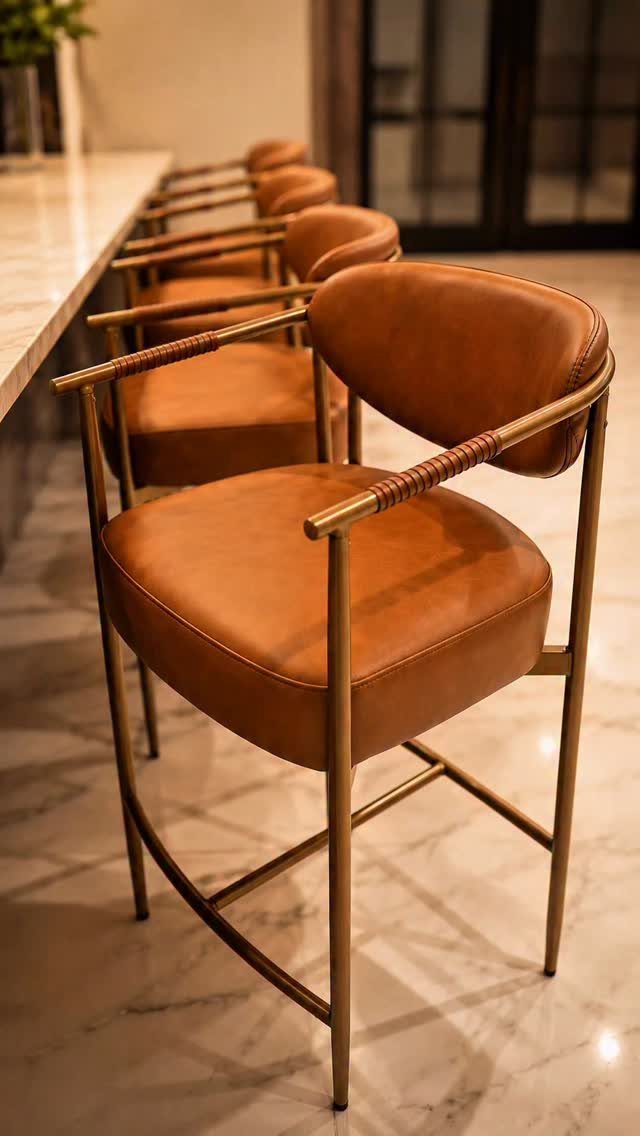
Leather upholstery with thin metal legs reads more furniture than kitchen stool, which matters in open-plan spaces where the island sits between the kitchen and living area.
The material cleans easier than fabric and ages without looking worn if the leather is full-grain.
Arms make the stool more comfortable for long conversations but take up more space along the island. Armless versions fit tighter and seat more people per foot of counter.
This style suits kitchens where the island acts as a room divider and the seating needs to look finished from both sides. The metal frame keeps the look light even when the upholstery is dark.
17. Cane-Back Stools
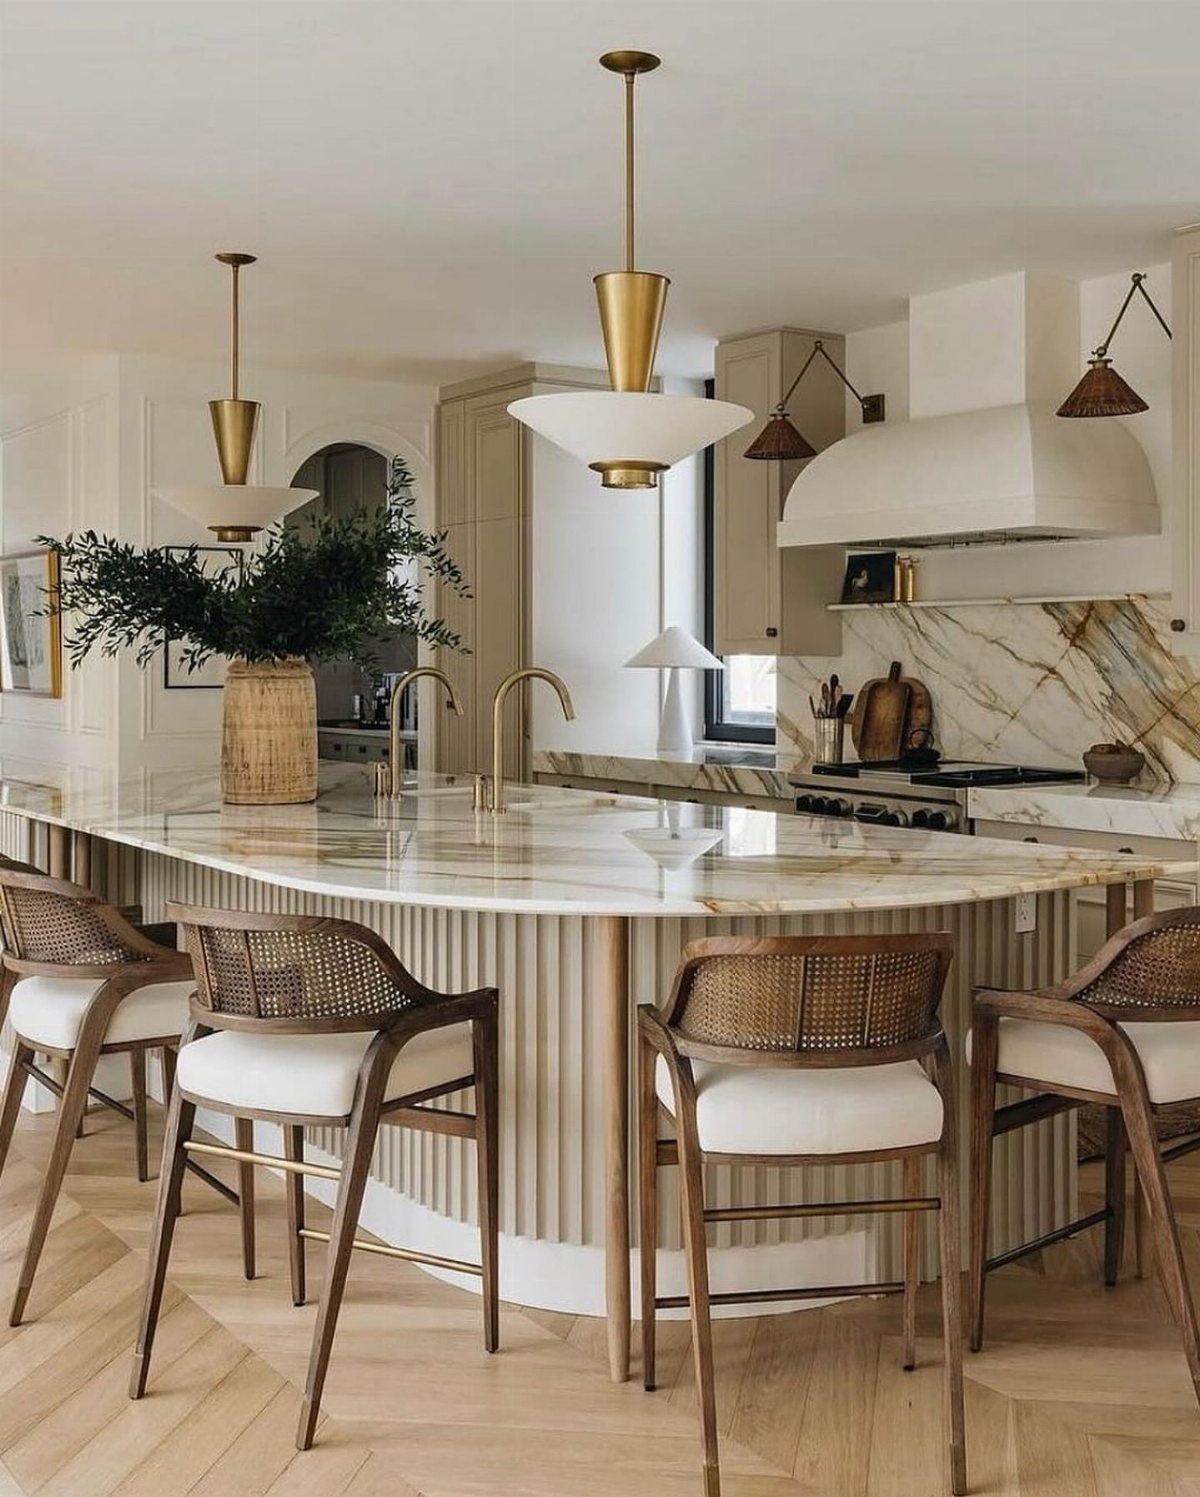
Woven cane fills the backrest, adding texture without bulk. The material breathes better than solid wood or upholstery, which makes the stool more comfortable in warmer kitchens.
Cane holds up well in dry climates but can sag over time in humid spaces or if the frame gets wet regularly. Inspect the weave before buying; tight, even strands last longer than loose or uneven ones.
A curved back fits the body better than a flat one and reads more refined. Cane-back stools suit islands that have warm-toned countertops or natural wood cabinetry.
18. Narrow Island
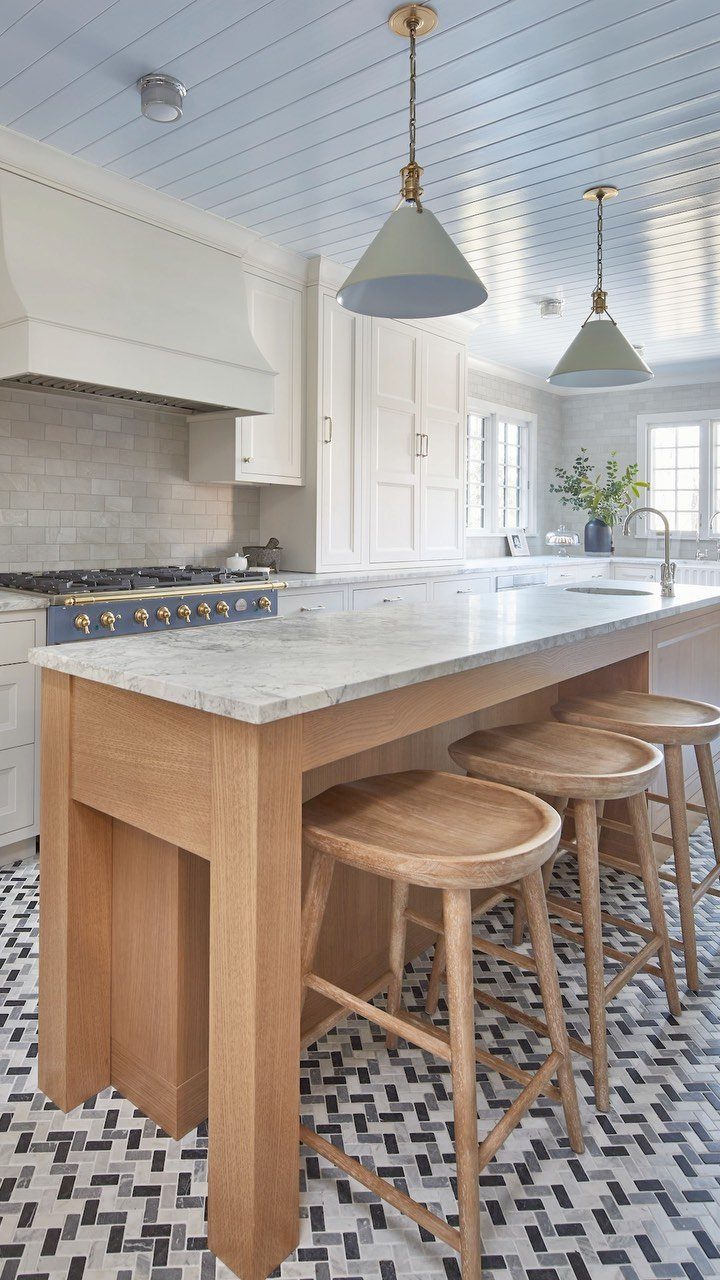
A narrow island fits in a galley or L-shaped kitchen where a standard-width island would block cabinet access or crowd the work triangle.
The slimmer profile leaves enough clearance on both sides while still seating a few people along its length.
The island should be long enough to hold 3 stools without cramping elbows. Shorter lengths fit 2 seats comfortably.
This layout works when the kitchen is long rather than wide and the island runs parallel to one bank of cabinetry.
19. Bouclé Counter Stools
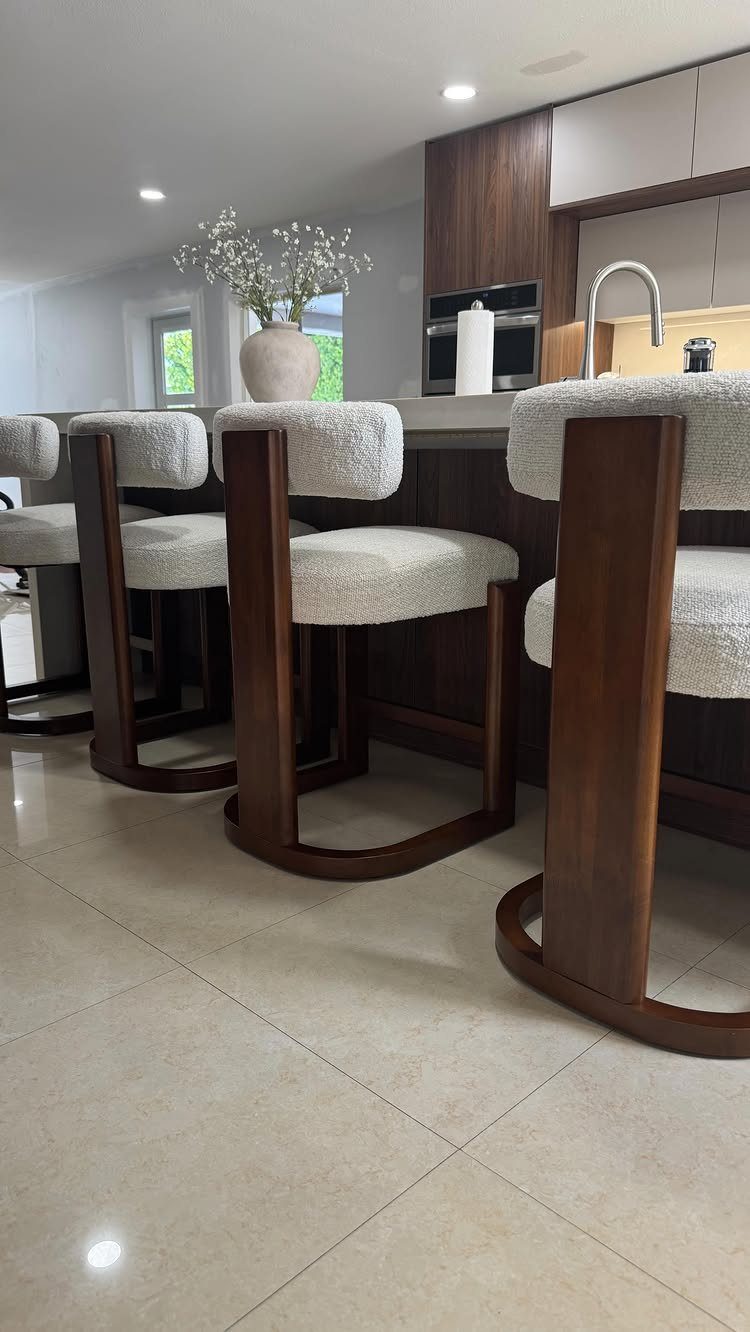
The curved wood frame wraps the back and arms in one continuous line, giving the stool structure without blocking sightlines across the island. White bouclé softens the seat and back while the dark wood grounds the piece.
Bouclé hides crumbs better than smooth upholstery and cleans with a stiff brush. The texture reads warmer than leather in kitchens with wood cabinetry or stone counters.
20. Wood-Frame Bouclé Stools
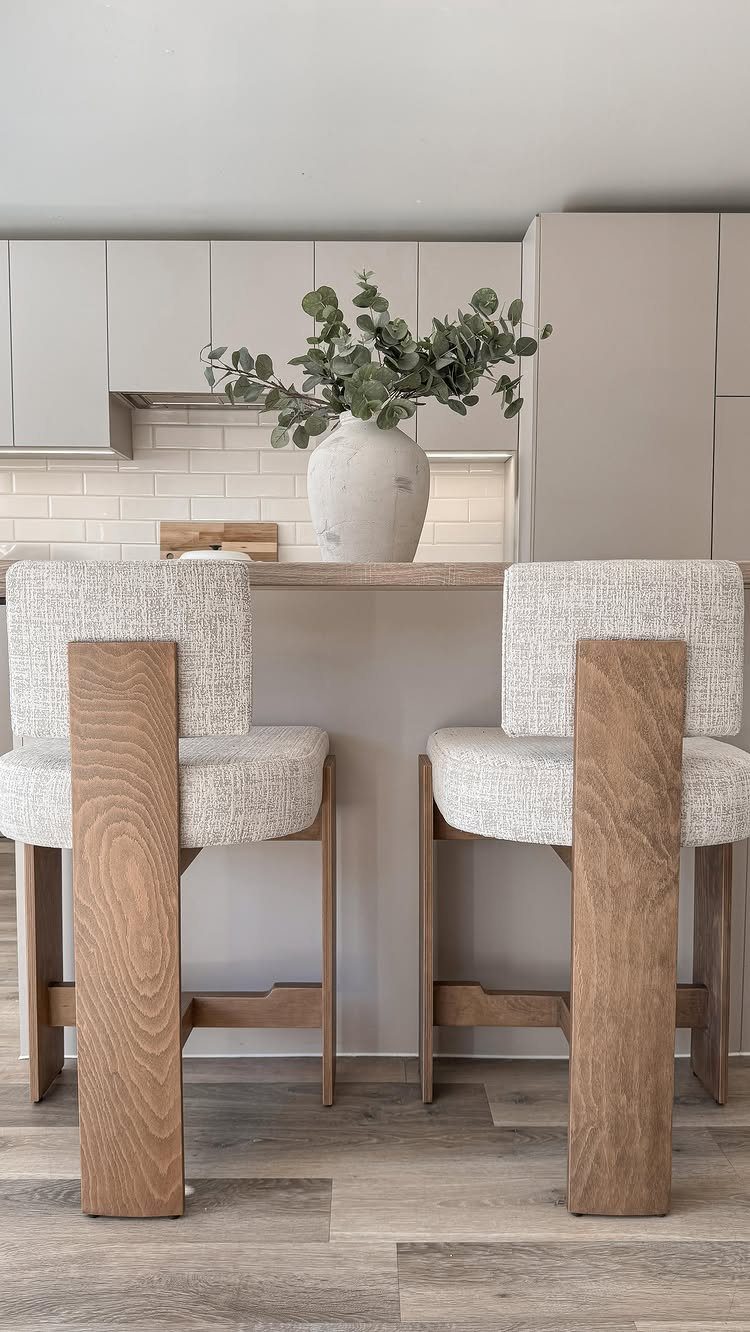
Thicker wooden frames read more substantial than thin metal legs and suit islands where the seating needs weight to match heavier cabinetry or stone countertops.
A light wood frame keeps the visual weight down even when the stool itself is wide.
Bouclé in white or cream stays neutral enough to work with most finishes. The fabric breathes better than vinyl and holds up to daily use without flattening quickly.
Full backs make longer conversations more comfortable but add depth, so check that the stool clears the island overhang when pushed in.
21. Upholstered Counter Stools
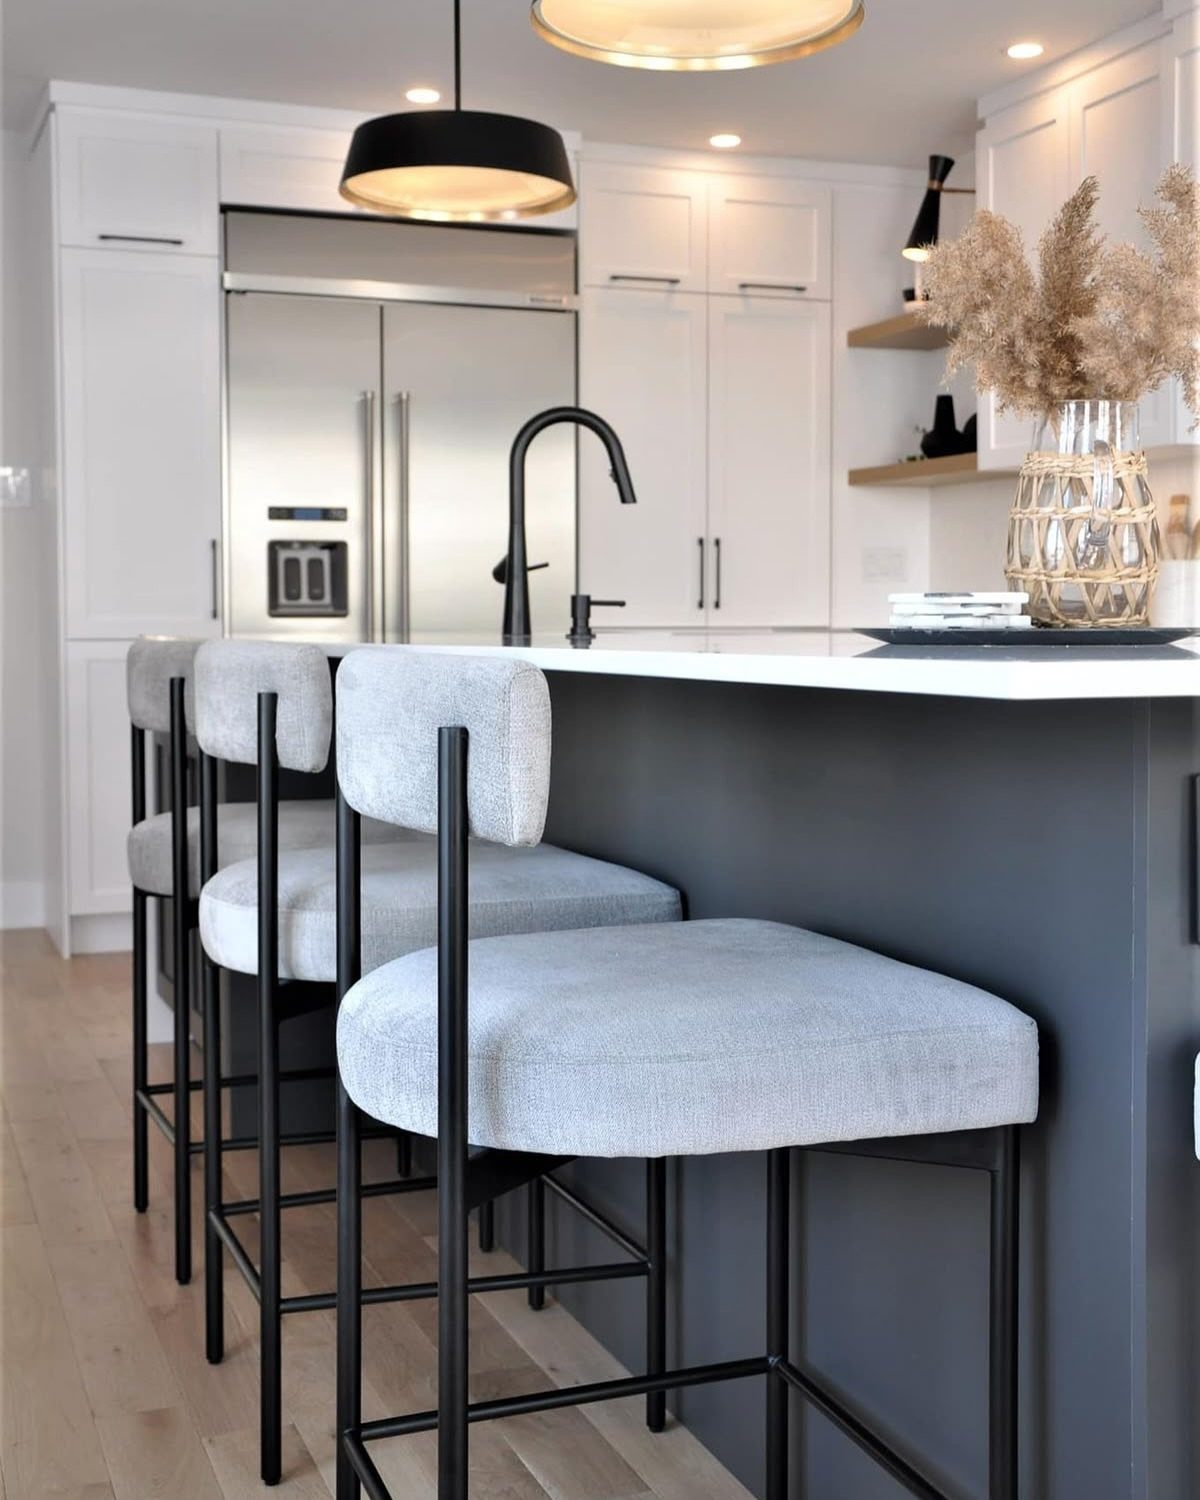
Fabric upholstery in grey, beige, or brown absorbs sound better than hard surfaces, which matters in open kitchens where every chair scrape carries. The padding makes the stool more comfortable for meals that run longer than a quick breakfast.
Metal frames in black or brushed steel keep the look clean and pair with modern hardware. A footrest makes the stool easier to climb into and steadier once seated.
Darker fabrics hide spills better than light ones. Removable covers simplify cleaning but cost more upfront.
22. Wooden Bar Stools
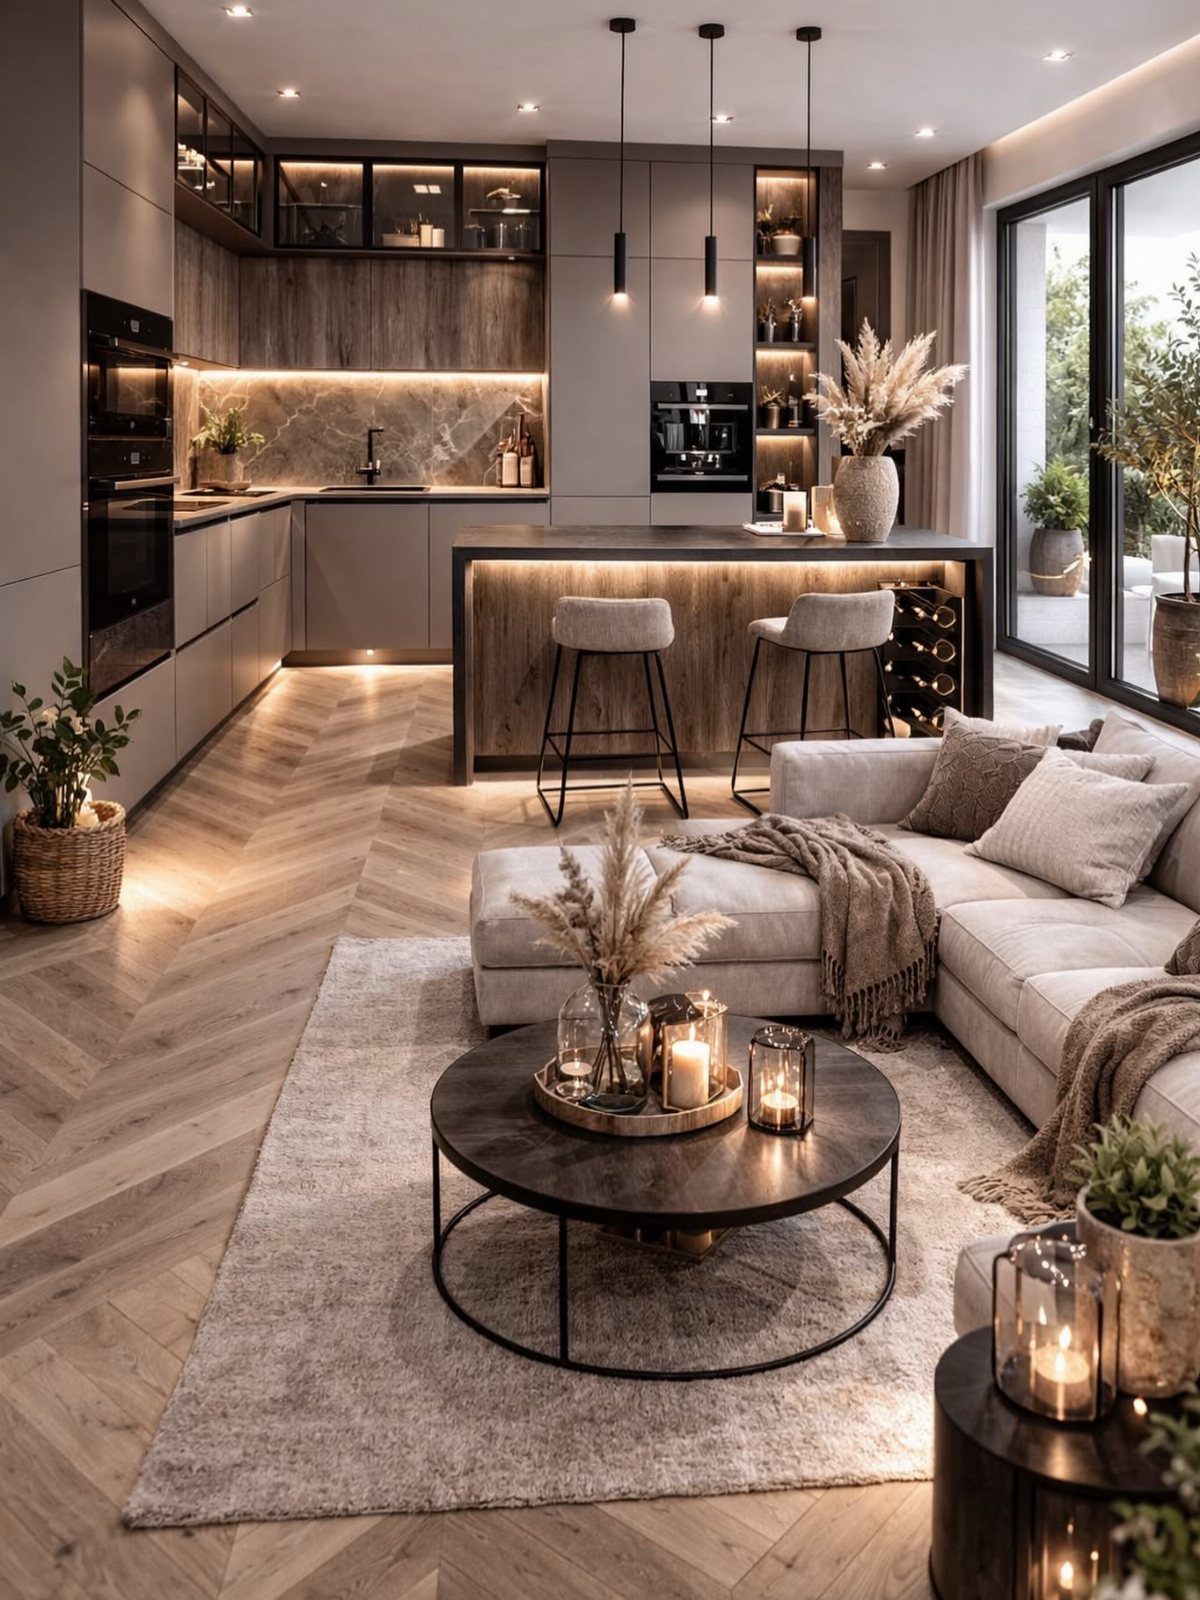
Solid wood or wood veneer keeps the stool light in appearance while adding enough structure to hold up to daily use. An upholstered seat cushion improves comfort without covering the whole stool in fabric.
Wood finish should match or complement the island tone. A natural or light stain pairs with lighter countertops; darker finishes suit walnut or espresso cabinetry.
Backless versions slide fully under the counter and take up less visual space. Low backs give you support without cutting the sightline across the island.
23. Black Metal Bar Stools
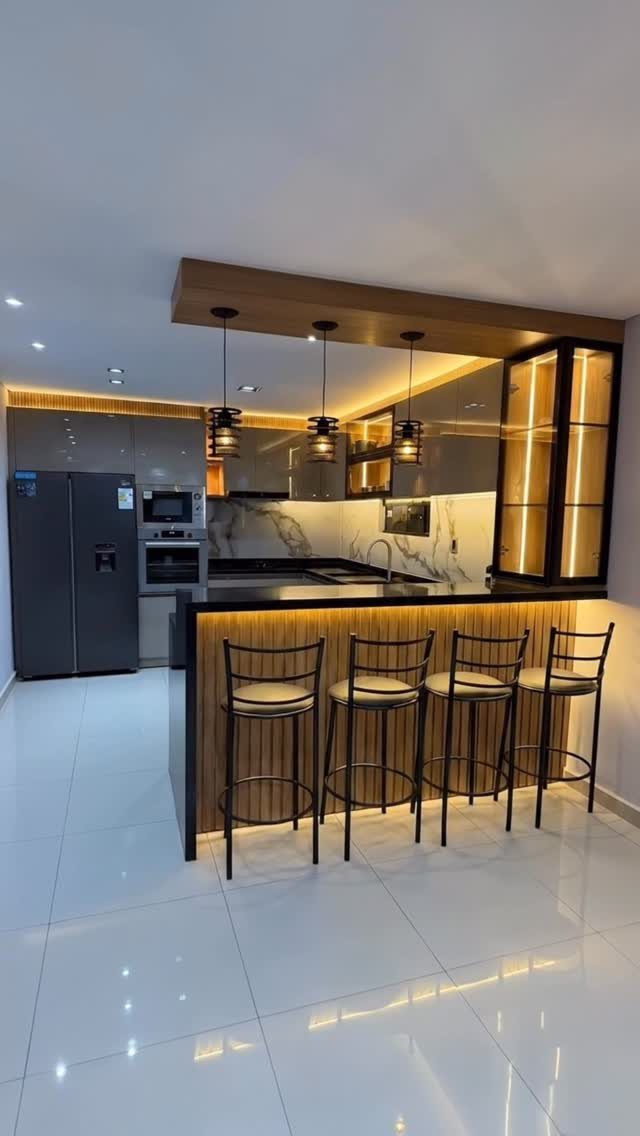
Black metal frames suit kitchens with industrial details or dark cabinetry, and the thin profile keeps the look minimal. Cushioned seats in beige, grey, or black add comfort without softening the frame’s clean lines.
Bar height calls for taller countertops. Counter-height versions of the same style work with standard 36-inch islands.
Metal wipes clean faster than wood and holds up better in kitchens where moisture is common. A footrest stabilizes the stool and gives the legs somewhere to rest during longer meals.
24. Island with Dining Table
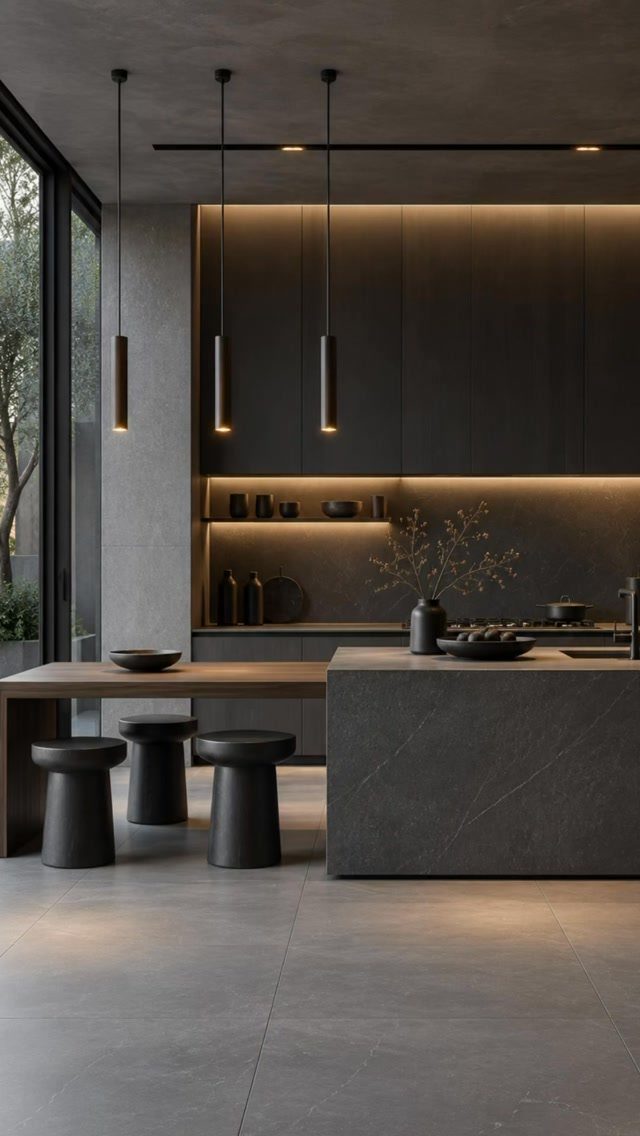
The wooden surface extends from the island at dining height, creating a table that seats more people without requiring a separate piece of furniture.
The table portion stays clear of the working side, so prep and dining happen in 2 distinct zones.
I use this approach when the kitchen opens to a larger room and the island needs to handle both cooking and sit-down meals.
The arrangement saves floor space but locks the seating in place once installed.
25. Island with Wooden Seating Extension
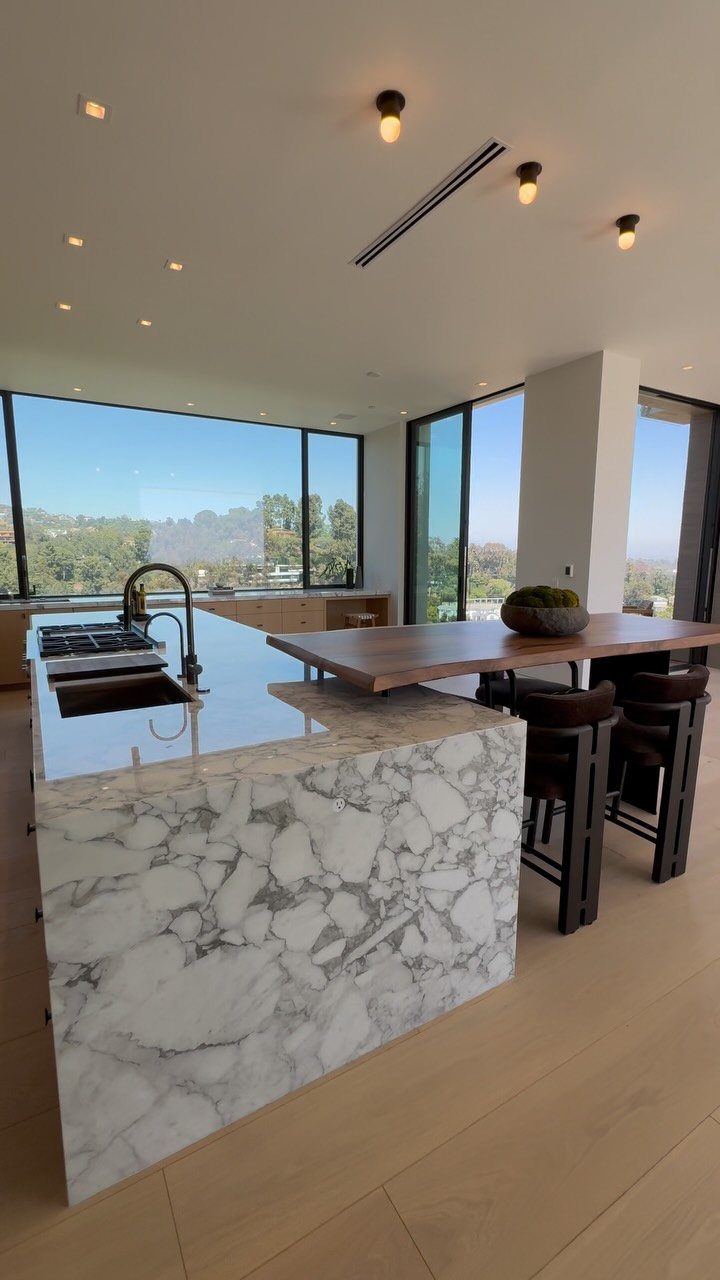
A wooden extension runs from one end of the marble island at dining height, adding table space without needing a separate piece. The wood brings warmth against the white stone and marks where prep stops and eating starts.
The extension can be built into the island or added after the base is installed. Stools tuck beneath it, which keeps the floor clear and leaves the working sides of the island open.
This setup suits kitchens where the island handles both cooking and casual meals.
The wood section stays lower than the marble work surface, so it reads as a table rather than more counter. If formal dinners happen often, a separate dining table gives more flexibility.
Island Size and Kitchen Flow
Measure clearance before you pick the island. The standard is 36 inches on all working sides—enough room to open cabinet doors and move past someone standing at the counter.
If stools will sit along one edge, that side needs extra: 32 inches when nobody walks behind the seated person, 44 inches if the aisle sees regular traffic.
Counter-height islands sit at 36 inches, and the stools that match them have seats 24 to 26 inches off the floor. Bar-height islands rise to 42 inches and require taller stools.
How long the island runs determines the seat count. Allow 24 inches of counter per person, 30 inches if the stools have arms or the seats are wide.
Materials and Added Features
Granite countertops hold up to heat, knives, and daily spills without showing damage.
Granite needs sealing every year or two; quartz does not. Both materials cost more than laminate but last longer in a kitchen where the island takes constant use.
A hardwood base in oak or maple holds paint or stain without splitting and supports the countertop weight. Plywood boxes wrapped in hardwood veneer cost less and look similar once the finish goes on.
Electrical outlets on the island side keep cords off the counter and appliances within reach. 2 outlets spaced along the length cover most needs.
A prep sink in the island shortens trips to the main sink, but the plumbing has to run under the floor. Pendant lights over the island deliver task lighting while leaving the counter clear.
Clearances and Seat Dimensions
Each seated person needs 24 inches of counter width to sit without elbows bumping. Stools with arms or extra width call for 30 inches per seat.
Knees need clearance under the counter overhang. At a 36-inch counter height, leave 9 to 12 inches from the top of the stool seat to the underside of the counter.
Behind the stools, allow 36 inches if that side of the island faces a wall or cabinetry and nobody walks through. A walkway behind seating needs 36 inches for one person to squeeze past, 44 inches for two-way traffic.
Frequently Asked Questions
How wide does the kitchen need to be for an island with seating?
Leave at least 36 inches between the island and the nearest cabinet or wall so people can walk through when stools are occupied.
Behind the stools, 32 inches is the minimum if no one walks through, but 44 inches is better when traffic passes behind seated people. Tight clearance turns a comfortable island into a bottleneck.
Should a kitchen island be the same height as the counter?
Most islands sit at 36 inches, the same height as your counters, and standard counter stools tuck right under.
Bar-height islands at 42 inches separate the eating surface from the work zone and suit taller users better, but they require bar stools and take up more vertical space.
How long should a kitchen island be to seat 4?
I budget two feet of counter per seat, so four stools call for an eight-foot run.
Stools with arms or wider seats can push that closer to two and a half feet apiece. If the island is shorter, the seats crowd each other and elbows overlap.
How many stools fit at a kitchen island?
Divide the seating side’s length by 24 inches per stool for standard widths, or 30 inches for wide stools or those with arms.
A six-foot island fits three; eight feet gets you four. Going tighter than 24 inches per seat makes the arrangement uncomfortable.
How much space do I need for a kitchen island with seating?
Each stool needs 24 inches of counter width, and the island requires at least 36 inches of clearance on all working sides.
If the back of the stools faces a wall, 32 inches is enough; a walkway behind them wants 44. Undersized clearance blocks cabinet doors and traps the cook.
What types of seating options are available for kitchen islands?
Bar stools and counter stools are the most common, with backless versions sliding fully under the counter and backed styles adding support.
Benches seat more people in less space and suit families with young children. Integrated seating builds the bench into the island structure and stays permanent once installed.