
Interior design for a kitchen can mean painting existing cabinets for under a thousand dollars or building a waterfall island that requires custom fabrication and plumbing work.
The choice depends on whether you want a quick visual refresh or you’re ready to add storage and function that changes how the room works.
Butcher-block countertops need oiling every few months but cost less than stone, apron-front sinks sit deeper than standard drop-ins so large pots fit, and a tall pantry cabinet uses vertical space without eating into the counter or floor area.
1. Paint Kitchen Cabinets
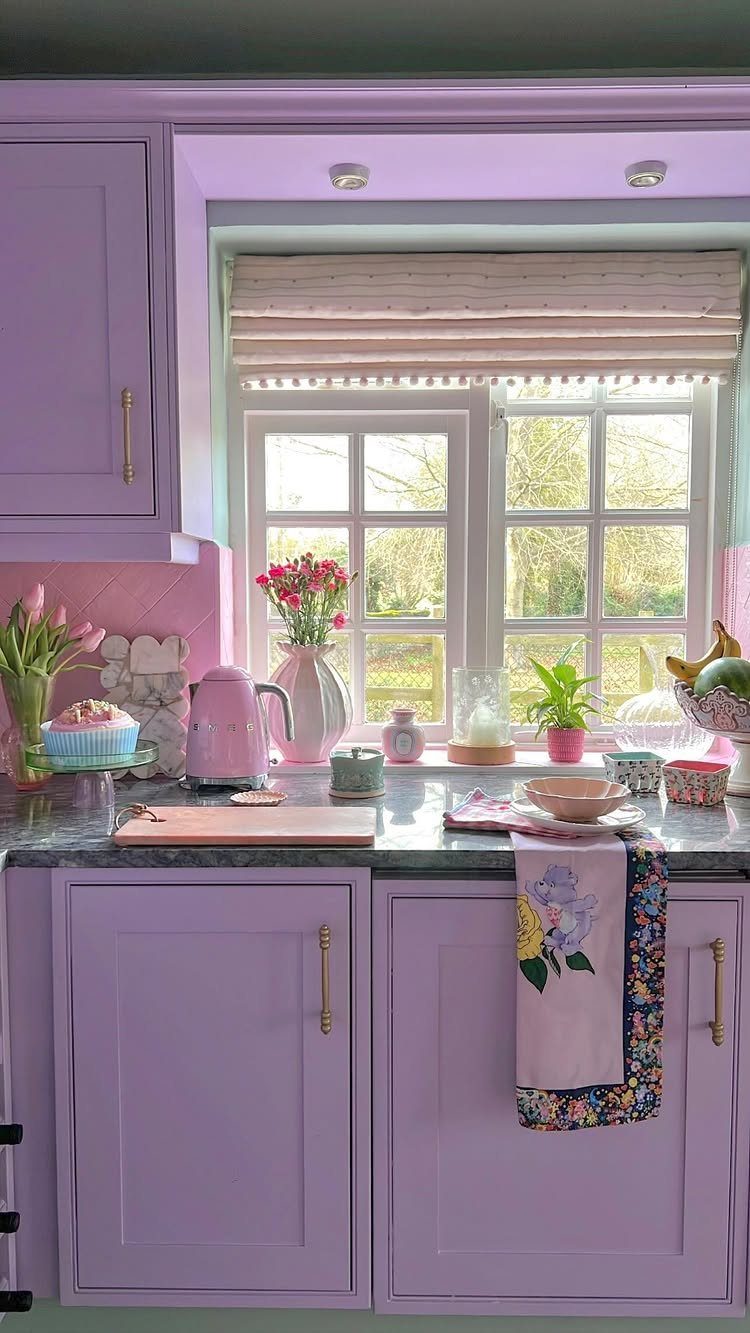
Painting cabinets changes the look of the kitchen without touching the layout. If the boxes and frames are solid and the doors still close cleanly, paint is faster and cheaper than replacement.
Purple cabinets sit against a grey countertop, which keeps the color from overwhelming the room. When you go bold on the cabinets, the countertop and backsplash need to stay quieter so the eye has somewhere to rest.
Prep takes longer than the actual painting.
Sand the doors lightly, clean every surface with degreaser, prime with a bonding primer, then roll 2 coats of cabinet paint. Most jobs take a weekend if the doors come off and dry flat.
2. Add a Backsplash
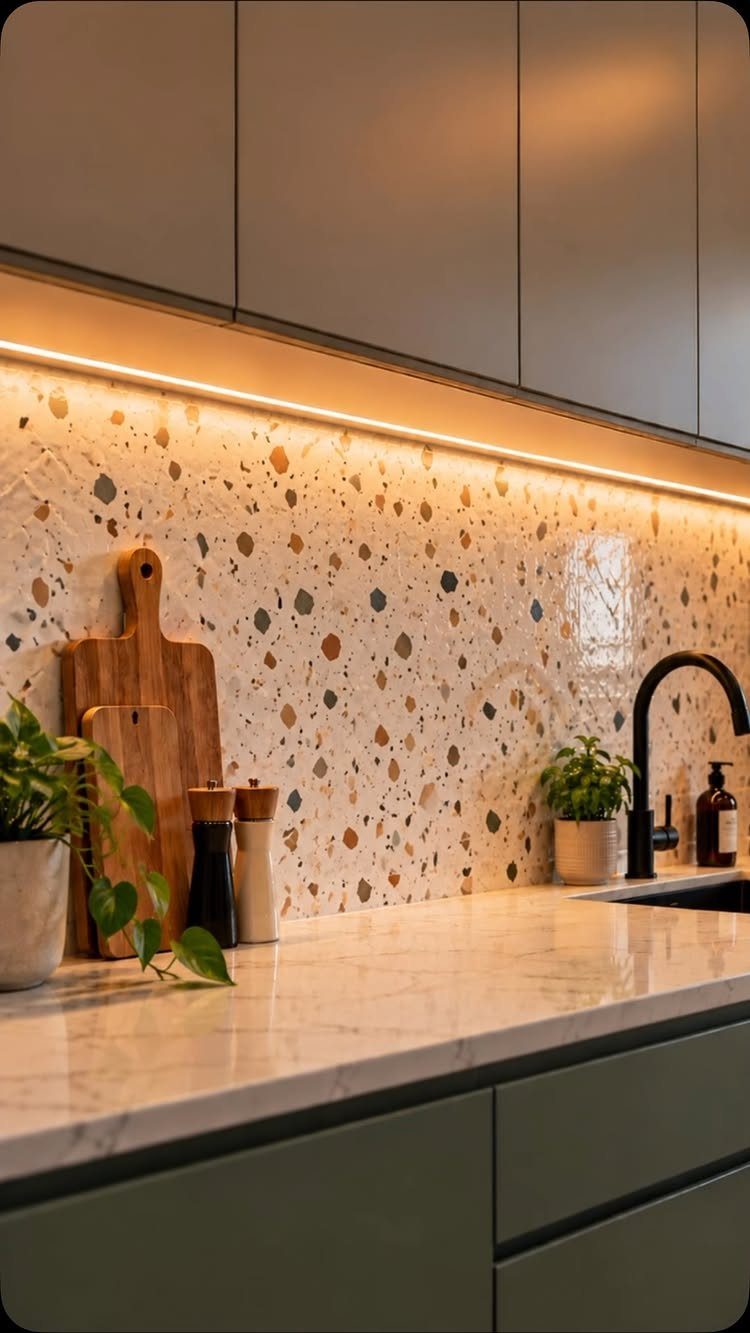
A backsplash protects the wall behind the counter and stove from splashes and grease while adding color or texture to the room.
Terrazzo, subway tile, and marble are the usual choices, but sheet materials like metal or beadboard can work too if the kitchen leans industrial or cottage. Installation cost depends on the material and how much cutting the layout requires.
Most backsplashes stop at the bottom of the upper cabinets. If you run tile all the way to the ceiling, the wall becomes a design element instead of background.
3. Add Open Shelving
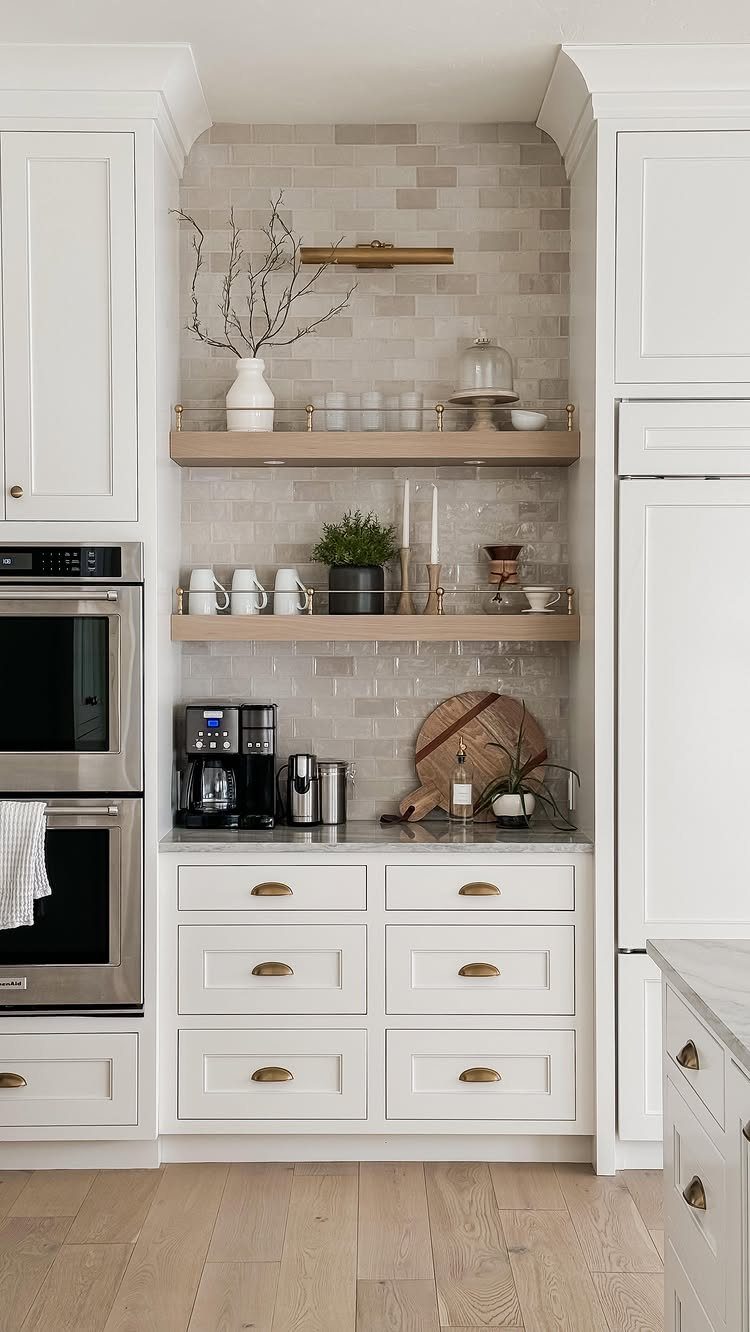
Open shelves put dishes, glassware, and mugs on display instead of behind cabinet doors. The 2 light-wood shelves here hold everyday items within reach, which works when you use the same pieces regularly and don’t mind keeping them tidy.
This setup suits a smaller kitchen where upper cabinets can make the room feel closed in. Shelves take up less visual weight and cost less to install than a full run of cabinetry.
Open shelves collect dust.
Everything on the shelf gets exposed to cooking grease and needs wiping down more often than items behind doors. If you cook with high heat or fry often, open shelving becomes more maintenance than convenience.
4. Create a Kitchen Island
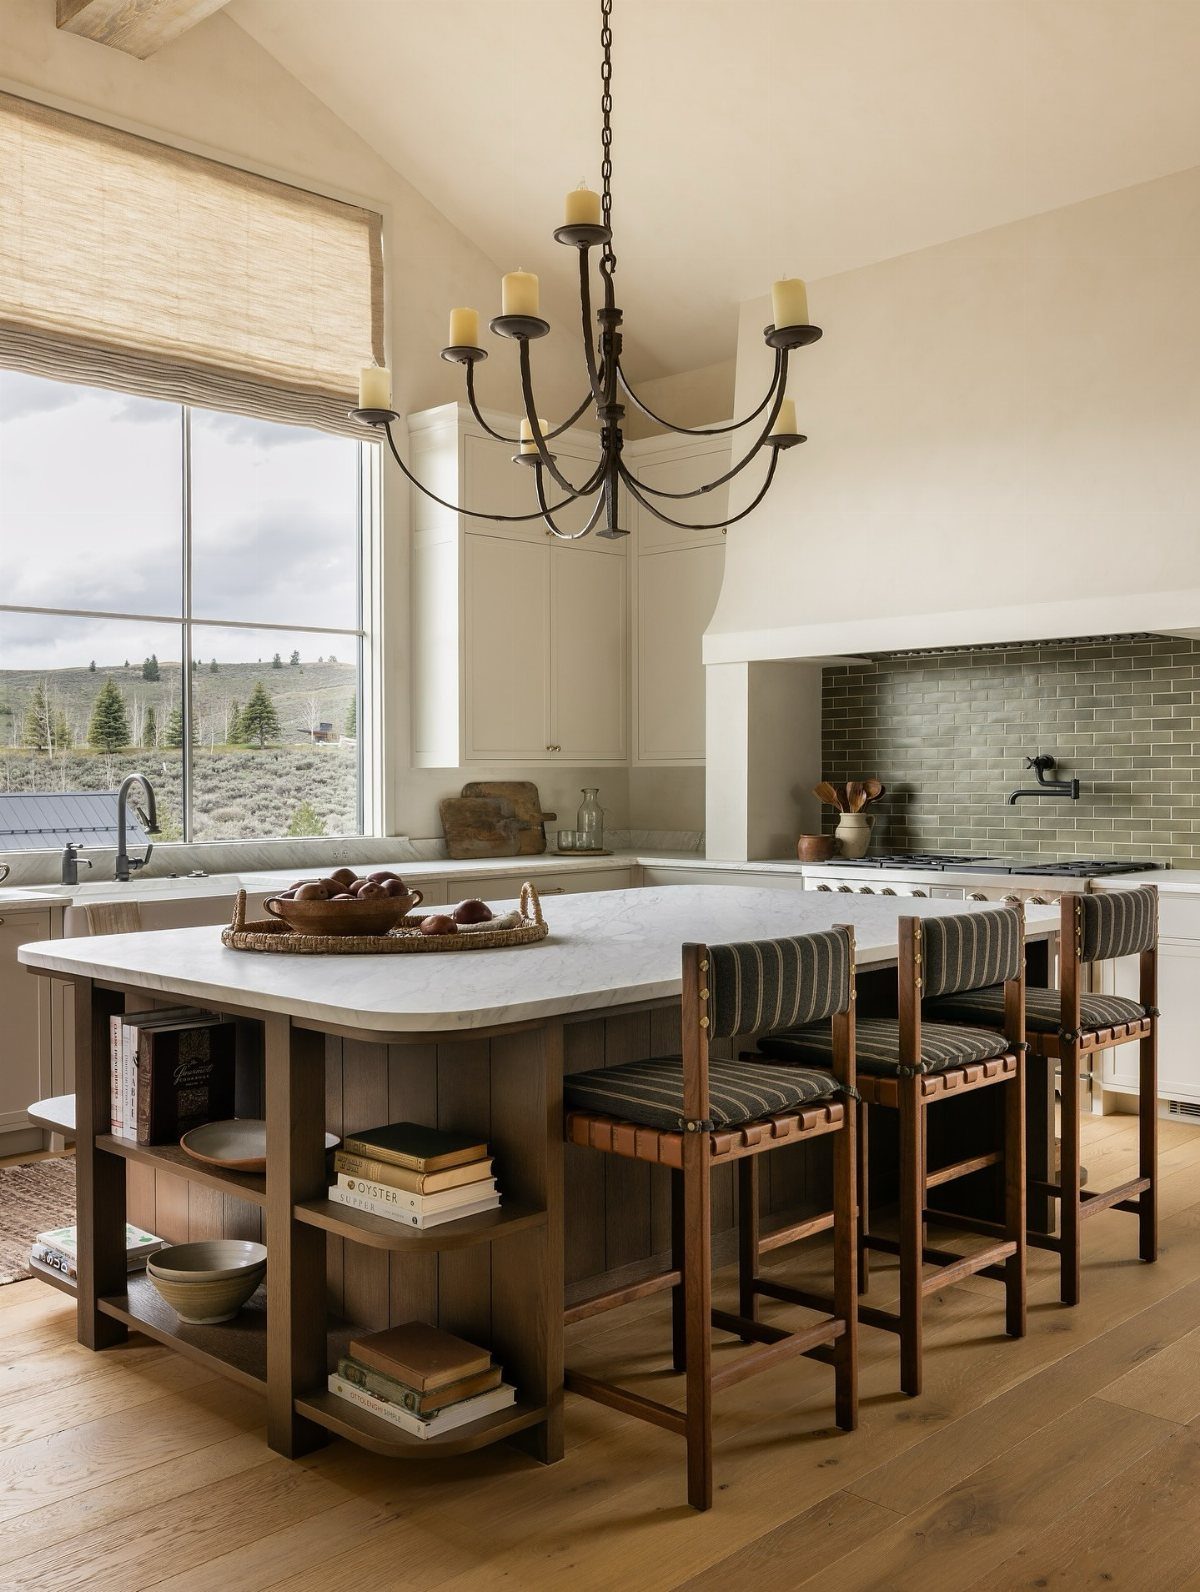
An island adds work surface, storage, and seating in one piece.
If the kitchen is large enough to walk around the island comfortably, it becomes the natural center of the room.
You need enough clearance on each side for traffic to work, and more room helps if multiple people cook at once.
Islands can be built in or freestanding. A freestanding piece costs less and moves with you, but a built-in island can house a sink, dishwasher, or cooktop if the plumbing and electrical lines are already there.
5. Neutral Kitchen with Marble Backsplash
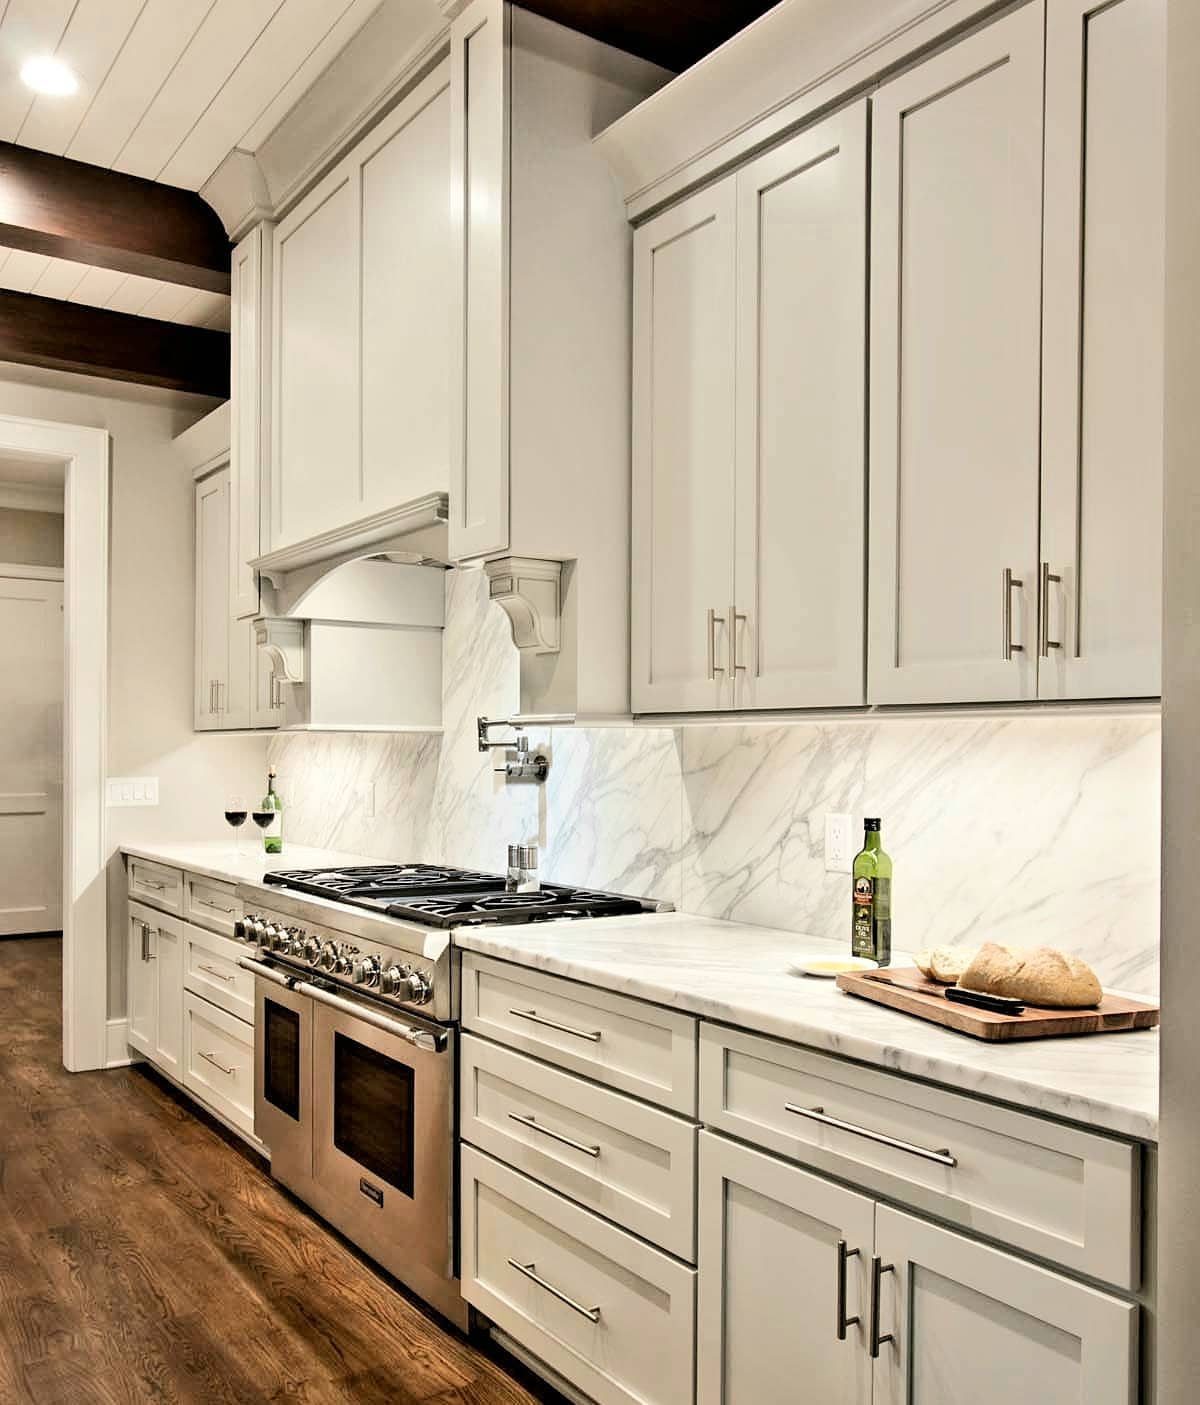
White cabinets and marble backsplash keep the kitchen calm and light without leaning cold. The marble here matches the countertop, which ties the surfaces together and makes the room feel cohesive.
This palette suits a kitchen that doesn’t get much natural light or one where the homeowner wants the space to fade into the background. The stainless steel stove and dark wood floors add contrast without introducing new colors.
Marble stains if you don’t seal it, so plan to reseal every year or two depending on how much cooking happens. If the budget doesn’t stretch to real marble, porcelain slabs and quartz both mimic the look without the upkeep.
6. Use Bold Cabinet Colors
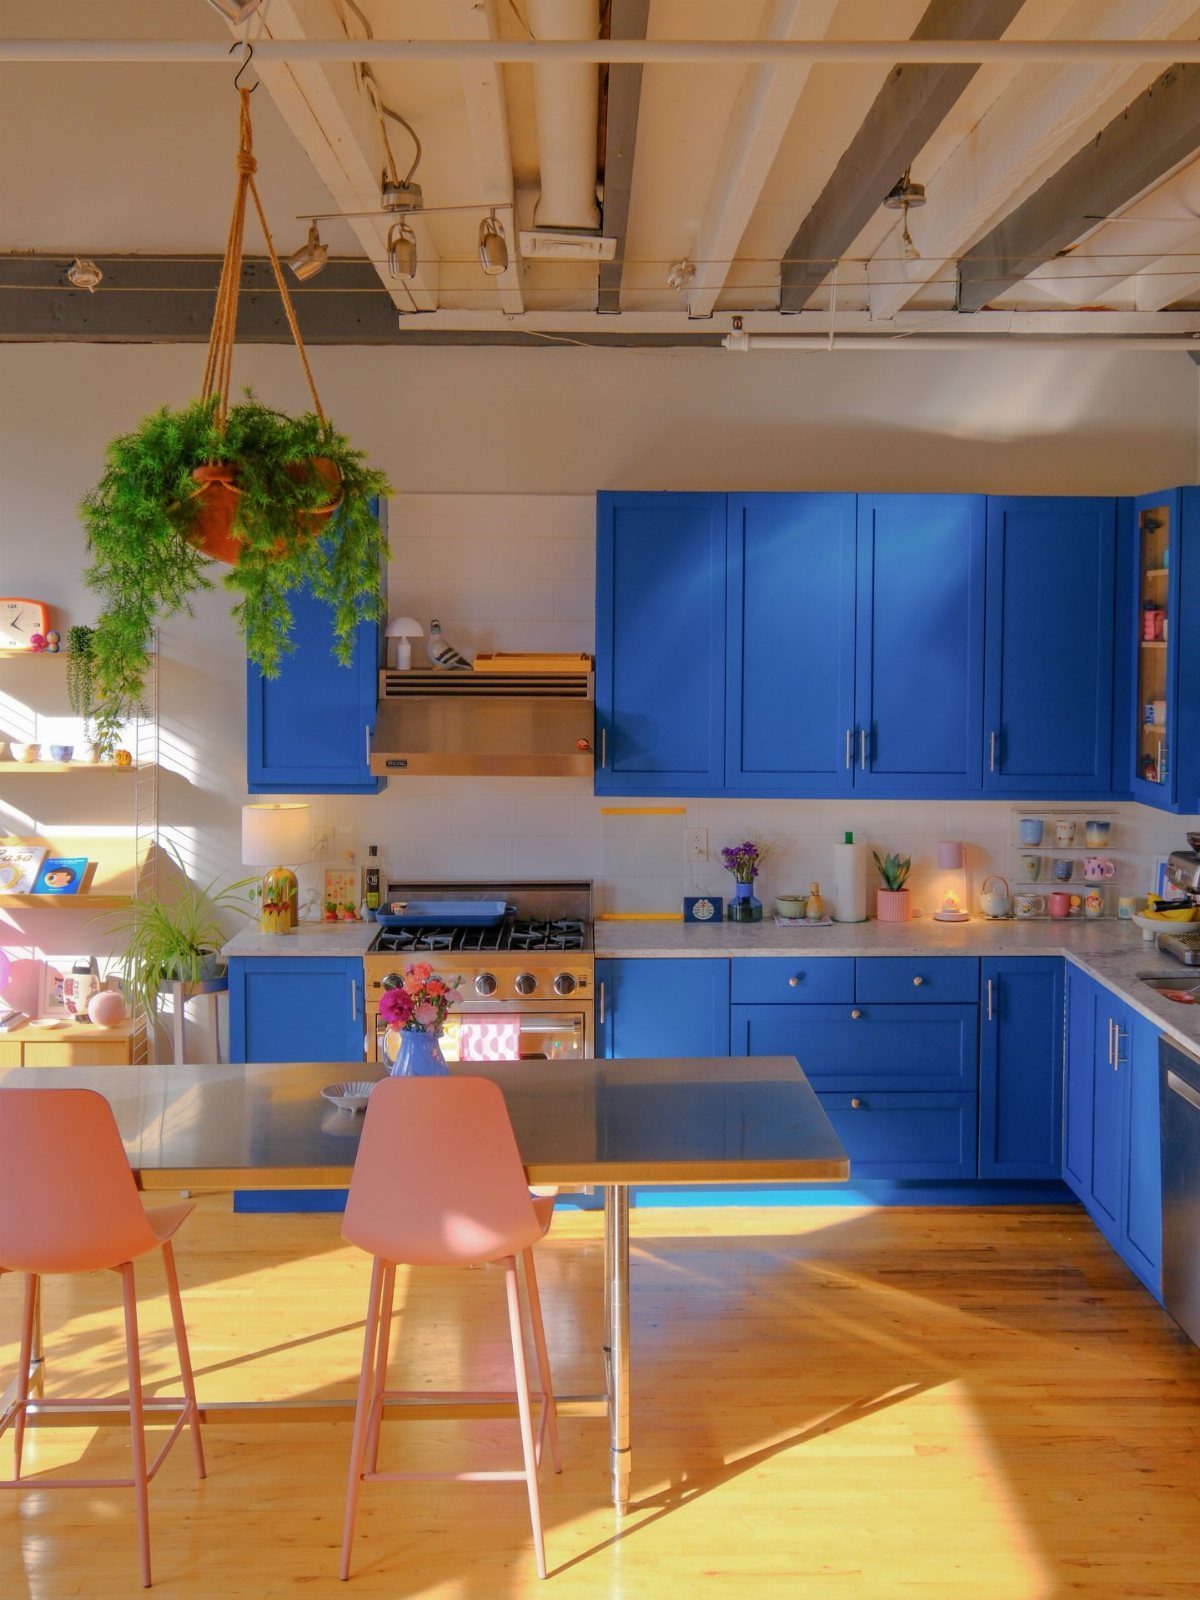
Bold cabinet color turns the kitchen into a statement instead of a neutral backdrop. The bright blue cabinets here work because everything else stays simple: light wood floors, white walls, and a stainless steel stove that doesn’t compete.
Color reads stronger on lower cabinets than on uppers, so if you want the effect without going all in, paint the base units and leave the wall cabinets white or off-white.
Darker or more saturated colors show wear faster than white or grey, so touch-ups become routine. If the kitchen gets heavy use, choose a paint that wipes clean without leaving marks.
7. Choose Farmhouse Sink
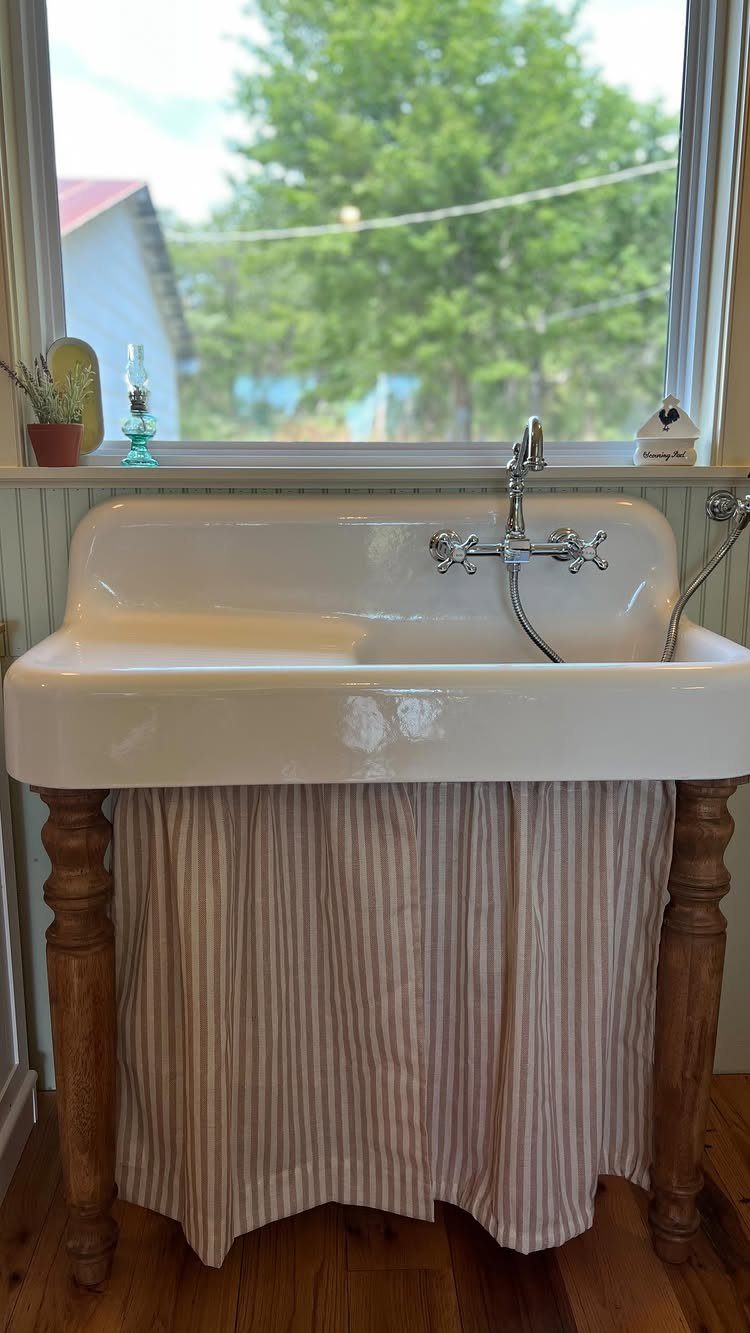
An apron-front sink sits deeper and wider than a standard drop-in, so washing large pots and sheet pans gets easier. The front panel shows, which means the material matters more than it would behind a cabinet door.
White fireclay is the most common choice, but cast iron and stainless steel both work if the look fits the kitchen.
Fireclay costs more and chips if you drop something heavy, but it holds up better to everyday wear than enamel over cast iron.
Most apron-front sinks need a custom cabinet base because the front panel changes how the unit sits. If the kitchen already has standard base cabinets, budget for carpentry or a sink base designed for this style.
8. Add a Coffee Station
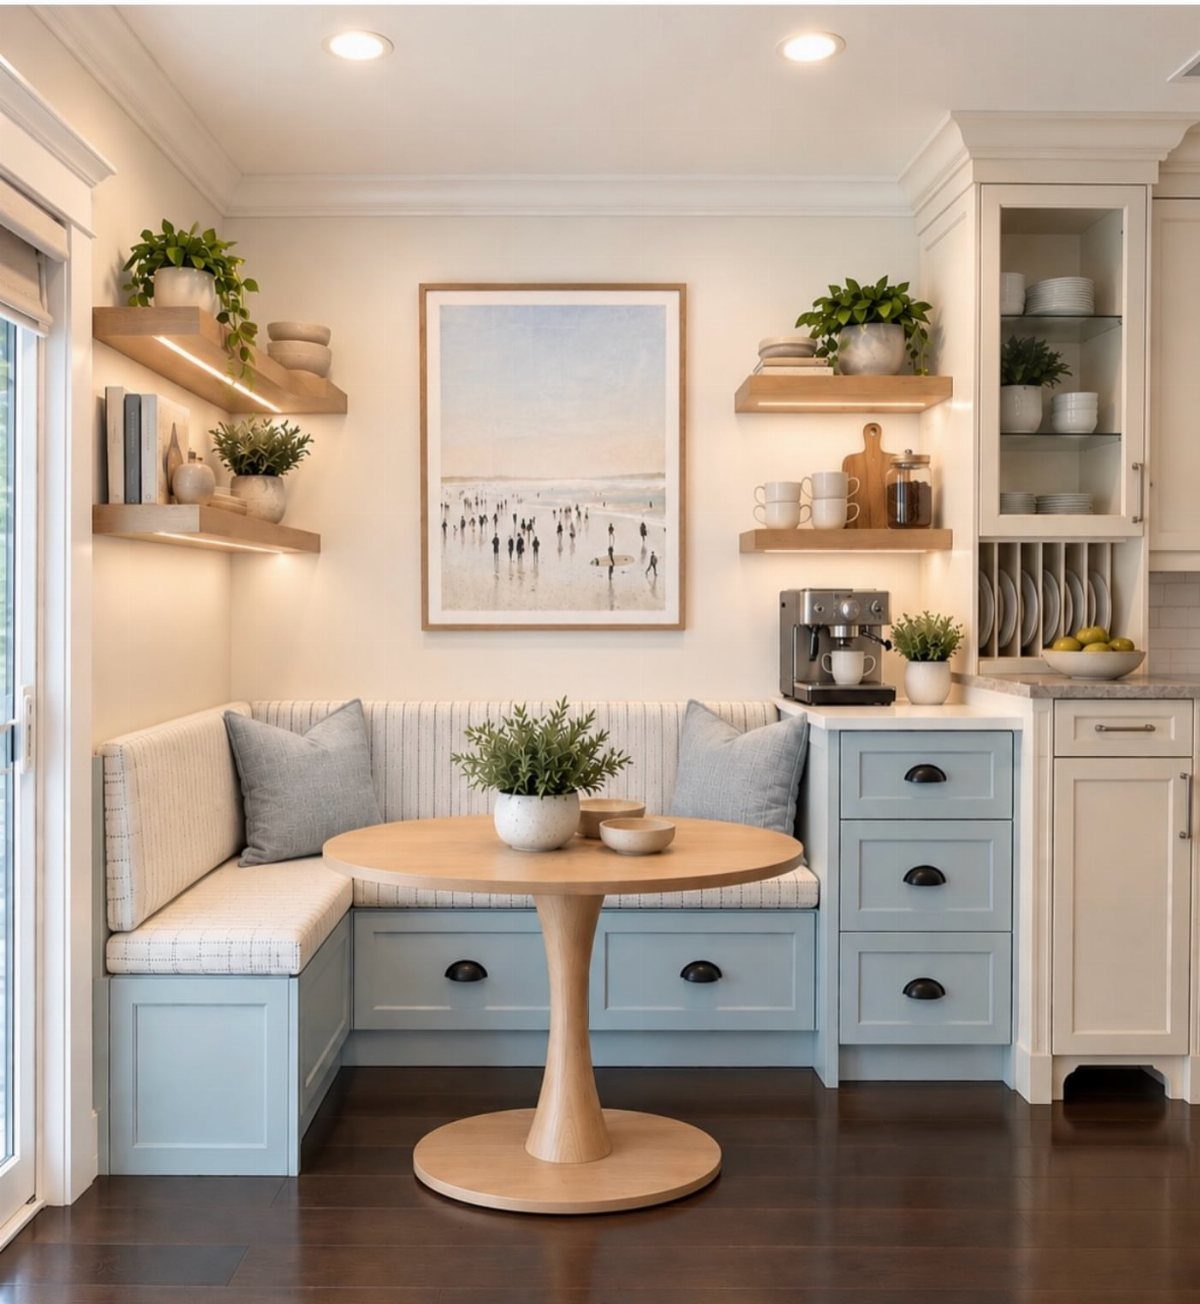
A coffee station keeps the machine, mugs, and supplies in one spot instead of scattered across the counter.
A section of counter near the breakfast nook can hold the machine, grinder, and a few mugs when the kitchen has surface area to dedicate to one task.
If counter space is tight, a wall-mounted shelf or a narrow cart can hold the machine and a few mugs without taking up prep room. The station needs an outlet nearby, so placement depends on where the wiring already sits.
This setup makes sense when coffee happens every morning and multiple people use the machine. If the kitchen serves one person or coffee only happens occasionally, a station adds clutter instead of convenience.
9. Choose Retro Kitchen Style
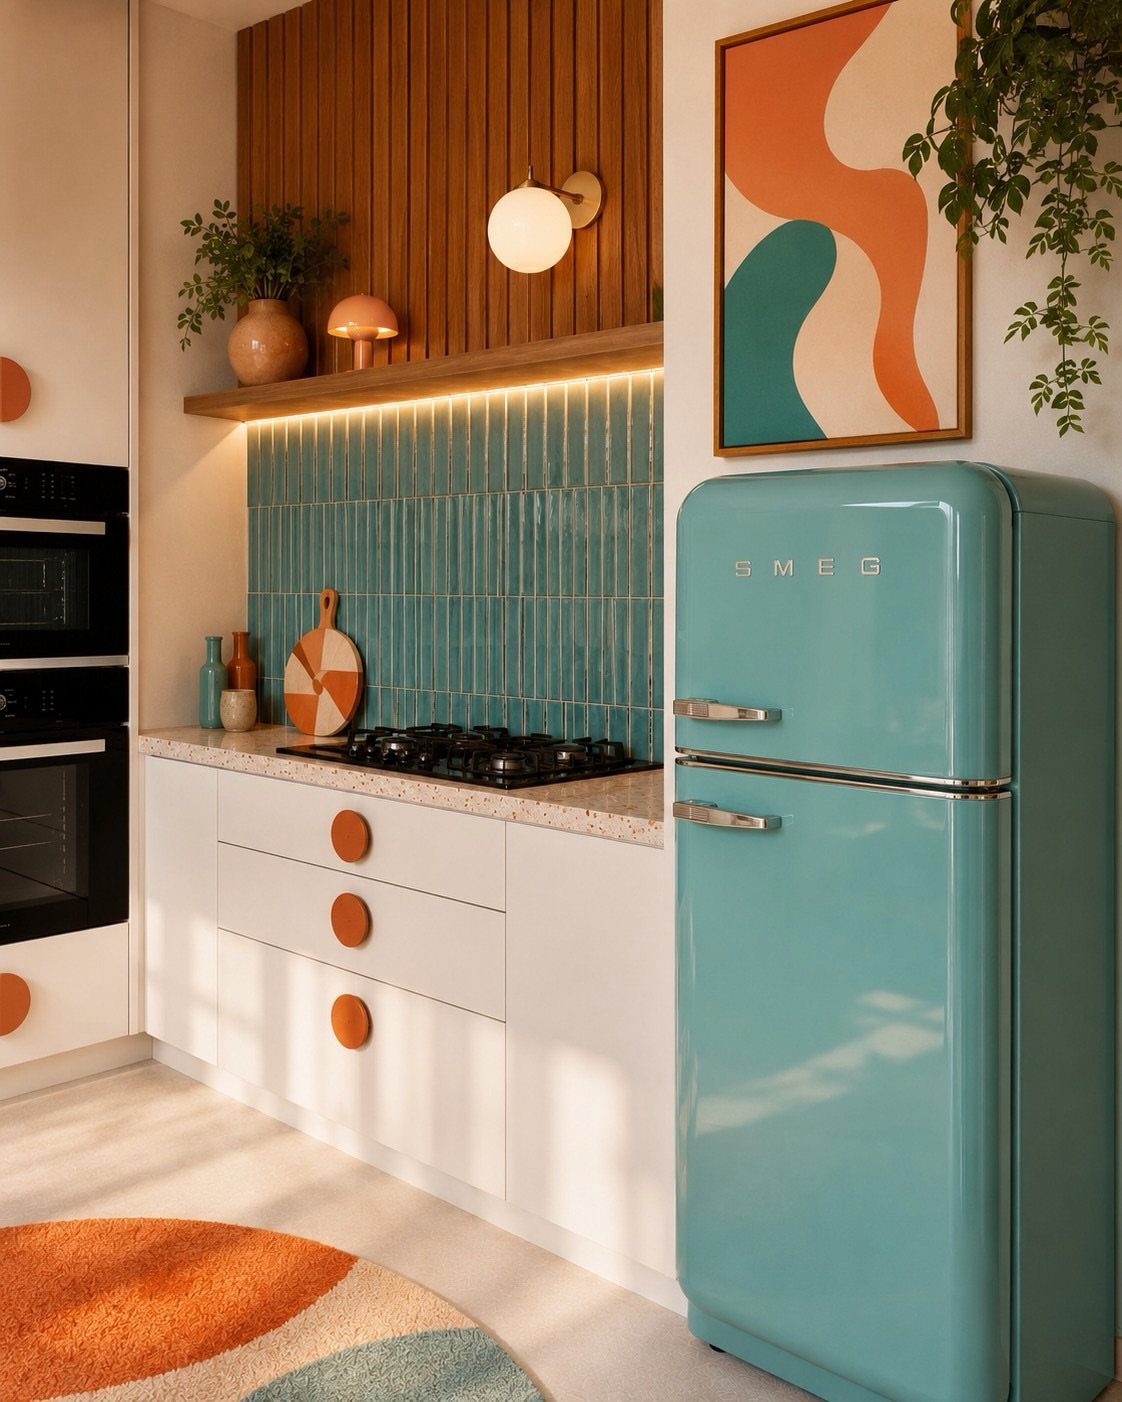
Retro kitchens pull from mid-century design with saturated color, geometric tile, and warm wood paneling. The turquoise refrigerator sets the tone, and the teal backsplash tile picks up the same color family without matching it exactly.
Wood paneling on the walls or lower cabinets adds warmth and keeps the bright color from feeling cold. If the room is small, use the bold color on one or two pieces and let the wood fill in the rest.
Retro appliances cost more than standard models and sometimes offer fewer features, so decide early if the look matters enough to narrow the options. Tile in vintage shapes and colors is easier to source now, which simplifies the backsplash.
10. Choose Modern Kitchen Style
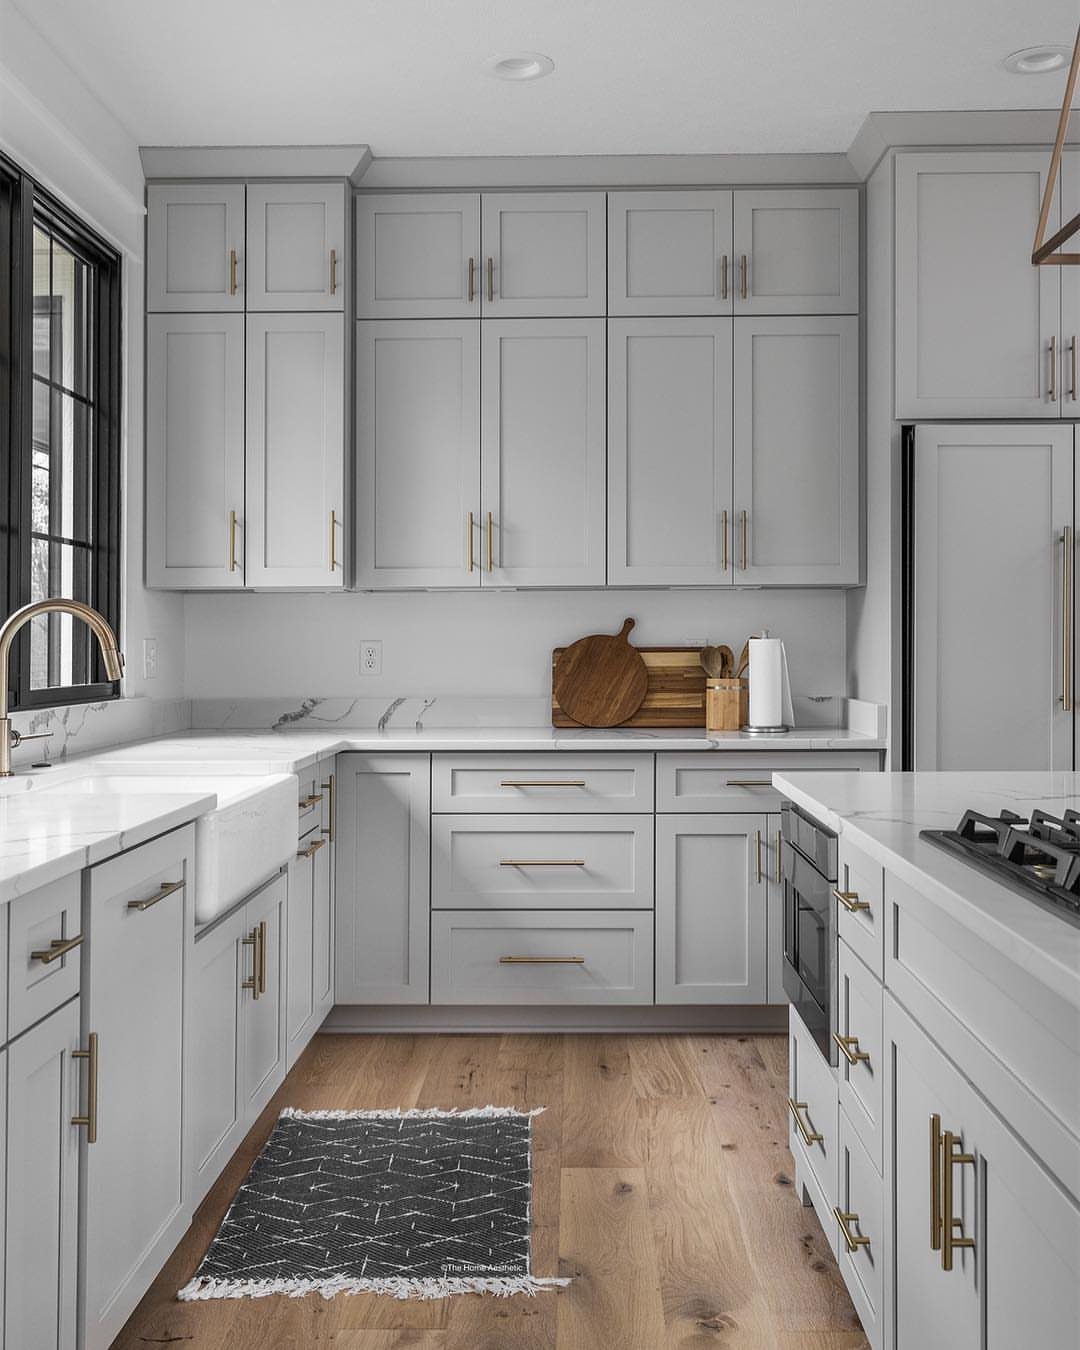
Modern kitchens lean on clean lines, flat-front cabinets, and a limited color range. The light grey cabinets here sit against white marble countertops, and the gold hardware adds warmth without introducing new colors.
This style suits open-plan homes where the kitchen shares space with the living area, because the restrained palette lets furniture and artwork take focus.
If the kitchen is enclosed, the same simplicity can read cold unless you bring in texture through wood floors or a patterned rug.
Flat-front cabinetry shows fingerprints and smudges more than recessed or shaker styles, so plan to wipe down the doors regularly. Matte finishes hide marks better than gloss, but they also collect grease if the kitchen sees heavy cooking.
11. Choose Neutral Palette
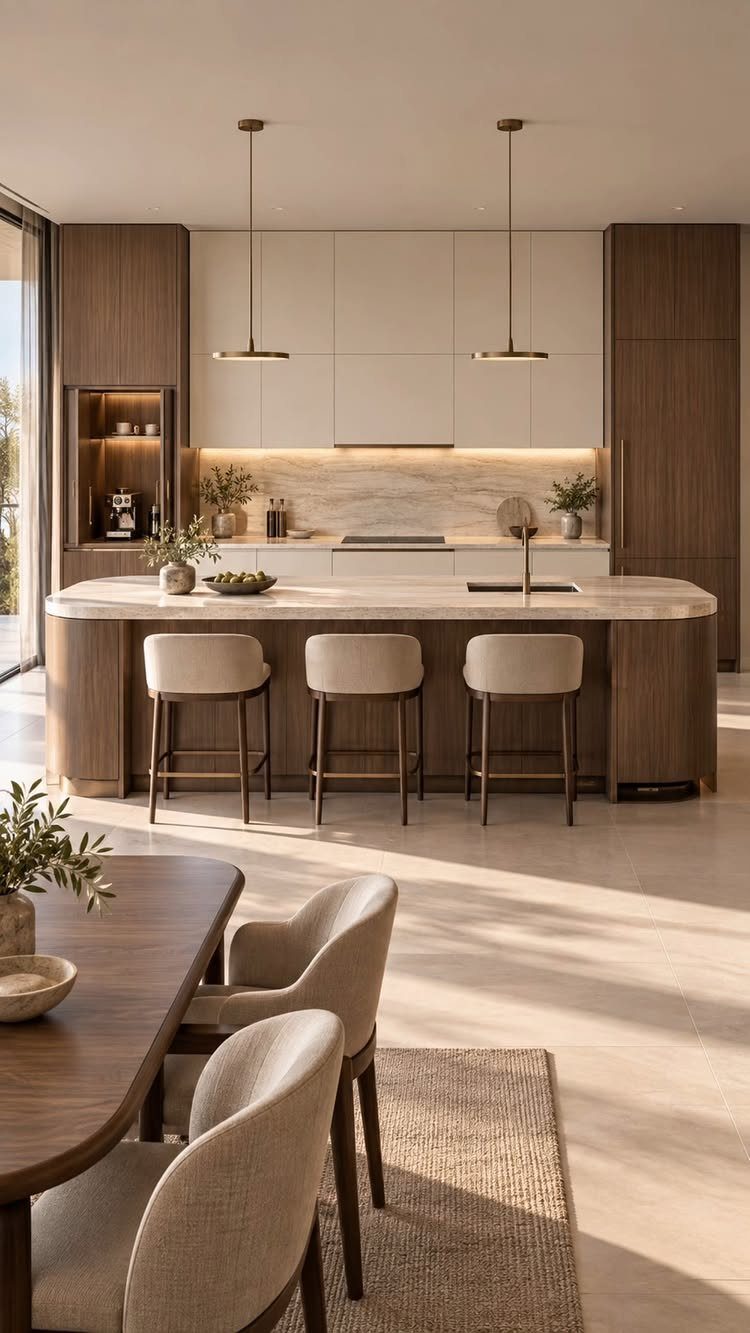
A neutral palette uses whites, greys, beiges, and wood tones instead of color, which keeps the kitchen from feeling dated as trends shift. The wood lower cabinets here sit below cream-painted uppers, and the marble island ties both finishes together.
This approach suits homeowners who want the kitchen to stay background so other rooms or furniture can carry more personality. Neutrals also make a small kitchen feel larger because the eye doesn’t stop on strong color contrasts.
Neutral kitchens can look flat if every surface has the same tone and finish. Mixing matte and polished surfaces or pairing warm wood with cool stone keeps the room from reading one-note.
12. Update Kitchen Fixtures
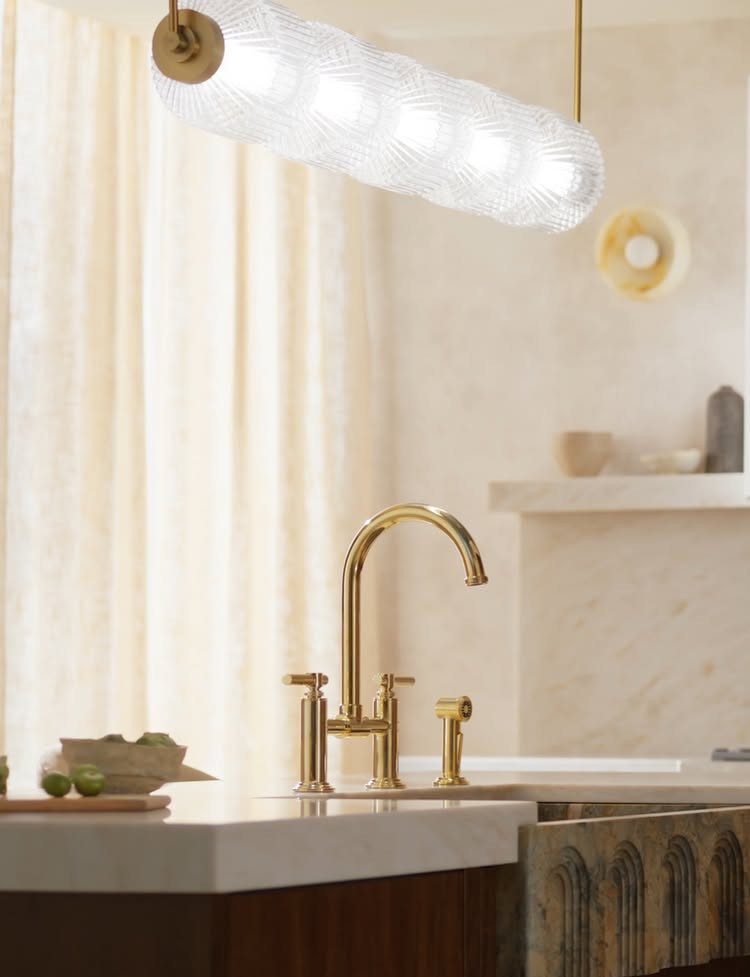
Swapping faucets, cabinet pulls, or light fixtures changes how the kitchen reads without construction. The gold faucet replaces a standard chrome or stainless model, and the finish warms the white countertop and pale wall behind it.
Faucet replacement takes an hour if the connections match the old unit, but some older sinks need an adapter or a new hole drilled for a larger base.
Cabinet hardware installs faster, and most pulls and knobs use standard spacing, so switching finishes from chrome to brass or matte black is straightforward.
This update works best when the cabinets and countertops are staying but the room feels tired. If the layout or storage needs fixing, new fixtures won’t solve it.
13. Add a Kitchen Pantry
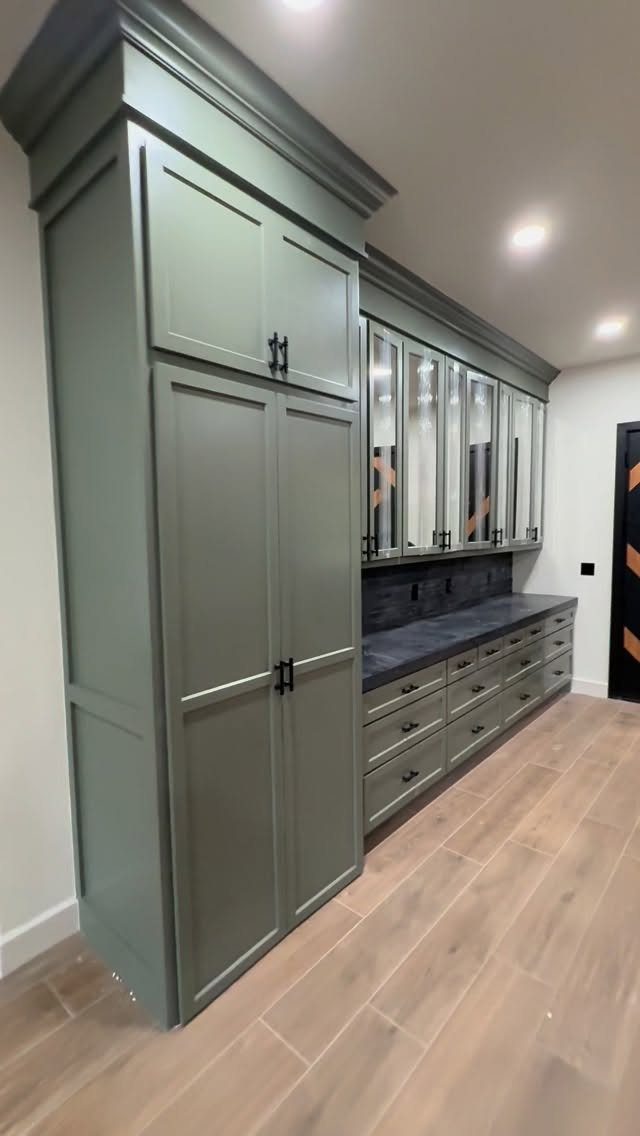
A tall pantry cabinet holds dry goods, canned items, and kitchen tools in one vertical unit instead of spreading them across multiple shelves or closets.
The sage green cabinet here reaches the ceiling, which adds storage without eating into counter or floor space.
Built-in pantries fit between existing cabinets or stand alone along an open wall. If you’re working with a kitchen that has room for a full-height unit, the pantry becomes the most efficient storage in the space.
Depth matters more than width.
A cabinet that holds packaged food well will also fit small appliances or bulk items if you go deeper. Shallow pantries keep everything visible, so nothing gets lost in the back.
14. Two-color Kitchen Cabinets
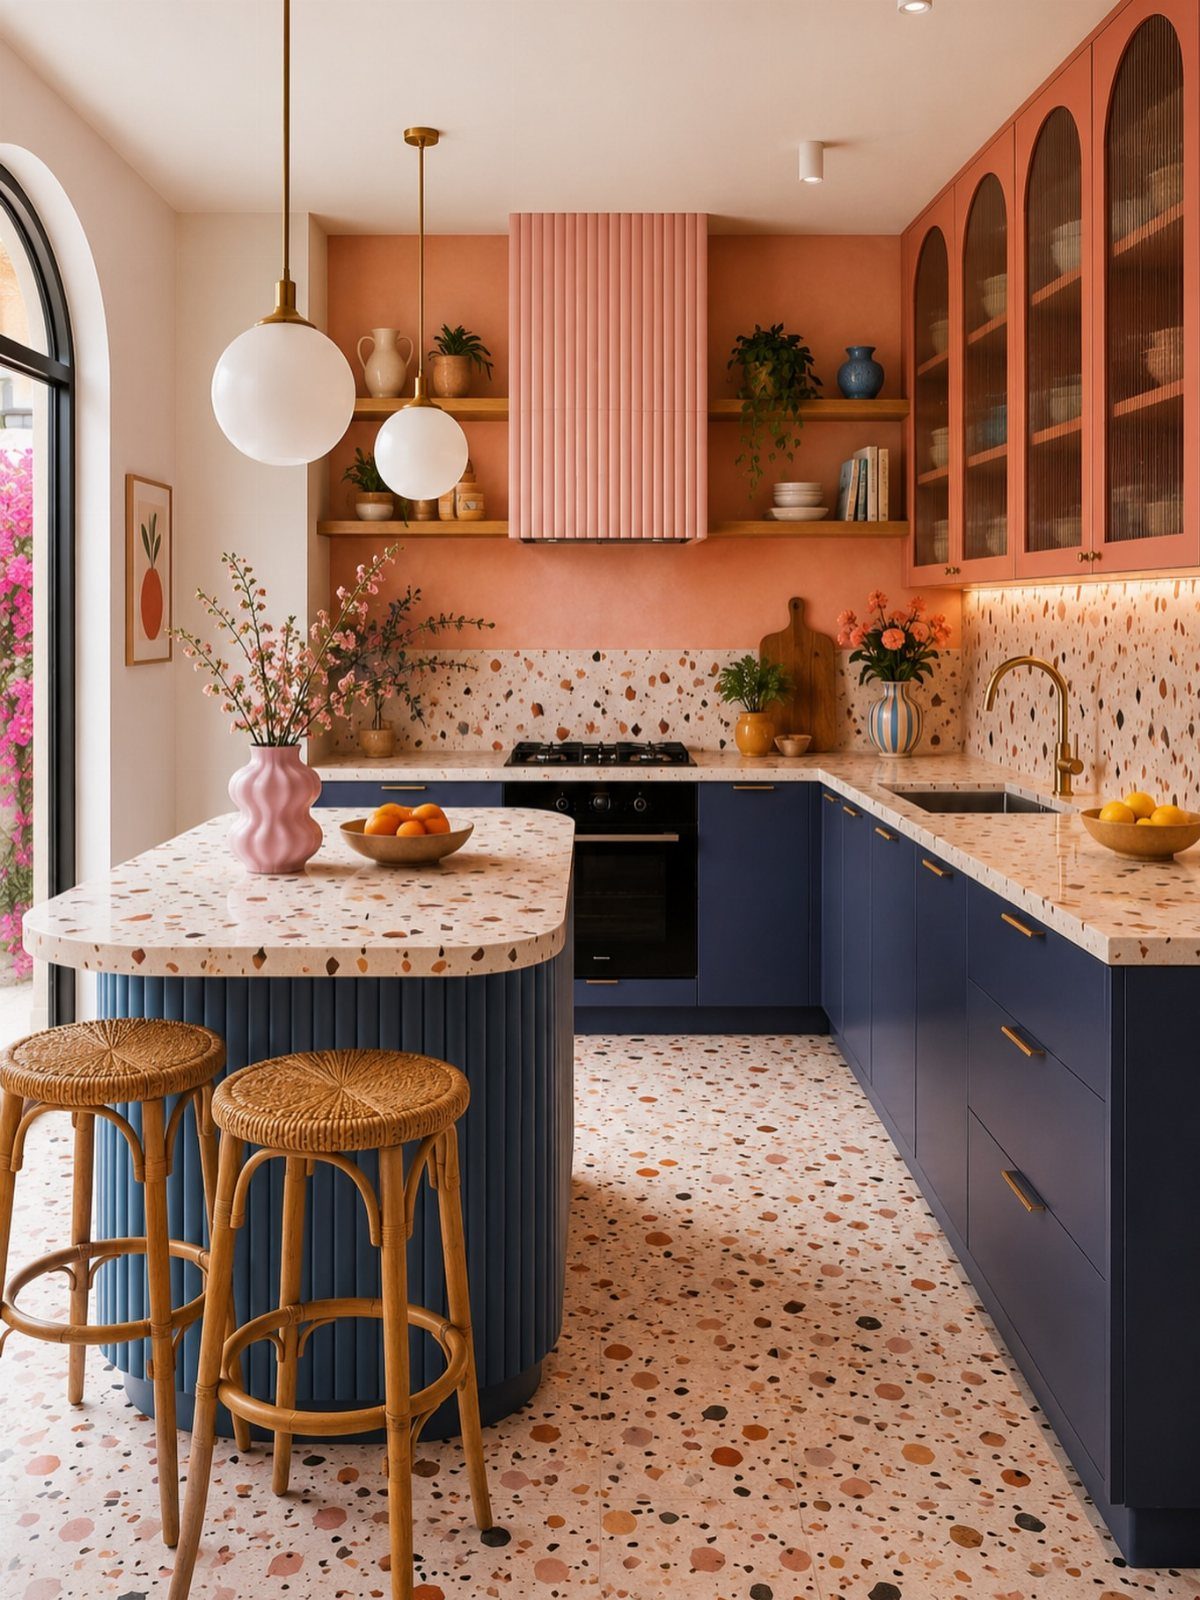
Splitting cabinet colors between upper and lower units breaks up the room and lets each half do different work.
Navy below and peach above separate the floor from the ceiling without a hard line, and the terrazzo countertop bridges both colors.
Darker cabinets below hide scuffs and wear better than light finishes, and the lighter upper cabinets keep the room from feeling closed in.
It’s particularly useful in kitchens with shorter ceilings, where one dark color top to bottom can make the space feel smaller.
If you want contrast without going bold, try white uppers with wood or grey lowers. The effect is quieter but still defines the 2 zones.
15. Use Butcher-block Counters
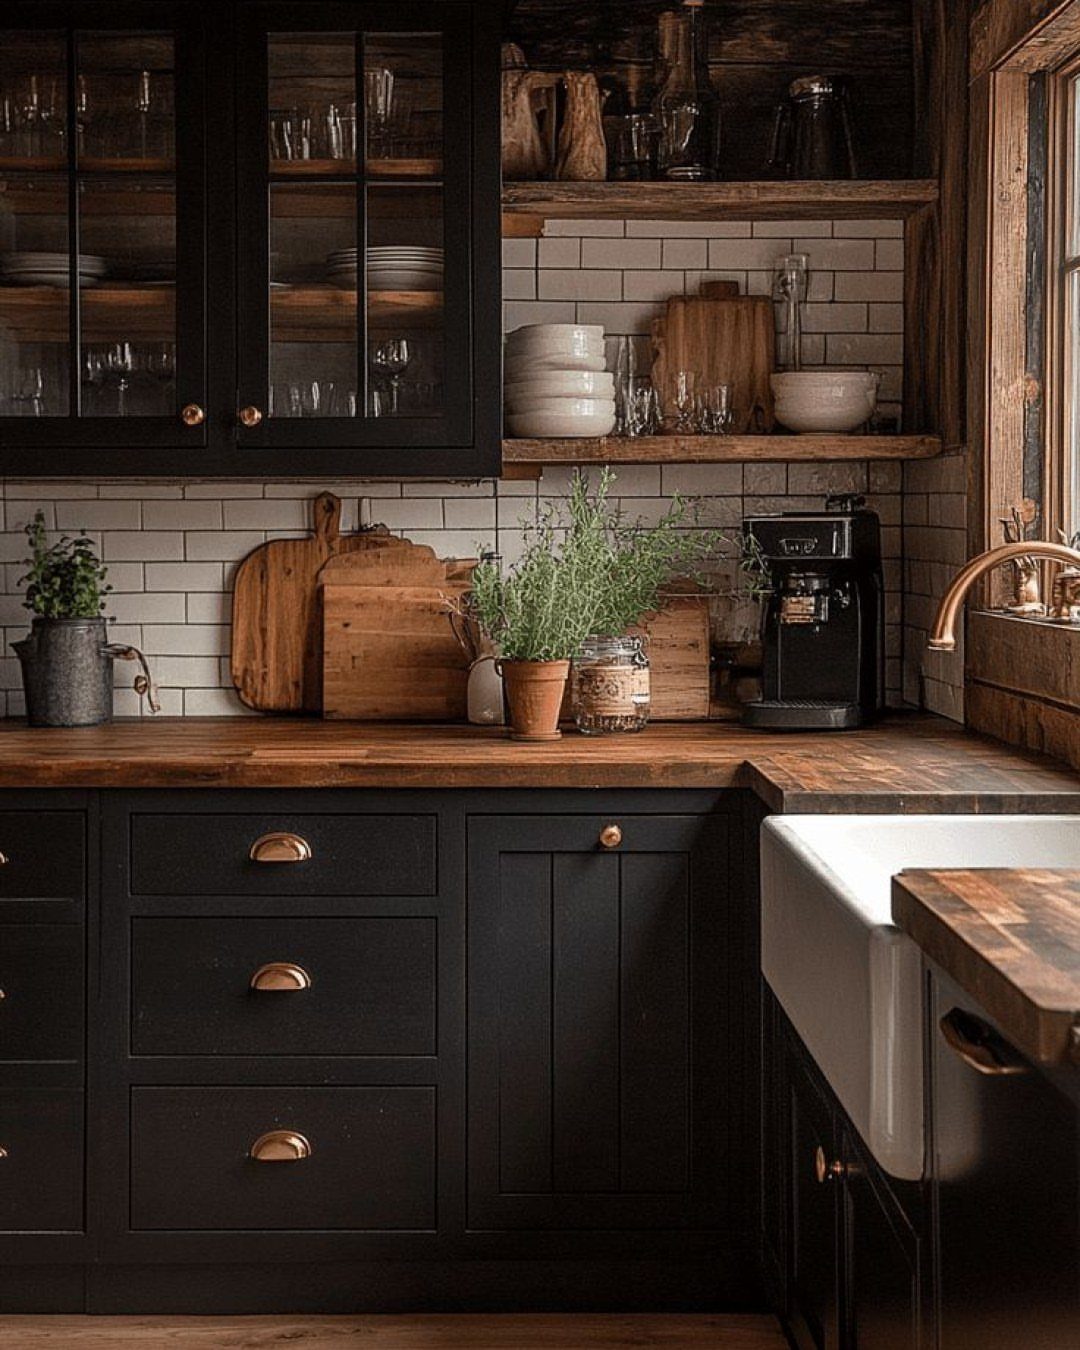
Wood countertops add warmth and give you a built-in cutting surface that doesn’t need a separate board. Butcher block here sits on black cabinets, and the contrast makes the wood read as a design choice instead of filler.
The countertop needs oiling every few months to keep water from soaking in.
Mineral oil or a food-safe finish works, and the job is quick. Wood scratches and stains, but you can sand out damage and refinish the surface without replacing the slab.
Butcher block costs less than stone and installs like any other countertop. If you cook with a lot of water or citrus, keep those areas dry or choose a sealed wood product instead of raw butcher block.
16. Add Geometric Tile
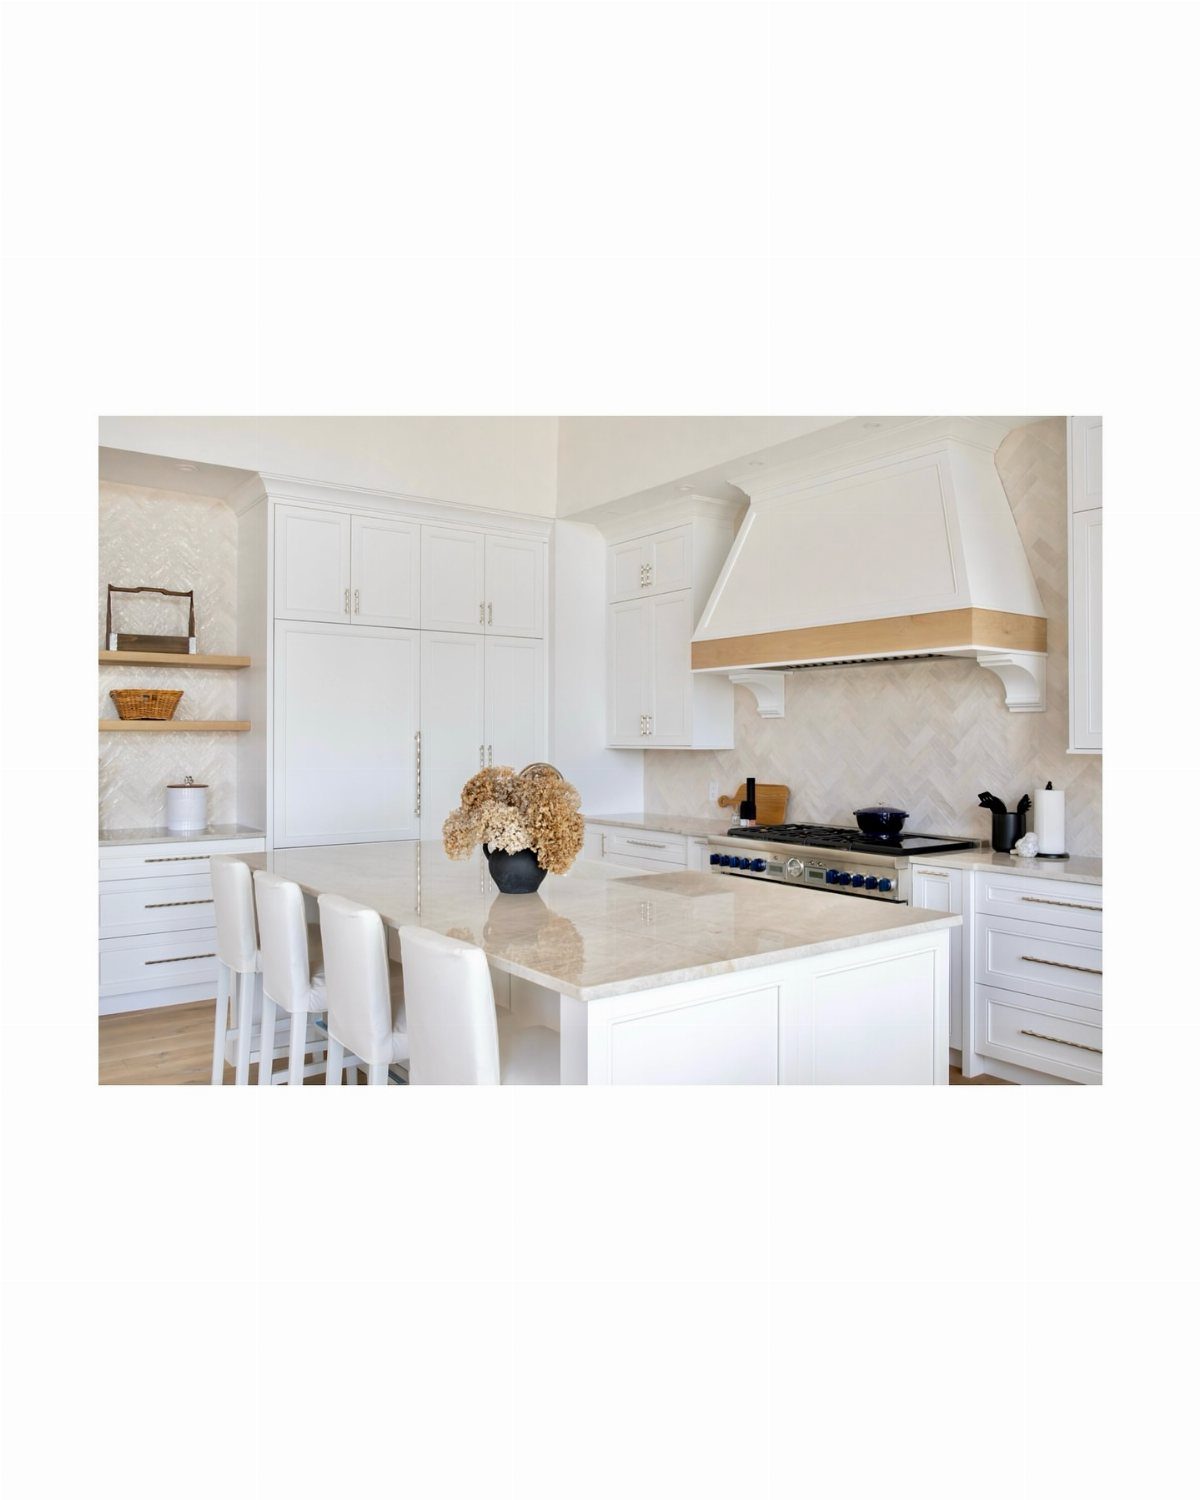
Tile laid in a pattern adds movement to the backsplash without introducing new colors. The herringbone here uses white subway tile, so the detail comes from the layout instead of the material.
Herringbone, chevron, and basket weave all work with standard rectangular tile, and most tile shops stock the sizes you need. Installation costs more than a straight grid because each piece has to be cut and angled, so labor usually doubles.
Geometric tile suits kitchens where the cabinets and countertops stay simple. If the room already has bold color or heavy texture, a straight tile layout keeps the backsplash from competing.
17. Add a Tiled Wall
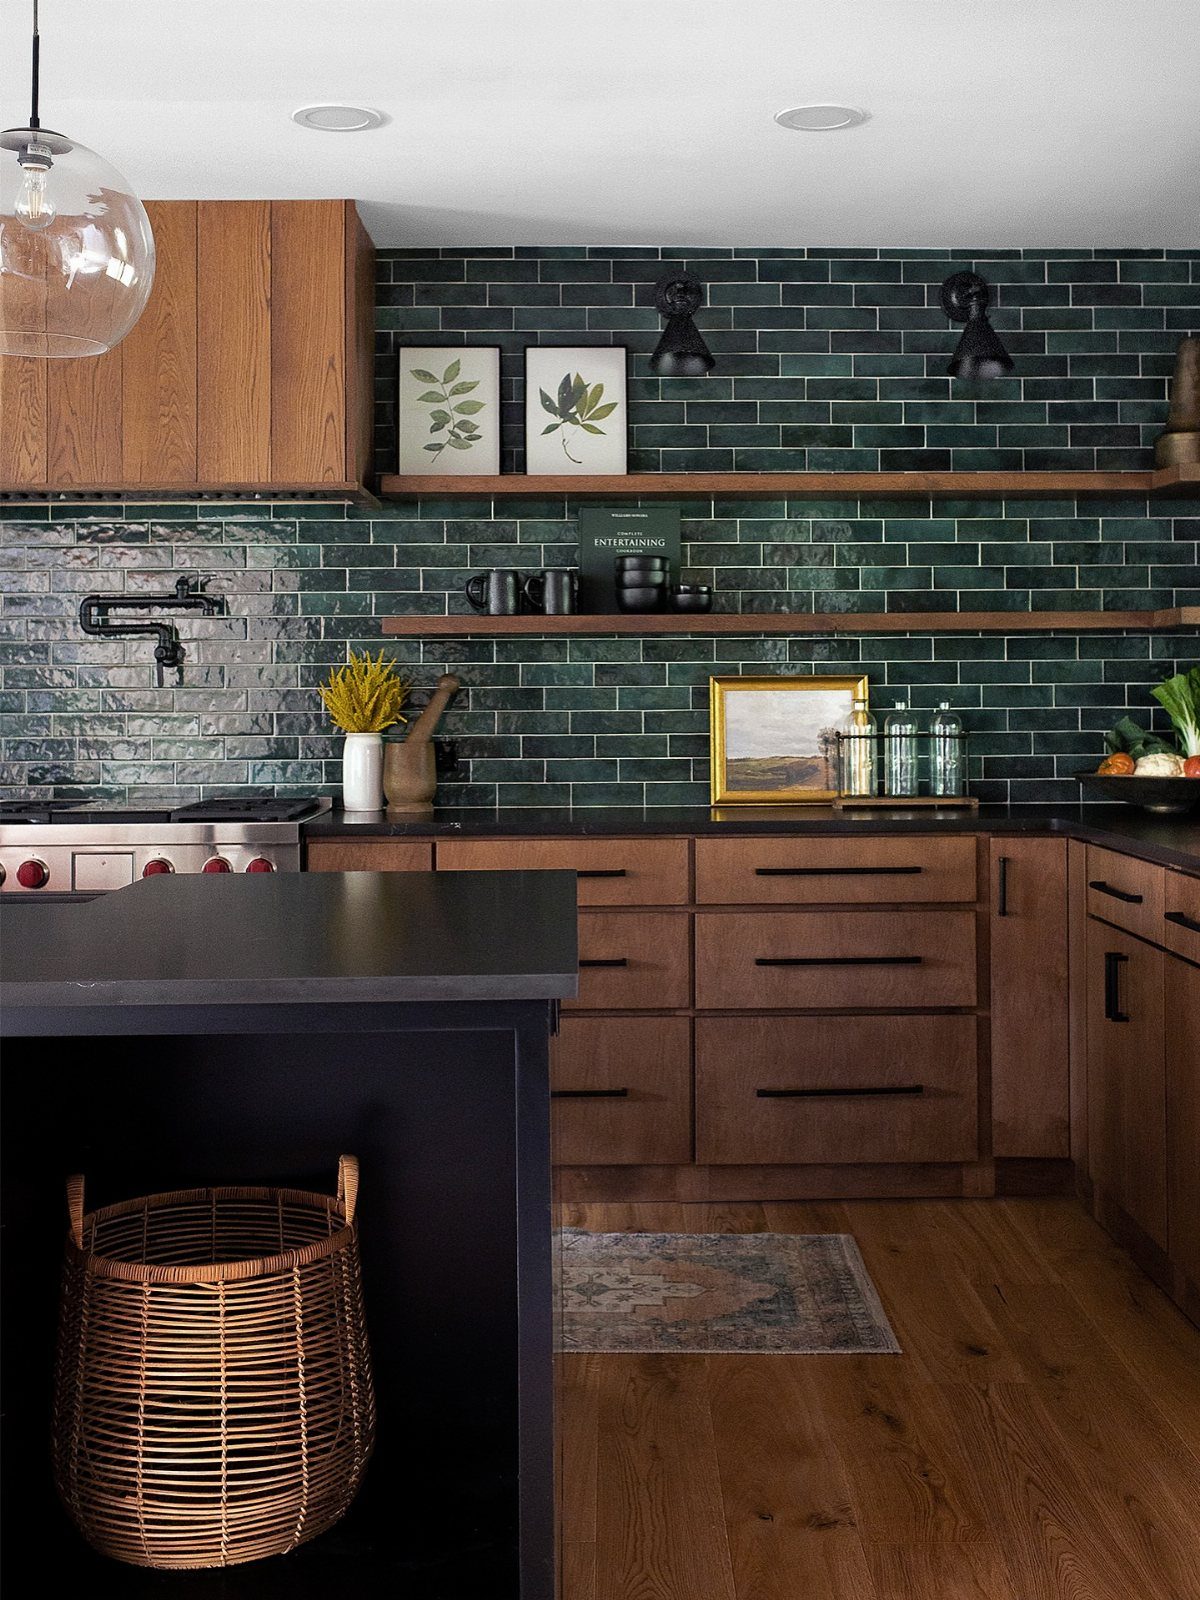
Tiling a full wall instead of just the backsplash turns the surface into a feature and makes the room easier to clean.
The dark green tile here covers the wall behind the stove and sink, and the glossy finish reflects light back into the space.
Full-wall tile works in kitchens where cooking generates steam and grease, because the surface wipes down without staining. If the room is small, tile one wall and leave the others painted so the space doesn’t feel too busy.
Tile to the ceiling or stop at a natural break like the bottom of a cabinet. Stopping mid-wall creates an awkward line that draws attention for the wrong reason.
18. Use Kitchen Wallpaper
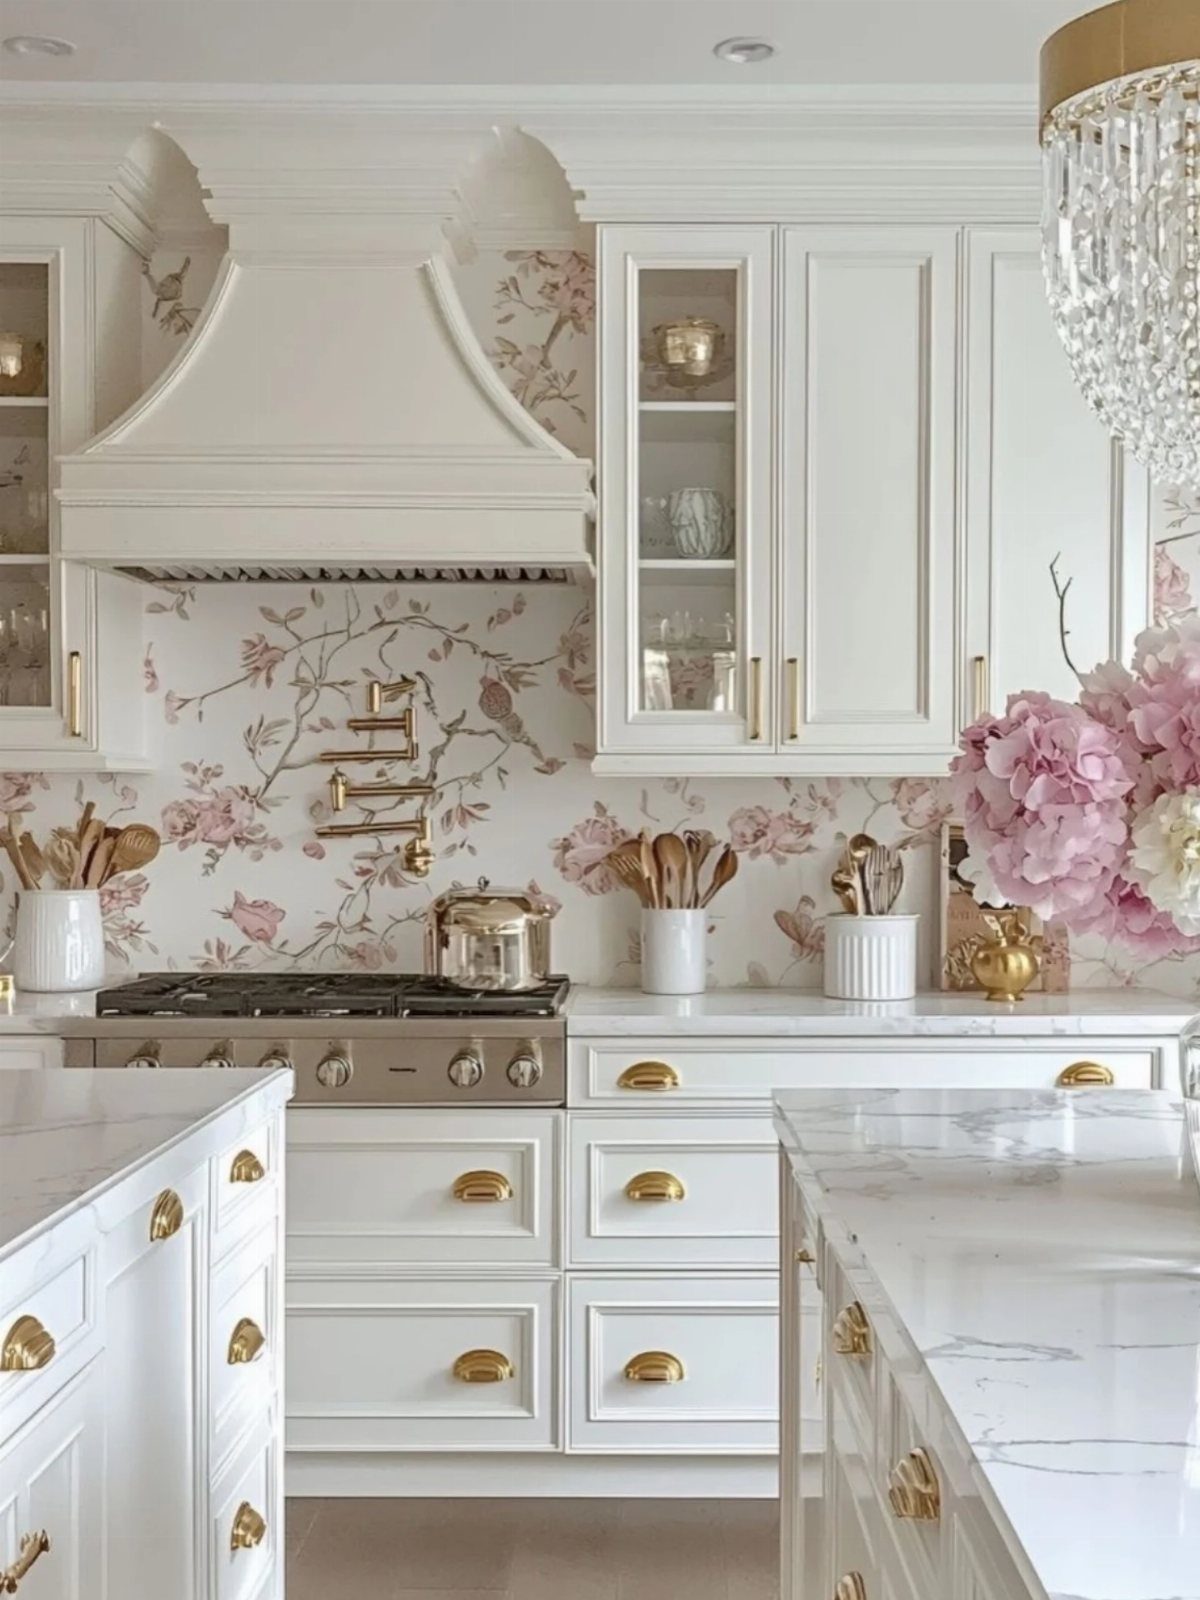
Wallpaper adds pattern to a kitchen without tile or paint.
Most kitchen wallpaper is vinyl-coated or solid vinyl, which handles moisture better than paper-backed options. Peel-and-stick versions install without paste and peel off cleanly, so they work in rentals or for testing a pattern before committing.
Wallpaper behind the stove needs a clear backsplash panel over it, or grease and heat will damage the print. If you skip the panel, keep wallpaper to walls away from direct cooking.
19. Expose Brick Wall
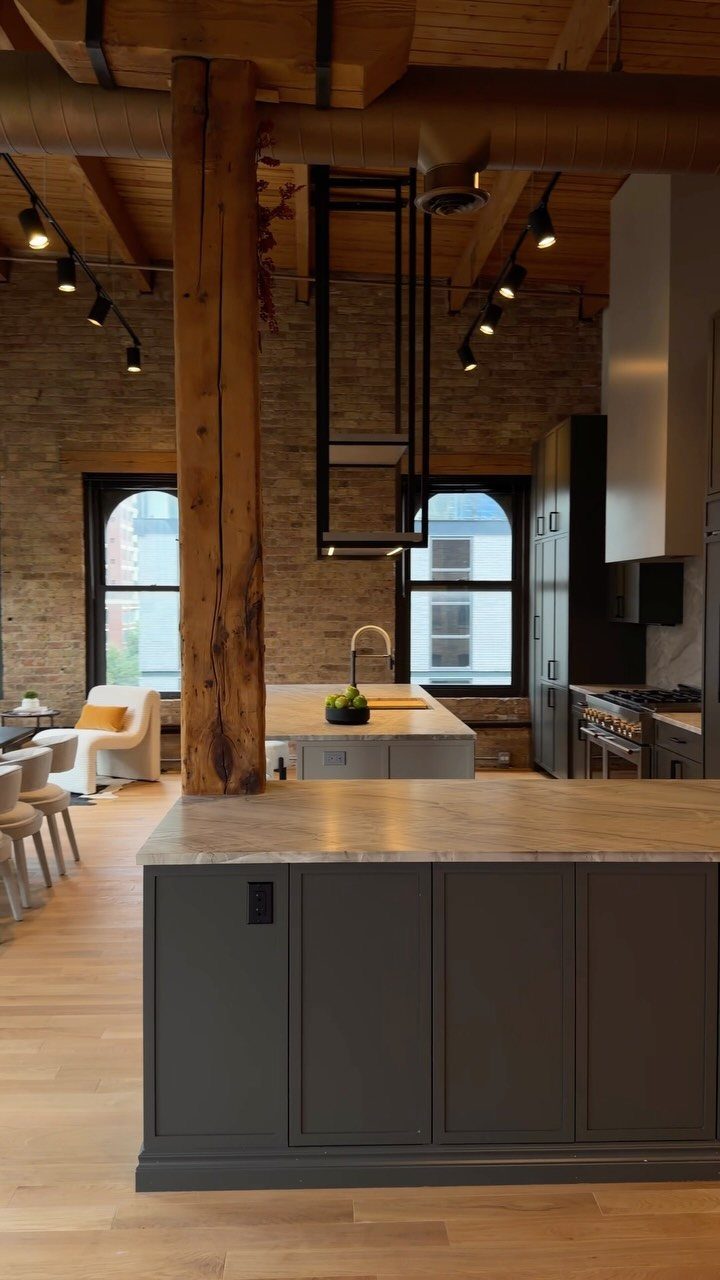
Exposed brick brings texture and warmth to a kitchen without adding cabinets or tile.
If the brick sits behind plaster or drywall, removing the covering shows the original wall, but the brick needs cleaning and sometimes sealing before it joins the kitchen.
Brick that has been painted or covered for decades often needs a wire brush and a few hours of scrubbing to remove old mortar dust and stains.
Sealing the brick keeps it from shedding dust onto counters and makes the surface easier to wipe down.
This approach is strongest in older homes where the brick is already there. Adding faux brick or thin veneer costs more and never looks quite right next to real materials.
20. Paint Kitchen Walls
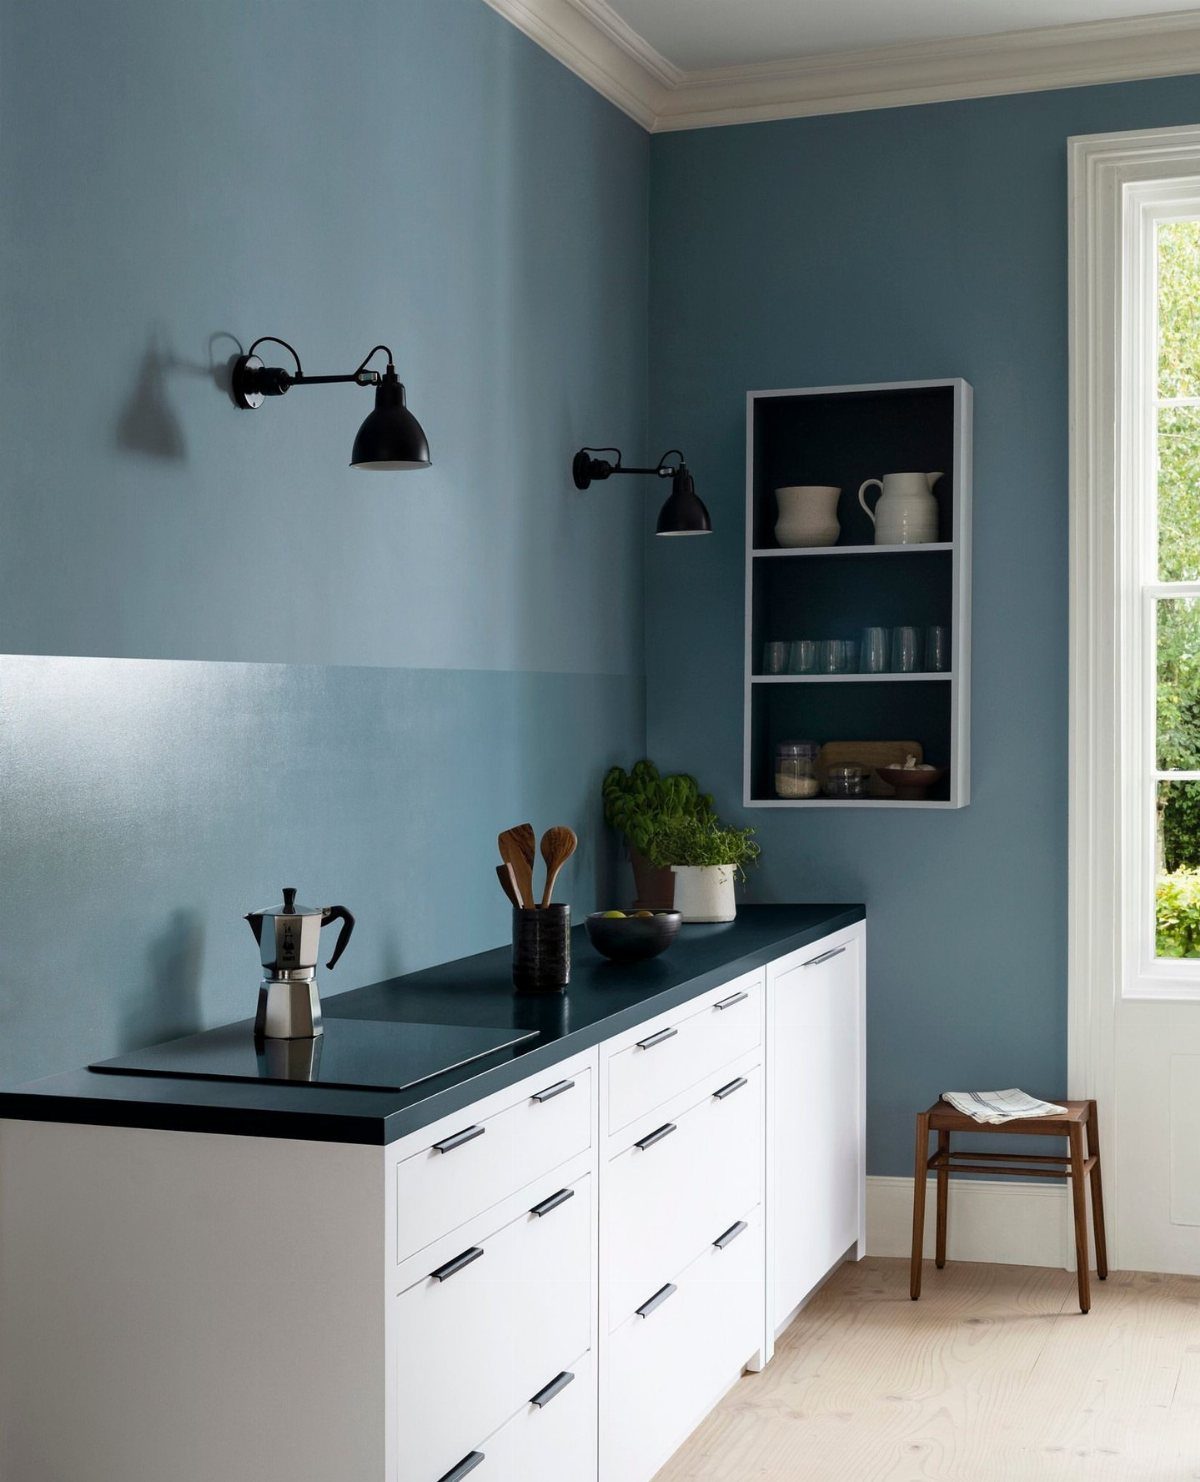
Blue here sits behind white cabinets and black countertops, and the color adds depth without competing with the finishes already in the room.
Most kitchen paints are semi-gloss or satin because they wipe clean more easily than flat.
If the walls sit near the stove or sink, test the finish in a small section first to make sure it holds up to splashes and steam.
21. Add a Kitchen Rug
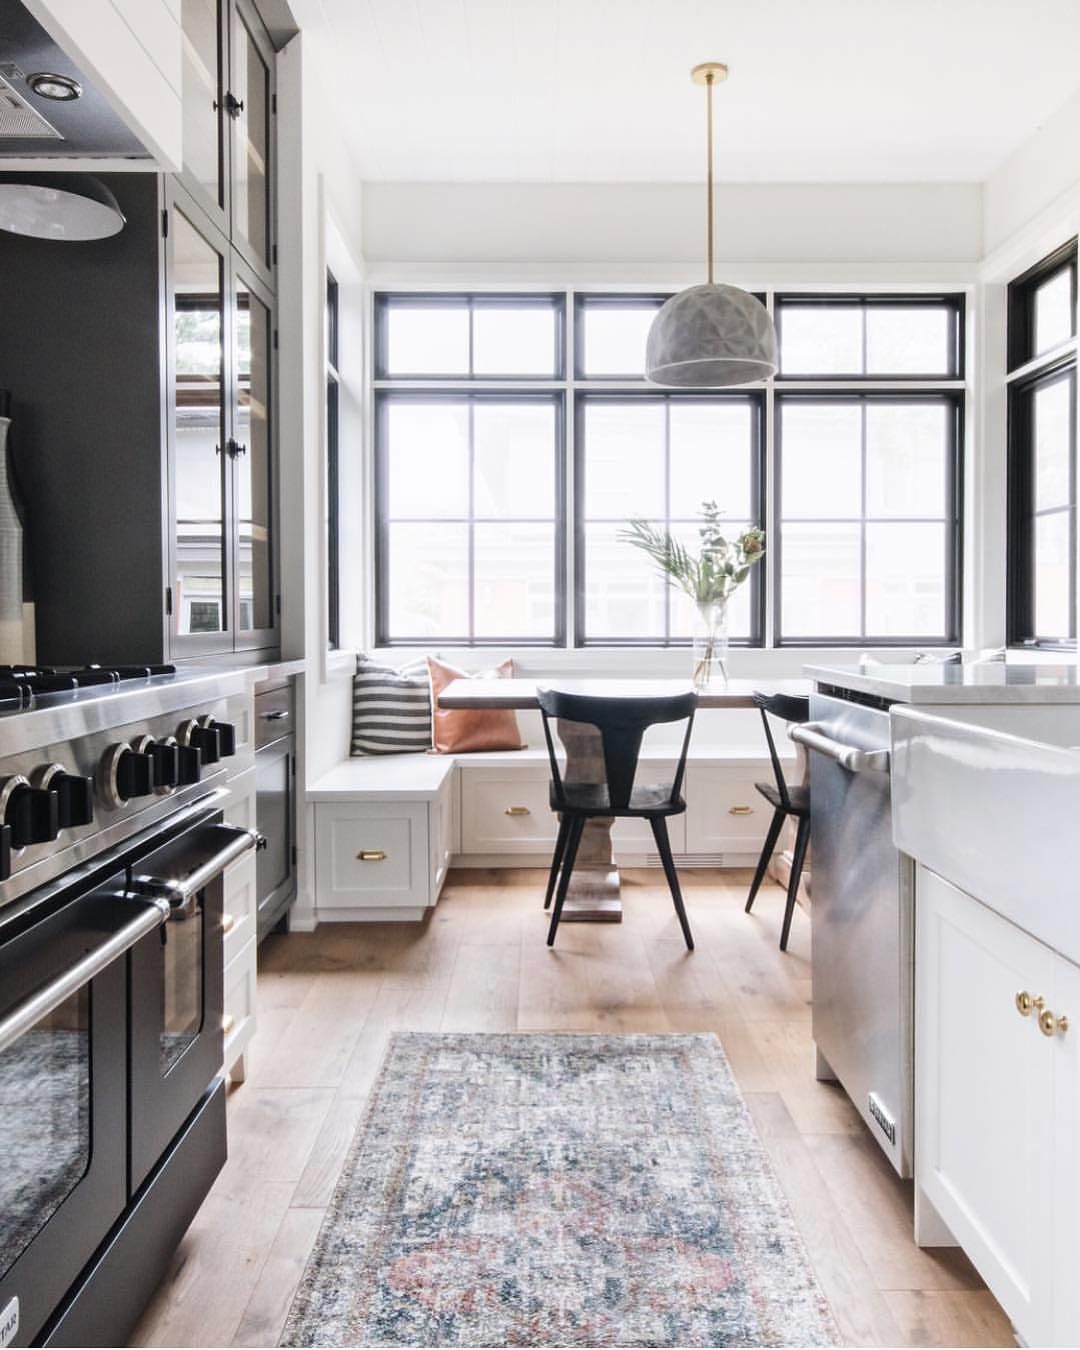
A rug softens a hard kitchen floor and hides wear in high-traffic areas without replacing tile or wood.
Kitchen rugs need to be washable or easy to shake out, because spills happen. Cotton and low-pile synthetic rugs go in the washing machine, which makes cleaning faster than spot-treating a larger piece.
22. Hang Kitchen Prints
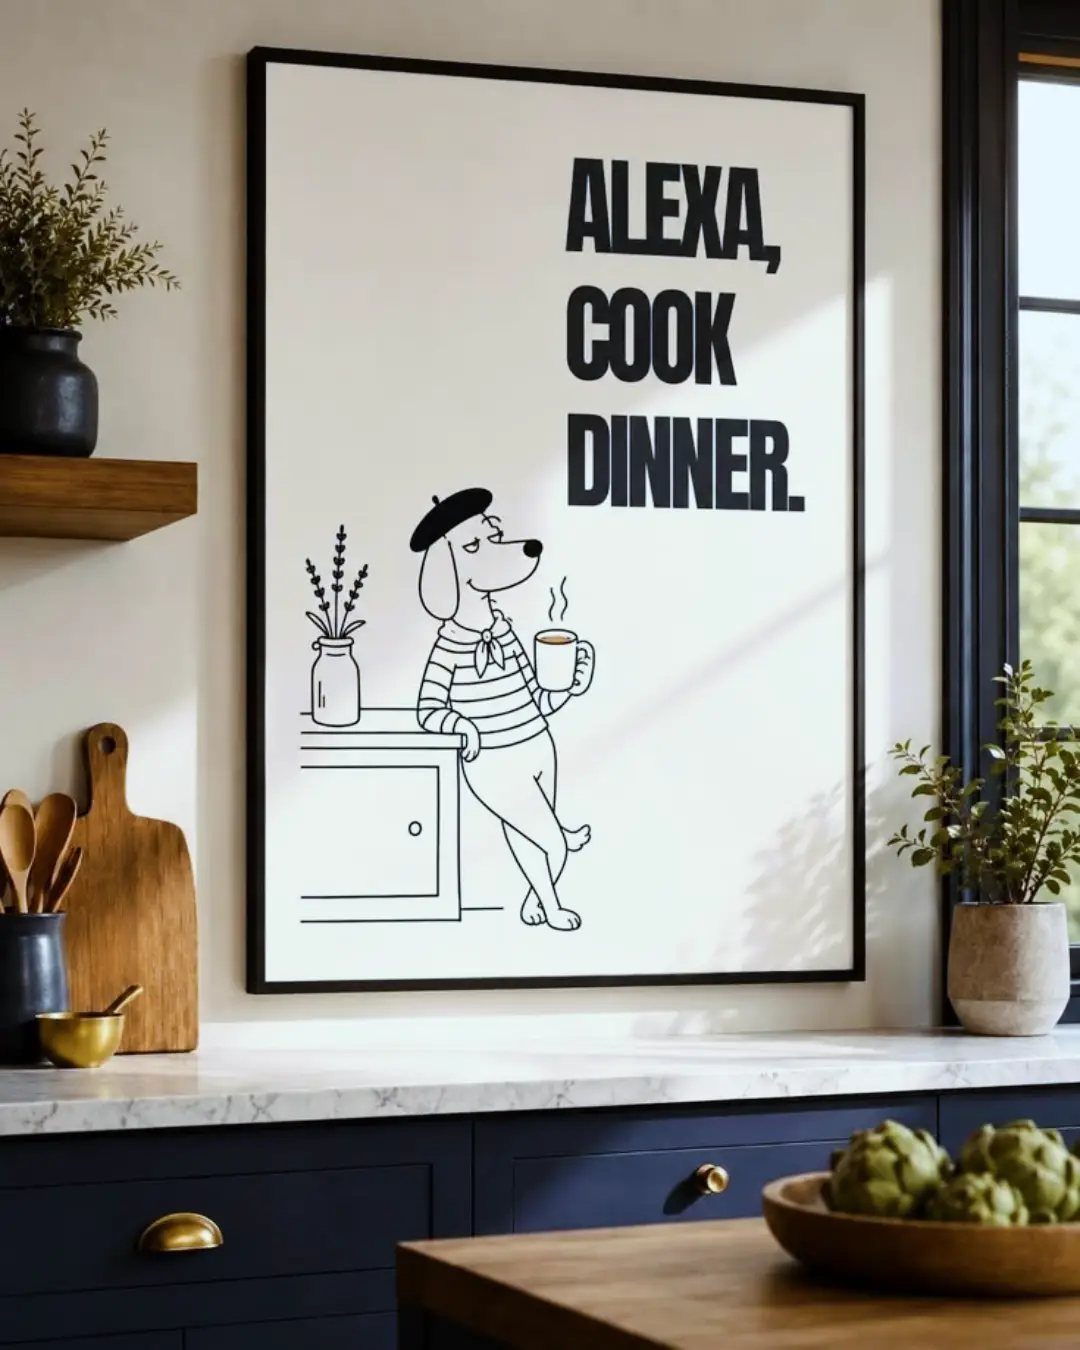
A framed print fills blank wall space above cabinets or counters without construction. The print here sits above the counter and adds a small detail that personalizes the kitchen without taking up surface area.
Hanging a print in the kitchen takes a picture hook or a small nail, and the frame protects the print from moisture better than unframed paper.
Keep the print away from the stove, where grease and heat will damage it over time.
23. Display Kitchen Utensils
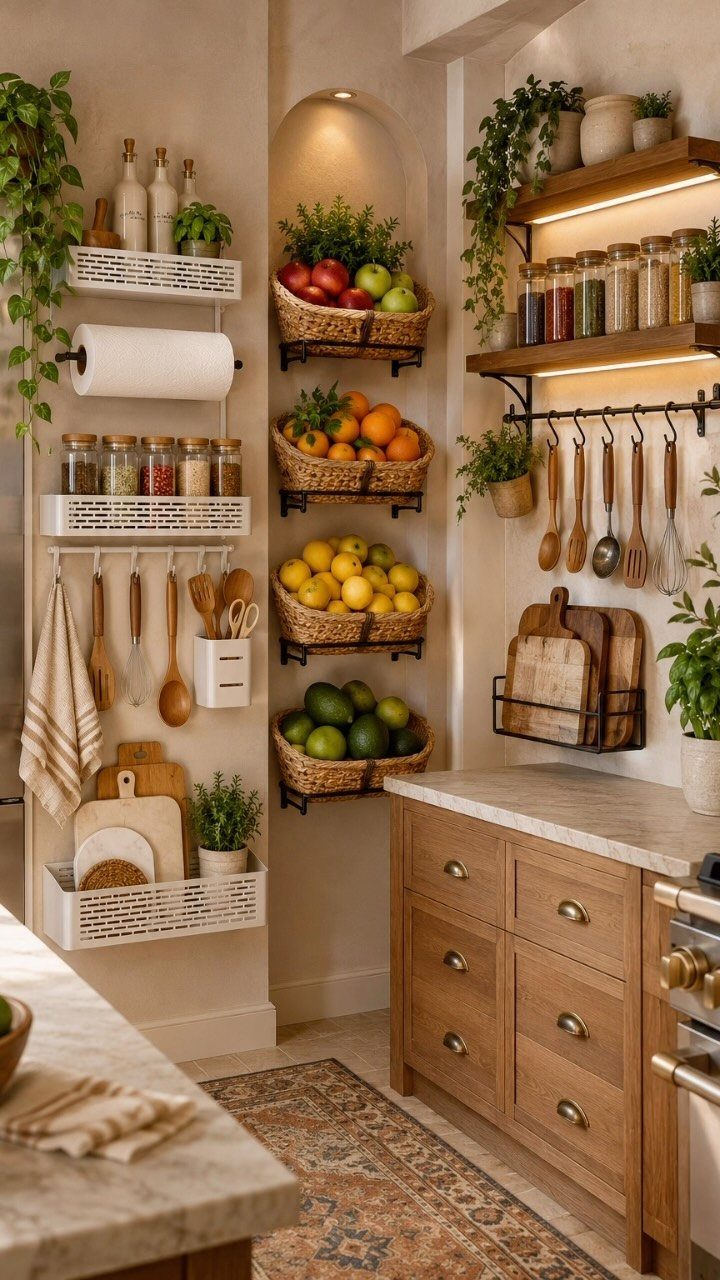
Hanging utensils on a rail or hook keeps them within reach and clears out a drawer.
Wooden spoons, spatulas, and whisks sit on the wall here, and the display uses tools that already exist instead of buying new items to fill the space.
A rail or a row of hooks installs with screws, and placement depends on where you stand while cooking. If the utensils hang too far from the stove or prep area, they become decoration instead of function.
24. Add Island Seating
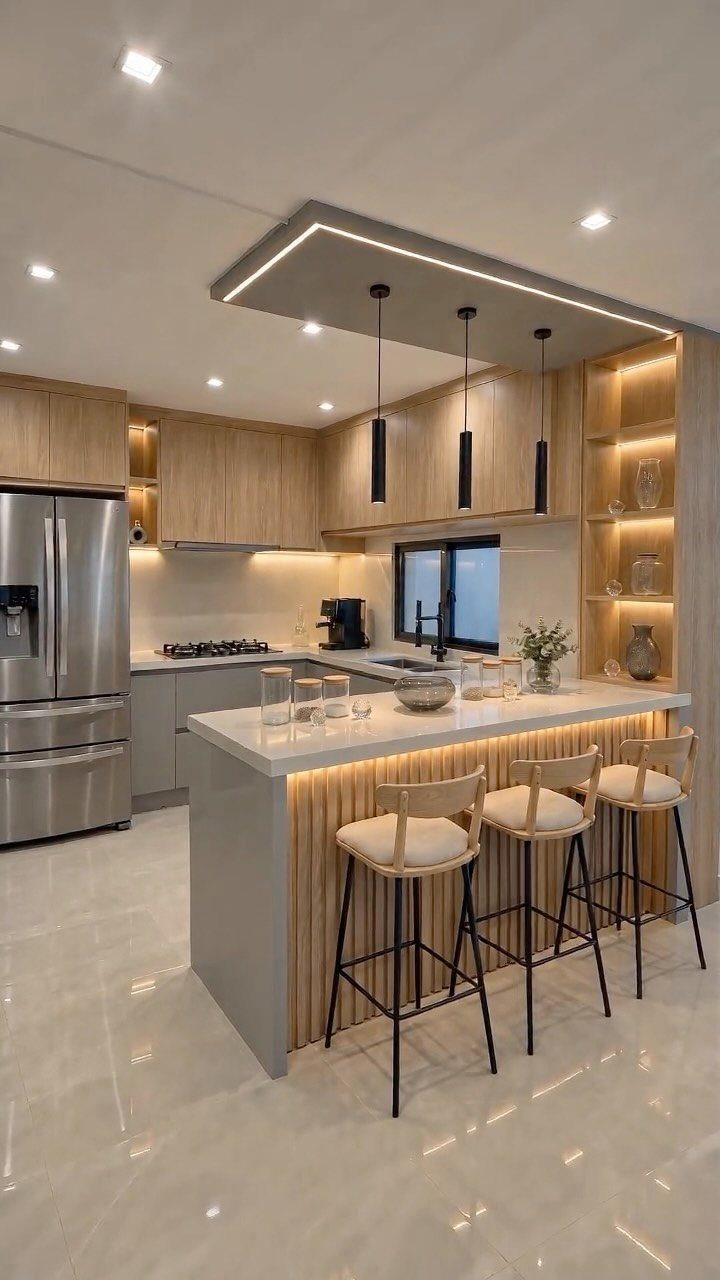
Stools tucked under the island turn it into a place to eat or sit while someone else cooks.
An overhang needs enough depth for knees to fit comfortably, and the stools should sit lower than the counter height.
If the island is narrow or already tight for prep space, adding seating can make the kitchen feel more crowded instead of more useful.
25. Style a Statement Island
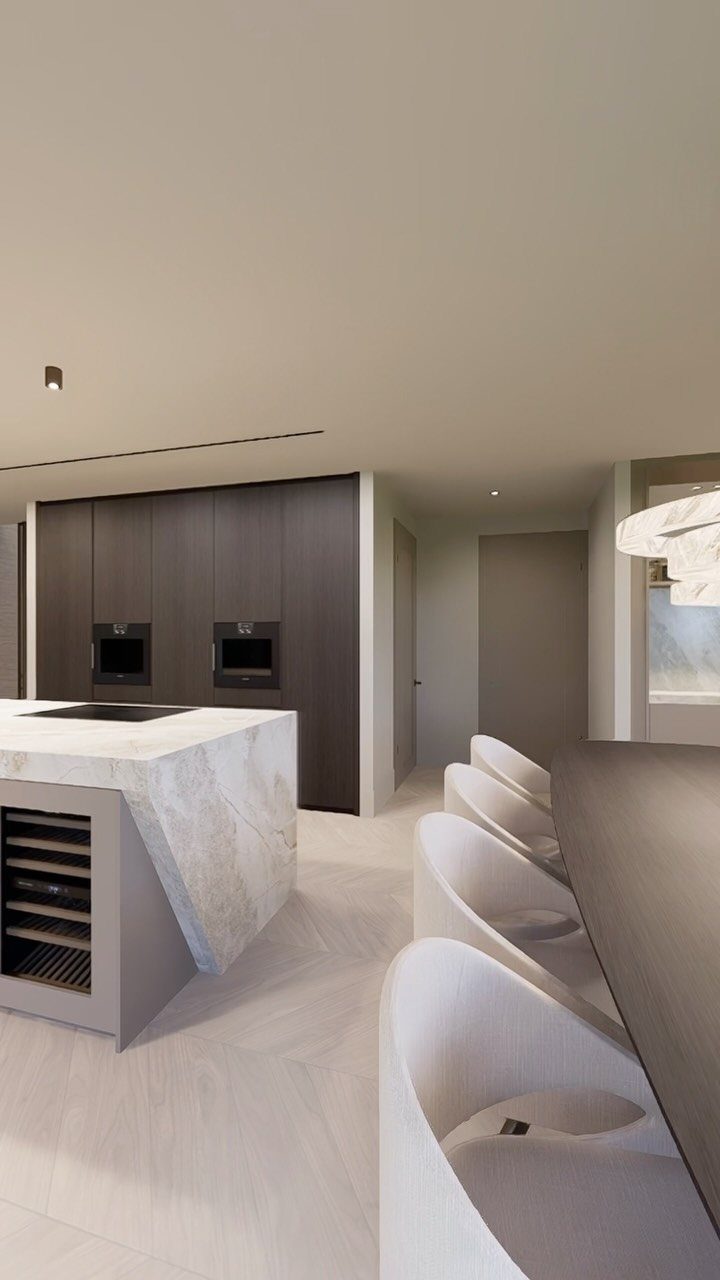
A waterfall island uses a slab that wraps over the edge and runs down the side in one continuous piece, which makes the island feel more finished than a standard overhang.
When you wrap the veining around the corner, the grain stays continuous and the island reads as one piece rather than slabs that meet.
Built-in appliances like the wine cooler turn the island into more than prep space, but adding them requires cutting into the base and running electrical or cooling lines before the countertop goes on.
Waterfall edges cost more than a flat overhang because the fabricator has to match the grain at the corner and polish 2 extra sides.
The look suits kitchens where the island sits in the middle of the room and every side is visible.
26. Tile the Island
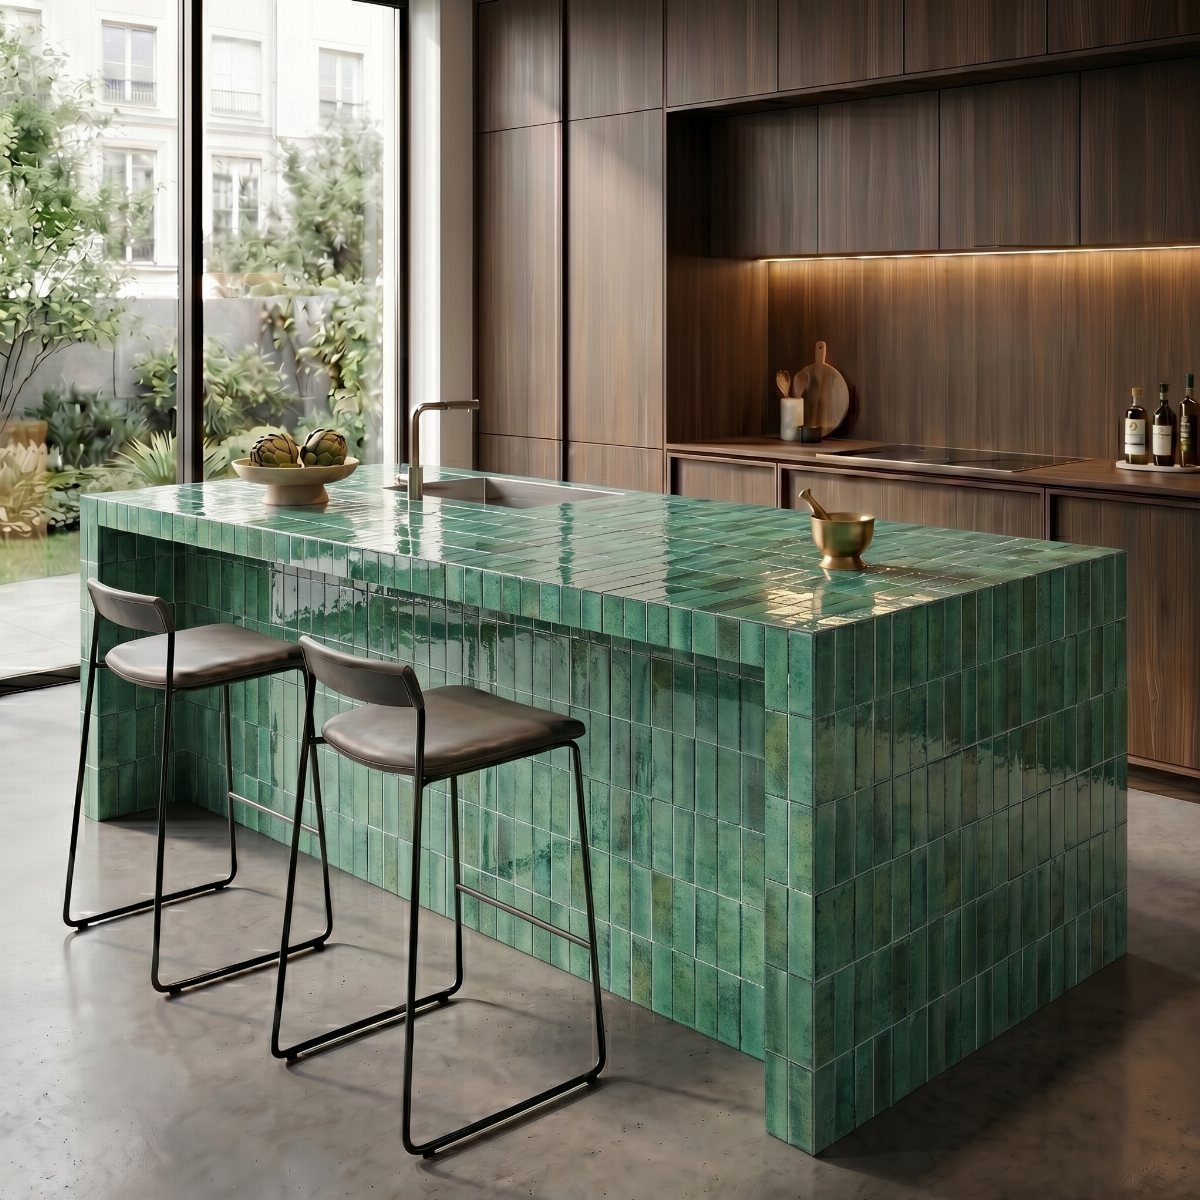
Tiling the island sides or base adds color and texture that separates it from the rest of the cabinetry.
The green gloss tile here wraps the island, and the reflective finish catches light in a way that painted or wood-faced cabinets do not.
Tile installs over plywood or drywall backing, so the island needs a solid frame. Grout lines add detail but also collect dirt, so sealed grout makes maintenance easier.
This approach works best when the surrounding cabinets stay simple. If the rest of the kitchen already has patterned tile or bold color, a tiled island can make the room feel too busy.
27. Add Metallic Island Finish
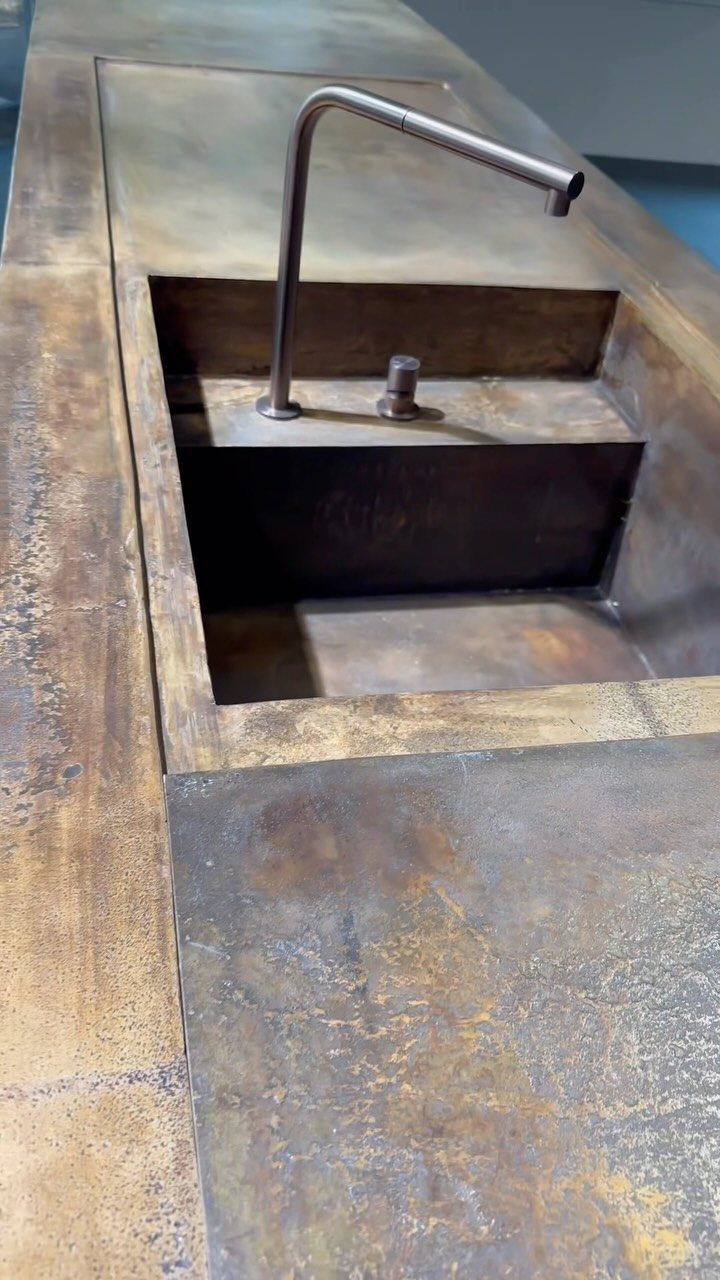
A metallic countertop brings an industrial finish into the kitchen and changes how the island reads against wood or painted cabinets.
The bronze here has been oxidized and hand-finished, so the surface varies across the slab and no 2 panels look identical.
Metal countertops resist heat and scratches better than laminate, but they dent if you drop something heavy.
Patina develops over time, which some homeowners want and others do not. If you prefer the surface to stay uniform, sealed metal or a clear coat slows the aging.
Integrated sinks in metal are welded in place, which gives a flush look but makes replacement harder than dropping in a new sink.
28. Display Crockery Openly
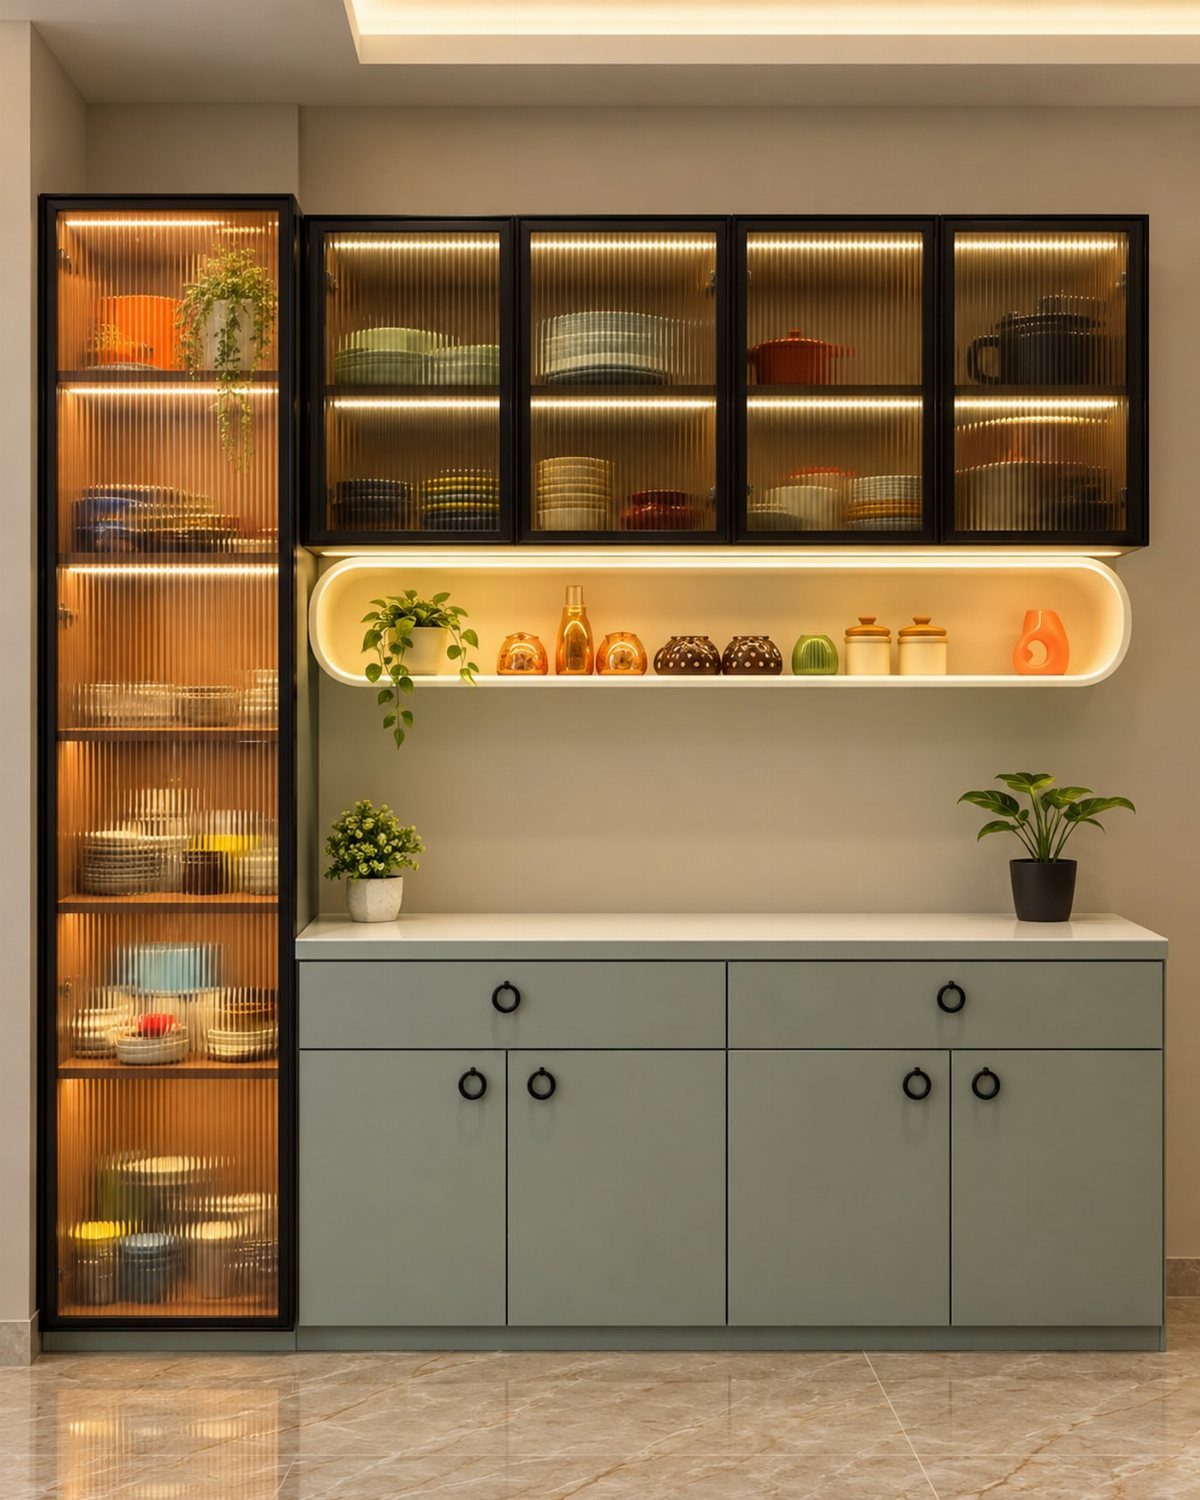
Fluted glass softens the view without making the contents invisible, and an open shelf below keeps everyday items within reach.
This setup works best when the dishes inside are part of the design. Mismatched stacks or half-empty shelves read as clutter instead of intention, so what shows should look deliberate.
Glass cabinets need more upkeep than solid doors because dust and fingerprints show through.
29. Add Quirky Displays
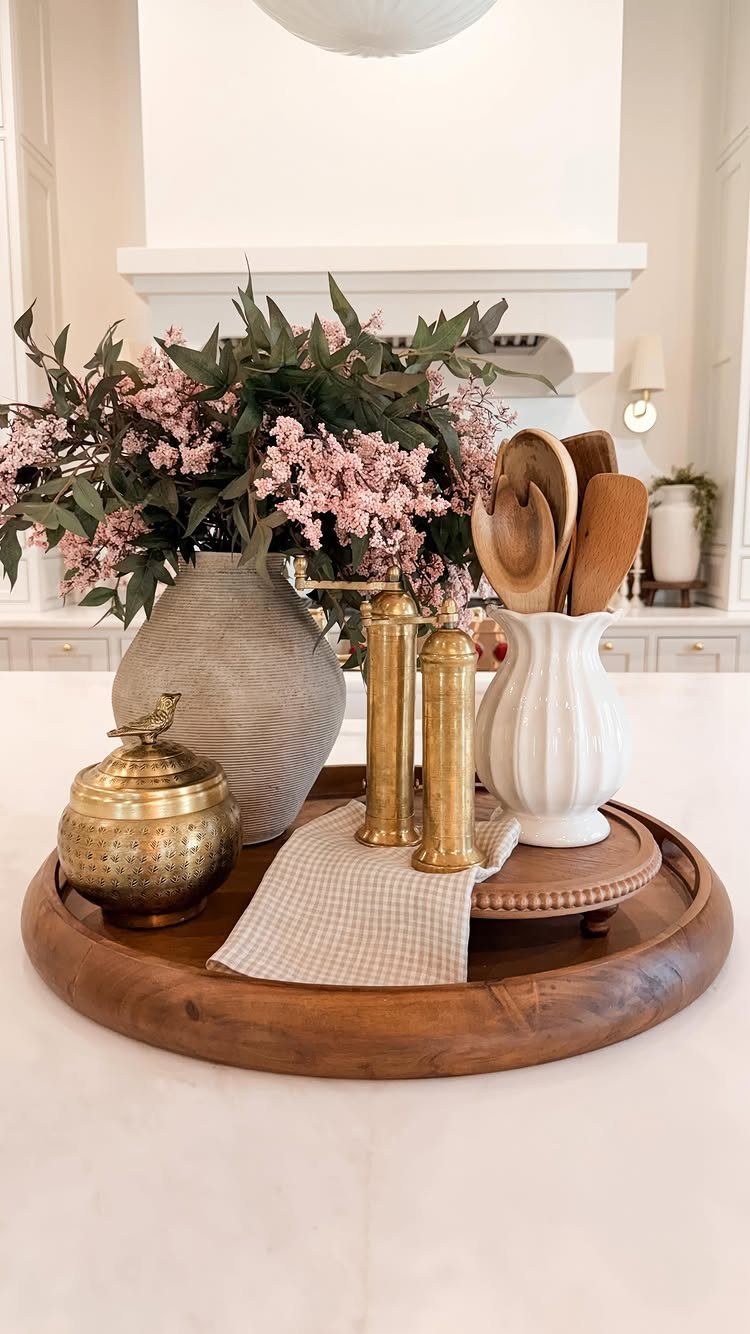
Grouping small items on a tray keeps the counter organized without clearing it completely. A wooden tray holds flowers, utensils, and canisters, and the arrangement brings warmth to a white surface that would otherwise feel bare.
Trays work because they contain the display in one spot, so the counter still has room for prep work. If the items sit directly on the counter without a tray, the look can feel scattered instead of styled.
Choose items that suit the kitchen but do not need daily use. A vase that holds fresh flowers or a jar that stores small tools fits better than decorative pieces that serve no purpose.
30. Use Cabinet Curtains
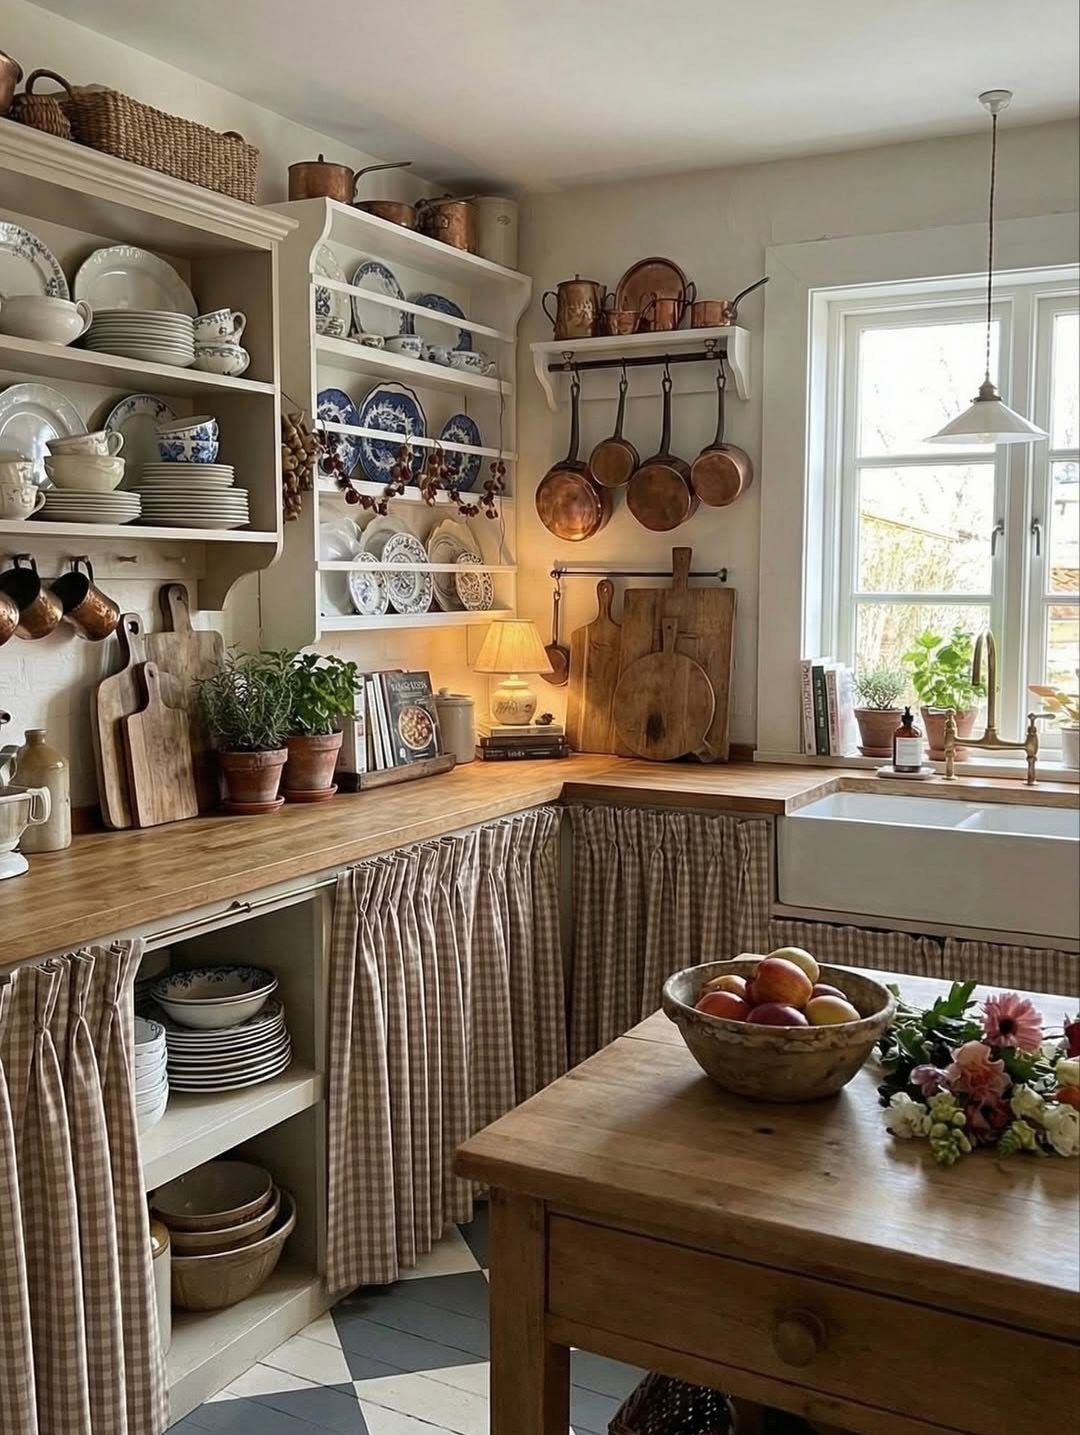
Fabric curtains replace cabinet doors and let you change the look without new hardware or paint. Checkered curtains hung from a rod inside the cabinet frame add soft texture against wood countertops and open shelving.
Curtains work in kitchens where the lower cabinets hold items that do not need to stay dust-free, like pots, linens, or serving pieces. If the space stores food or small tools, solid doors keep everything cleaner.
This approach costs less than replacing cabinet fronts and installs in an afternoon. Tension rods fit inside most frames without drilling, and the fabric pulls off for washing when it needs it.
31. Install Slimline Units
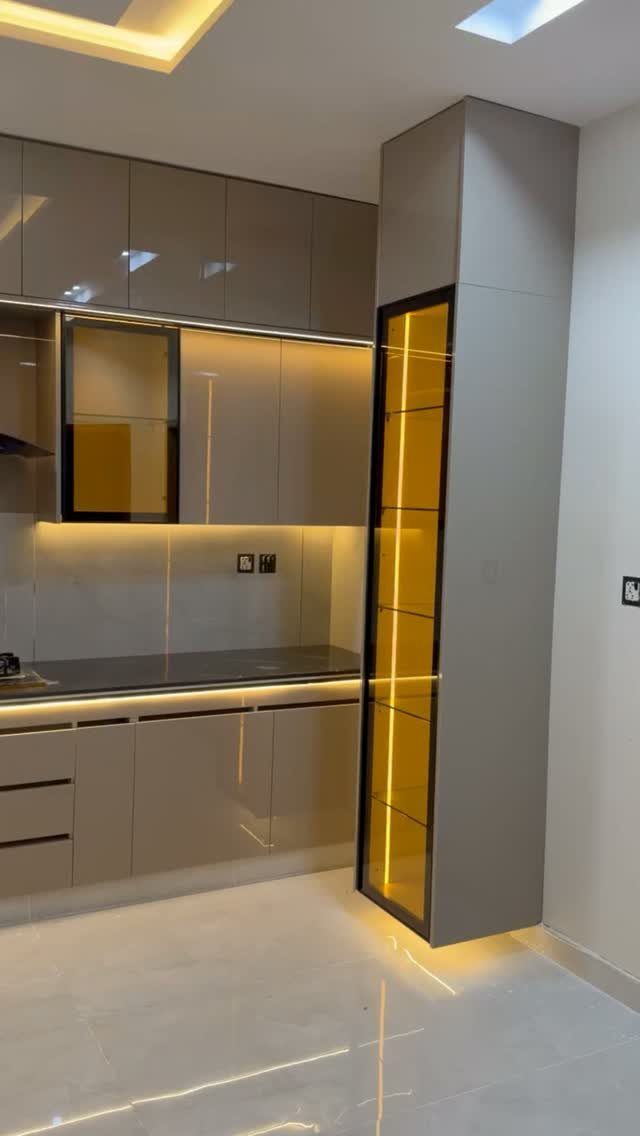
Slimline units fit into gaps too narrow for standard cabinets and hold items that would otherwise sit on the counter.
A glass-fronted unit that runs floor to ceiling stores dishes, bottles, or pantry items in a vertical column that takes up less than a foot of floor space.
These units work best when the kitchen layout has leftover inches between appliances or at the end of a run. Interior lighting makes the contents visible and turns the unit into a feature instead of filler.
If the kitchen has high ceilings, a tall slimline cabinet uses the full height without blocking movement through the room.
32. Embrace Kitchen Clutter
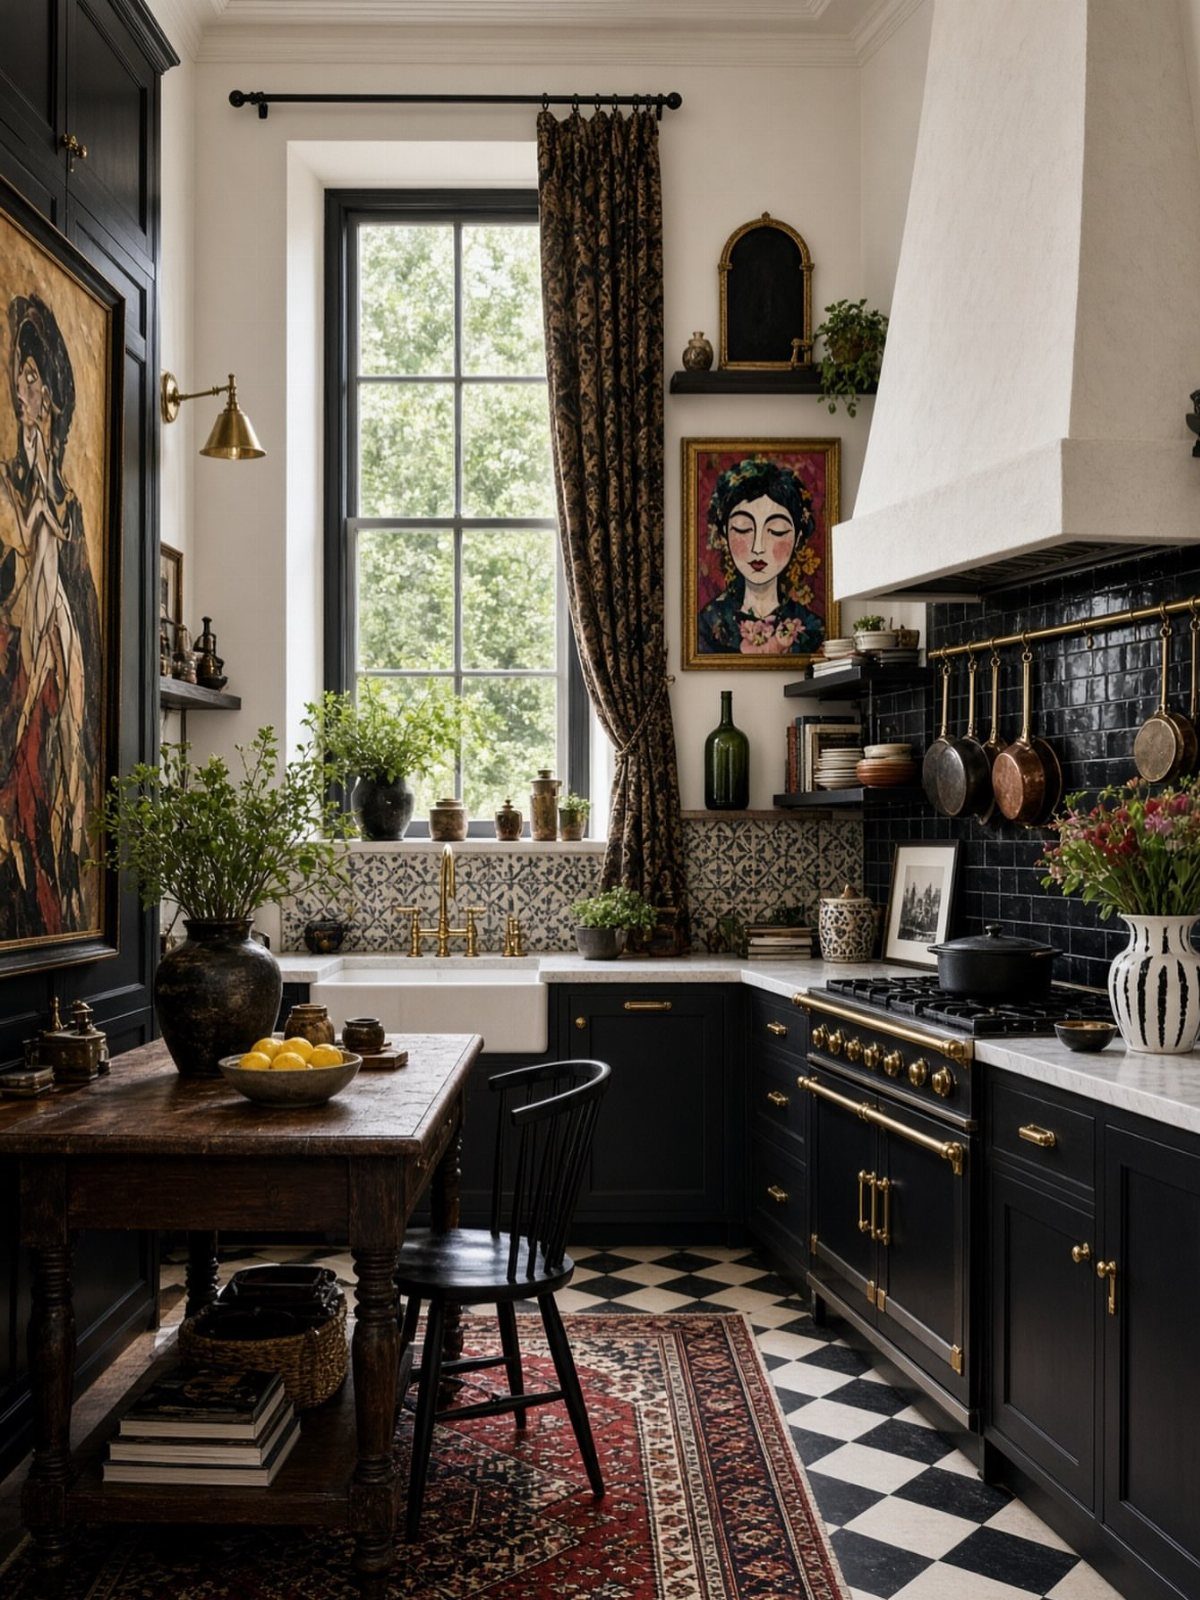
Letting everyday items stay visible can feel more honest than hiding everything behind closed doors. Pots on open shelves, art on the walls, and small objects on surfaces make a kitchen feel used instead of staged.
This approach works when the items themselves suit the room. Mismatched clutter still reads as mess, but if the cookware, bowls, and tools look deliberate, the display adds personality without taking up cabinet space.
You will clean more often. Open storage collects dust faster than closed cabinets, and visible surfaces need regular attention to keep the kitchen from looking neglected.
33. Use Freestanding Furniture
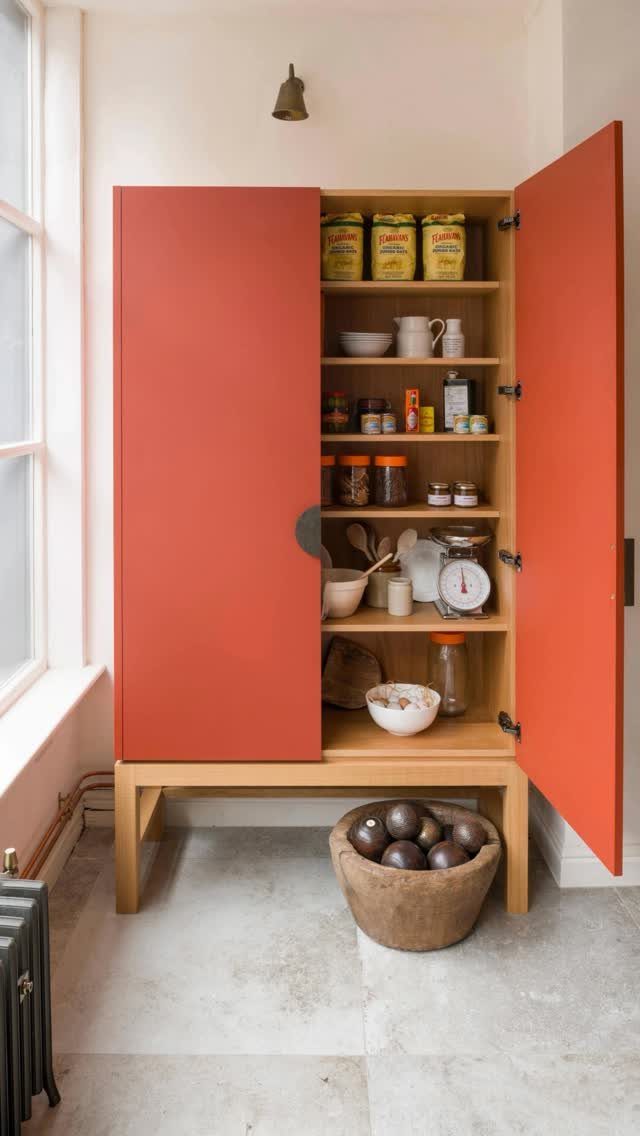
A freestanding piece moves without carpentry and lets you change the kitchen layout when needs shift. A freestanding cabinet holds pantry items and kitchenware and sits on the floor like furniture instead of attaching to the wall.
Freestanding cabinets suit rentals or homes where built-ins are not an option, because they install without drilling into walls or floors. If you move, the piece comes with you.
Choose a cabinet that matches the height of your other storage so the room feels cohesive. A tall piece against a short run of cabinets can make the kitchen look unbalanced.
34. Maple Cabinets with an Apron-front Sink
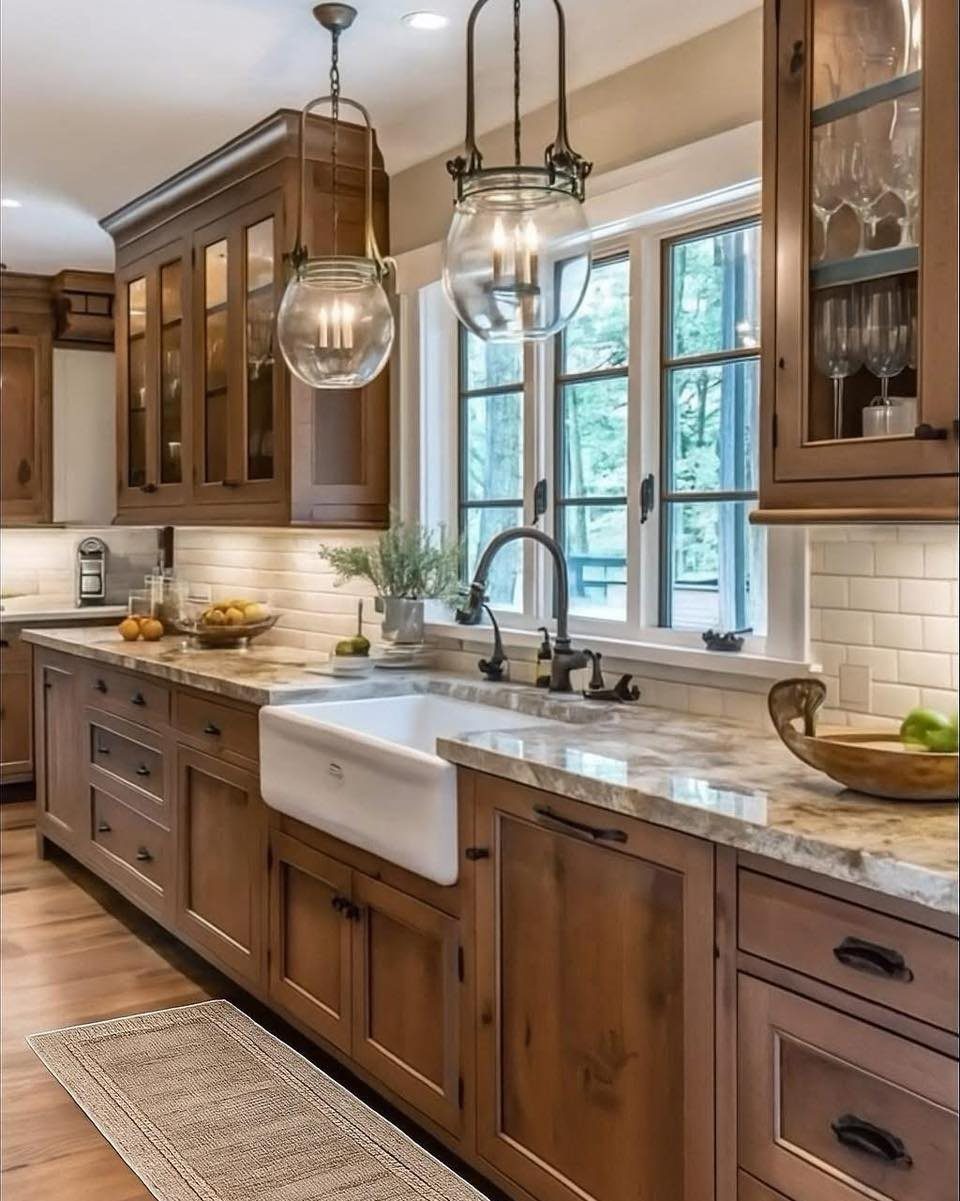
Maple cabinets bring warmth to a kitchen without leaning too orange or too yellow, and the grain shows through clearly when the finish stays natural.
An apron-front sink under a window pairs well with light countertops, which keeps the wood from feeling heavy.
Maple takes stain well, but a clear finish lets the natural color come through. If the kitchen gets a lot of light, the wood will darken slightly over time, so plan for the tone to shift.
Apron-front sinks sit forward of the cabinet face, which means the countertop has to be cut to fit around the sink before installation.
35. Use Two-tone Cabinetry
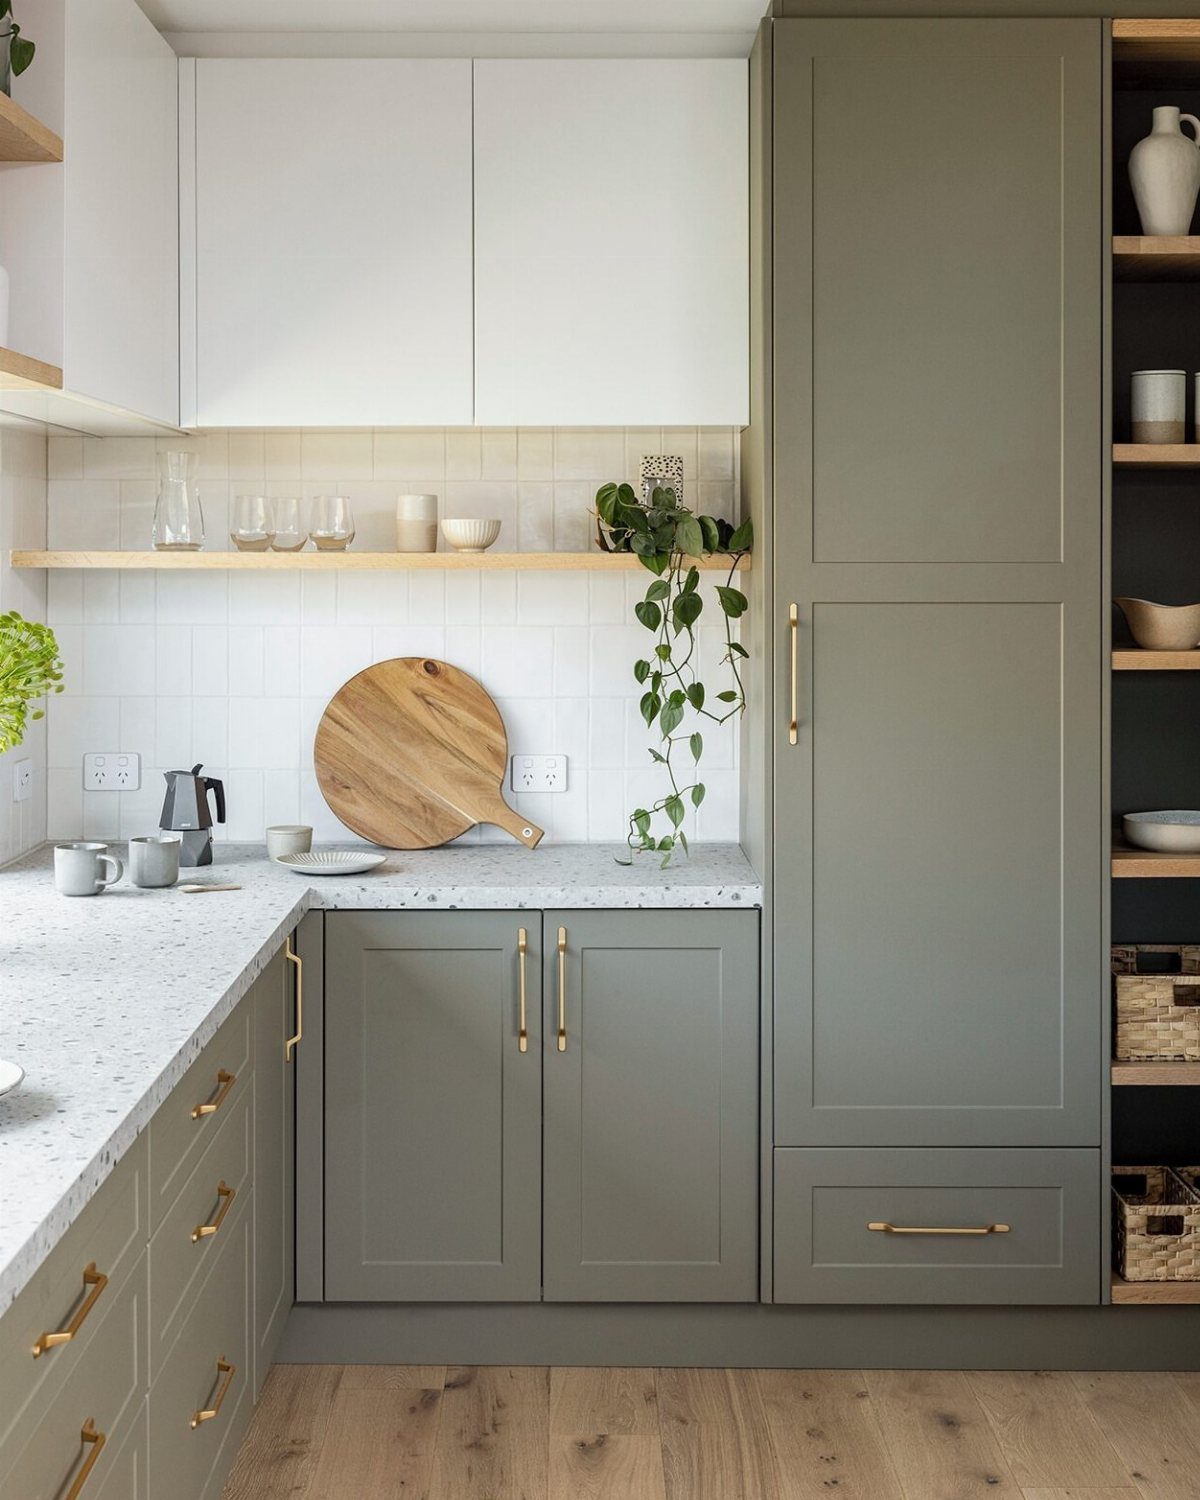
Splitting cabinet colors between upper and lower runs adds depth without repainting the whole kitchen. The grey base cabinets here sit under white uppers, and the division keeps the room from feeling too dark or too light.
Two-tone cabinetry works best when the colors share a similar intensity. A very dark lower cabinet under a very light upper reads as intentional, but mixing a bold color with a muted one can make the room feel unfinished.
If the kitchen has an island, decide whether it matches the uppers, the lowers, or neither. Most kitchens pick one of the two existing colors to keep the palette simple.
Budget and Project Planning
Set a spending cap before you start planning, then build in room for things that come up once the work begins.
A purchase-and-task list keeps the project from drifting, and collecting design images before you call anyone helps you explain what you want without guessing.
If you’re hiring help, get quotes from at least three contractors or designers and compare what each one includes.
Cosmetic changes like painting cabinets, swapping fixtures, or adding a backsplash cost less than tearing out the layout, and they finish faster too.
Hidden expenses show up in old plumbing that needs upgrading to meet code, appliances that don’t fit the new cabinet run, or walls that need patching after tile removal.
Most kitchen projects take longer than the estimate, so plan meals and cleanup around limited access to the sink and stove.
Frequently Asked Questions
How do I design my new kitchen?
Start with the layout and storage you need, then choose materials and finishes that fit your budget and style. If the boxes and doors are solid, painting cabinets or updating fixtures costs less than replacement.
Plan clearance around an island if you’re adding one, and keep bold color or pattern to one surface so the room doesn’t compete with itself.
What are 2026 kitchen trends?
Bold cabinet colors, green tones, and slab backsplashes are showing up more often.
Natural materials like wood countertops and terrazzo tile bring texture without heavy pattern, and two-color cabinets split the room between upper and lower units instead of committing to one finish top to bottom.
How do I design kitchen cabinets?
If the cabinet boxes and frames are solid, painting them changes the look without replacing the layout.
I prep with a bonding primer after a light sand and degrease, then apply 2 rolled coats of cabinet enamel. If I pull the doors and lay them flat, most cabinet paint jobs finish in a weekend.
What are the best kitchen design trends?
Pops of color on cabinets, natural materials like wood and terrazzo, green cabinet finishes, and slab backsplashes are the trends coming up most often.
These ideas add personality without heavy construction, and they work when the rest of the kitchen stays simple.
What are the most popular modern kitchen sink cabinet designs?
The two I install most often are apron-front farmhouse sinks and wide stainless models with built-in prep zones.