
A coffee cabinet can mean a pegboard station holding mugs and filters, a freestanding unit that moves when you do, or a built-in bar with shelves and cabinet doors.
The right setup depends on how much counter space you can spare, whether you want supplies behind doors or out in the open, and whether the station needs to stay tidy without constant attention.
1. HAAGAN Coffee Nook
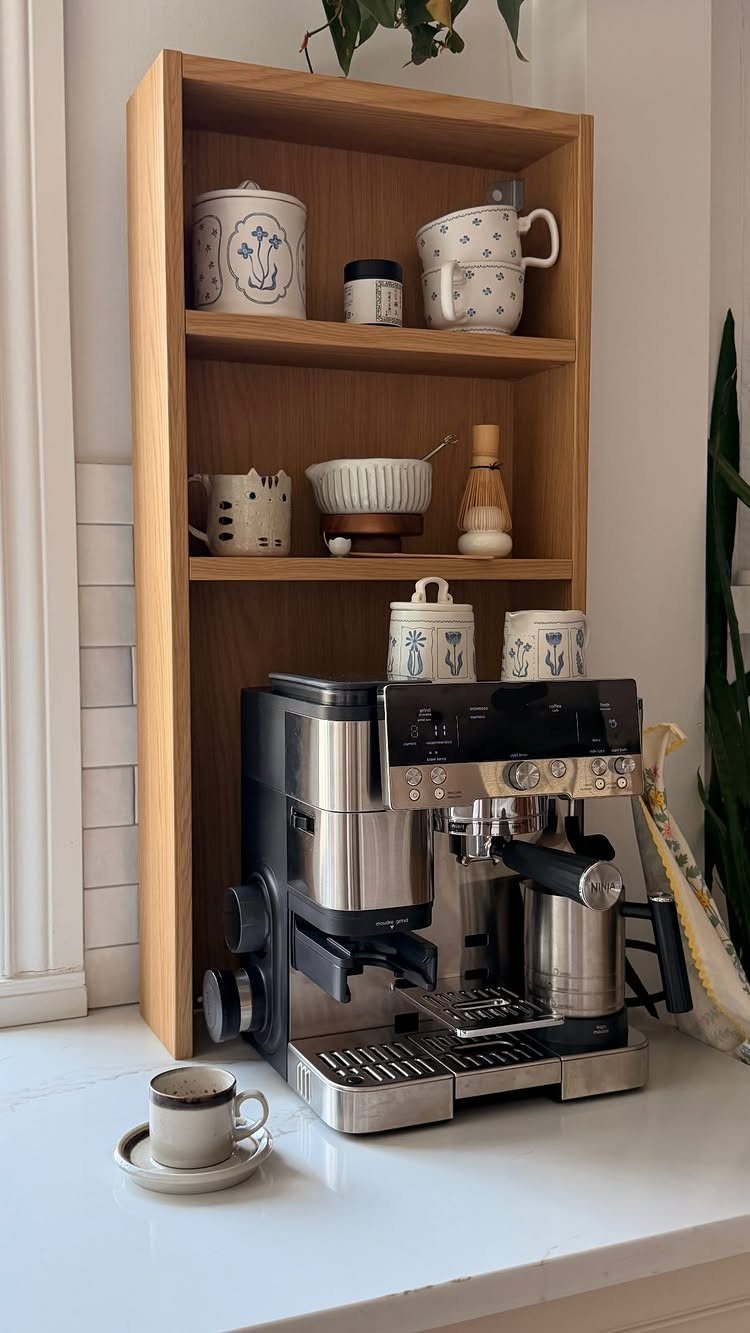
A wall cabinet dropped onto the counter gives you a coffee nook without cutting into base storage.
The setup keeps mugs and canisters at eye level, and the machine stays tucked under the cabinet shelf instead of claiming open counter space.
I like this best in a narrow kitchen where you need prep room but still want coffee supplies visible and contained.
Mount the cabinet low enough that you can reach the top shelf without a step stool. If the cabinet has a door, remove it or prop it open so you don’t lose access when your hands are full.
If you can’t make it to IKEA, you don’t necessarily need the HAAGAN shelf to replicate this easy kitchen DIY. Just make sure that you double-check the sizing of alternative options and that you can install the different shelves yourself.
2. Havsta Coffee Nook
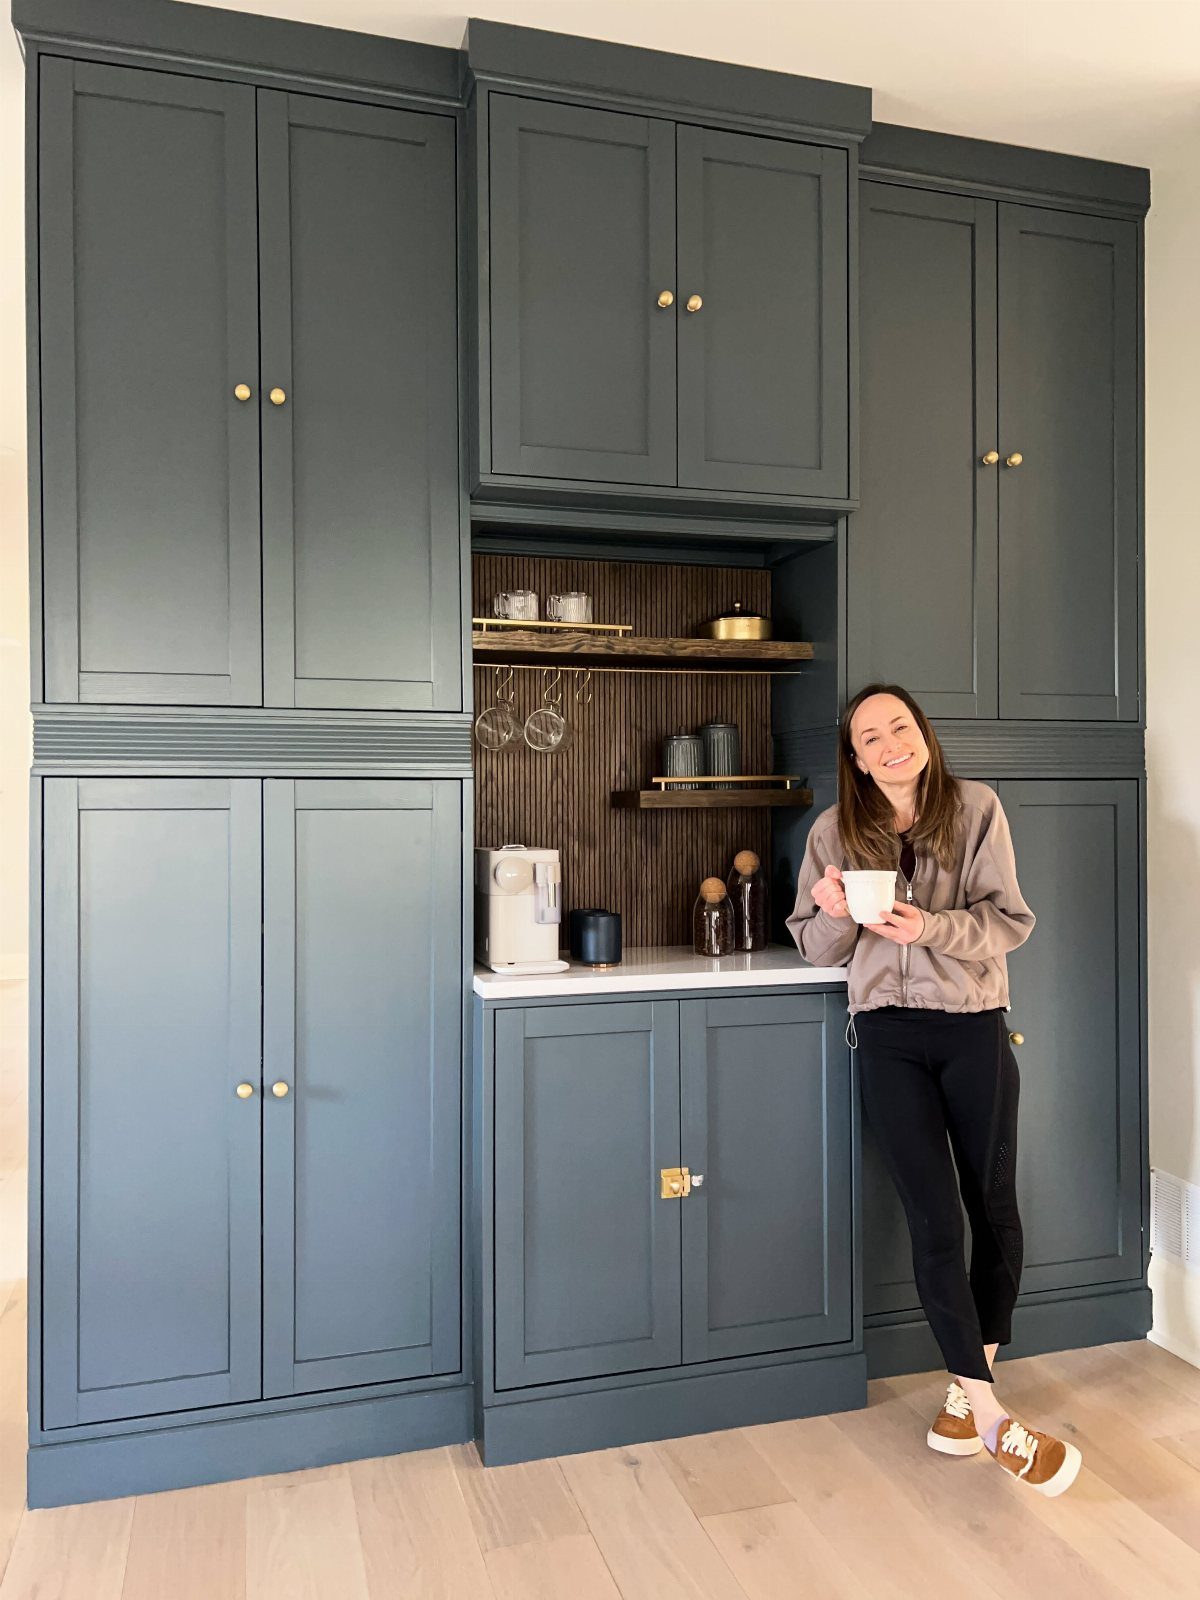
Havsta cabinets work well for a floor-to-ceiling coffee nook because the glass doors let you see what’s inside without the clutter reading as mess.
The proportions suit a narrow wall, and the single depth keeps the footprint small. I would add interior lighting if the room doesn’t get much natural light, since dark cabinets can make glassware hard to spot.
Swap the standard knobs for something with more presence if yours doesn’t already have upgraded hardware; brass or matte black reads more finished than the stock pull.
If you’re placing this in a rental, the freestanding format means you can take it with you when you move.
3. Built-in Coffee Bar
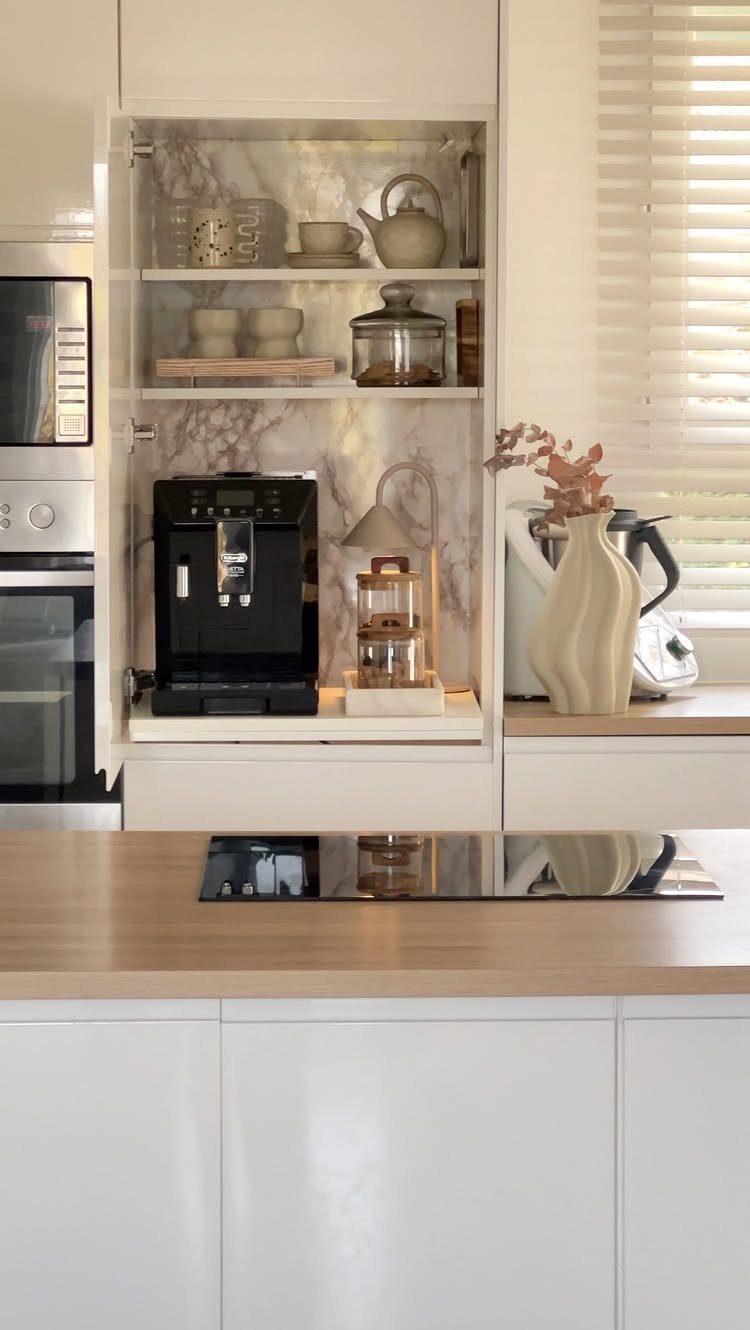
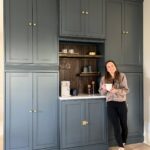
Building a coffee bar into the kitchen cabinet run keeps appliances out of sight when the door closes, which suits an open-plan layout where you want the kitchen to look clean from the living room.
The marble backsplash and dedicated counter give the station a permanent feel, and tucking it inside a cabinet means no new furniture claiming floor space.
I recommend a soft-close hinge so the door doesn’t slam when you open it in the morning. Make sure the cabinet is deep enough for your machine with the door closed.
4. Floating Shelf Coffee Bar
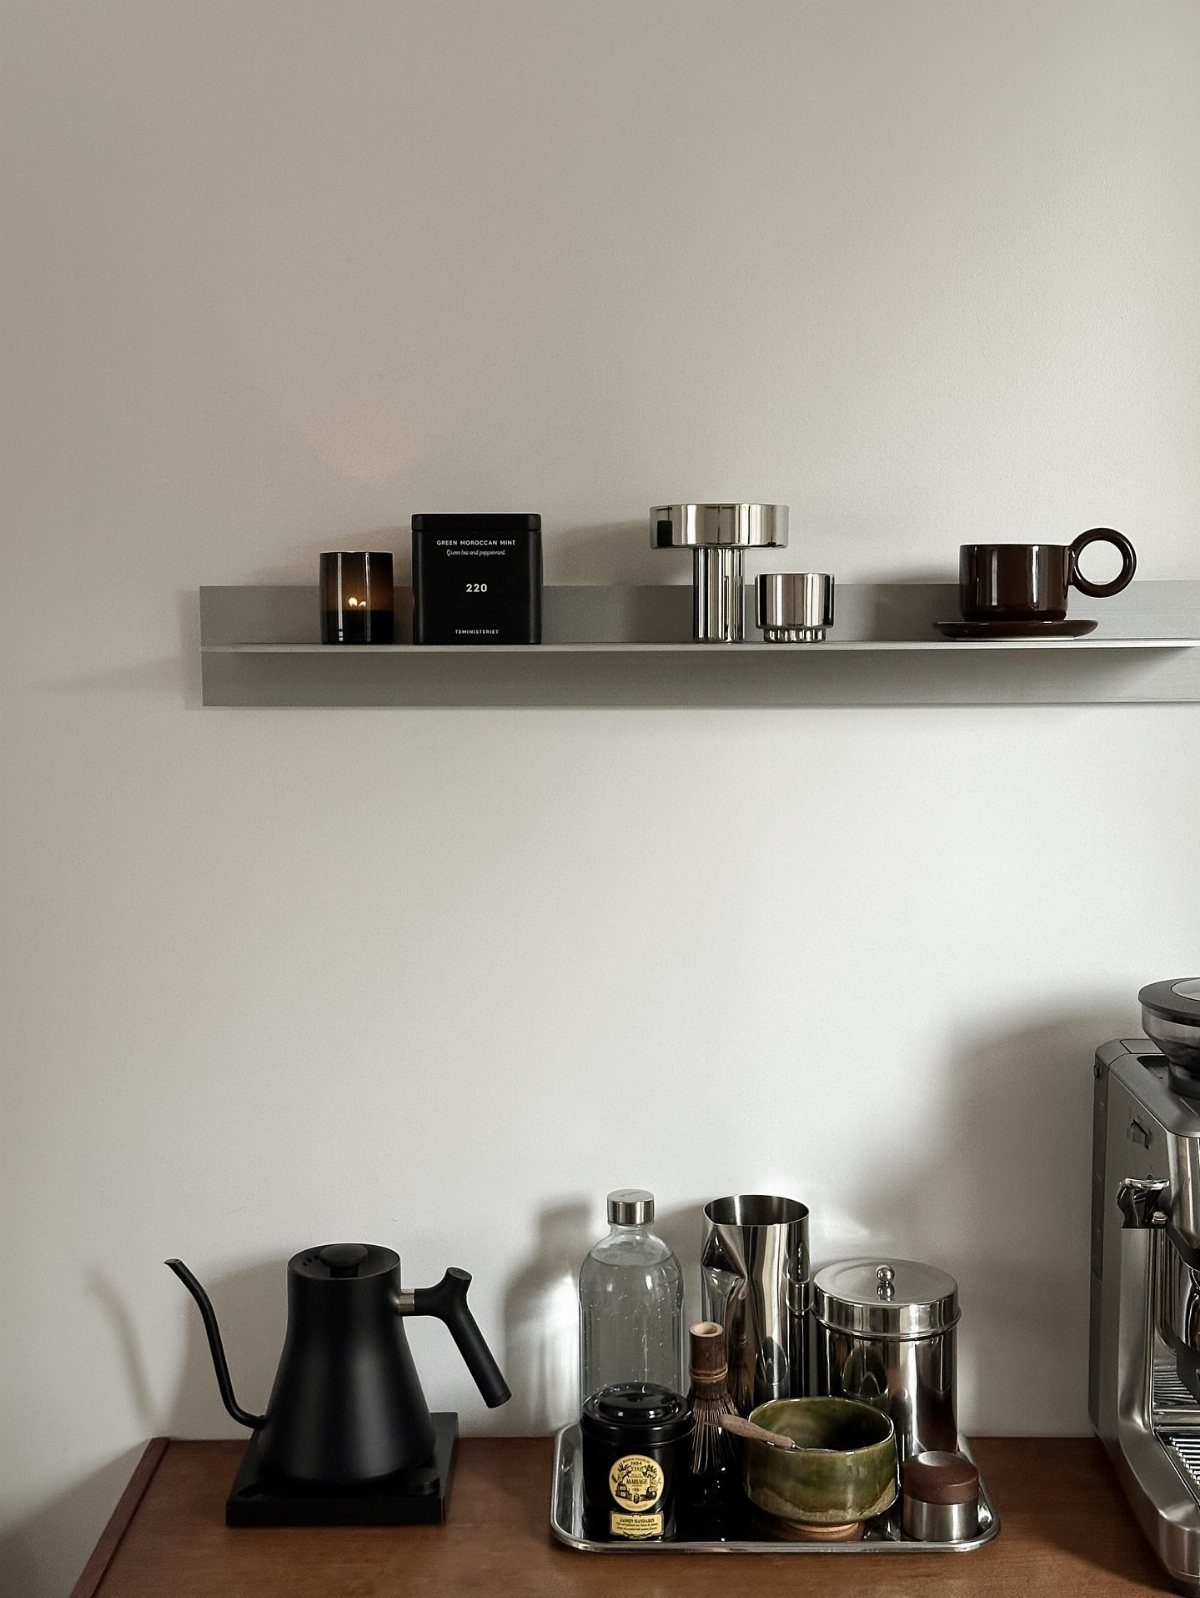
A floating shelf above a base cabinet gives you 2 storage zones without blocking the wall or making the setup feel heavy.
The open shelf keeps everyday items in reach, and the cabinet below hides backup supplies and anything that doesn’t look tidy on display.
I usually mount the shelf above the counter so there’s room to work underneath without your elbows hitting it.
Choose a shelf depth that matches or is slightly narrower than the cabinet below; a deep shelf over a shallow cabinet tips the proportions and makes the whole thing look unsteady.
5. Coffee Cabinet Upgrade
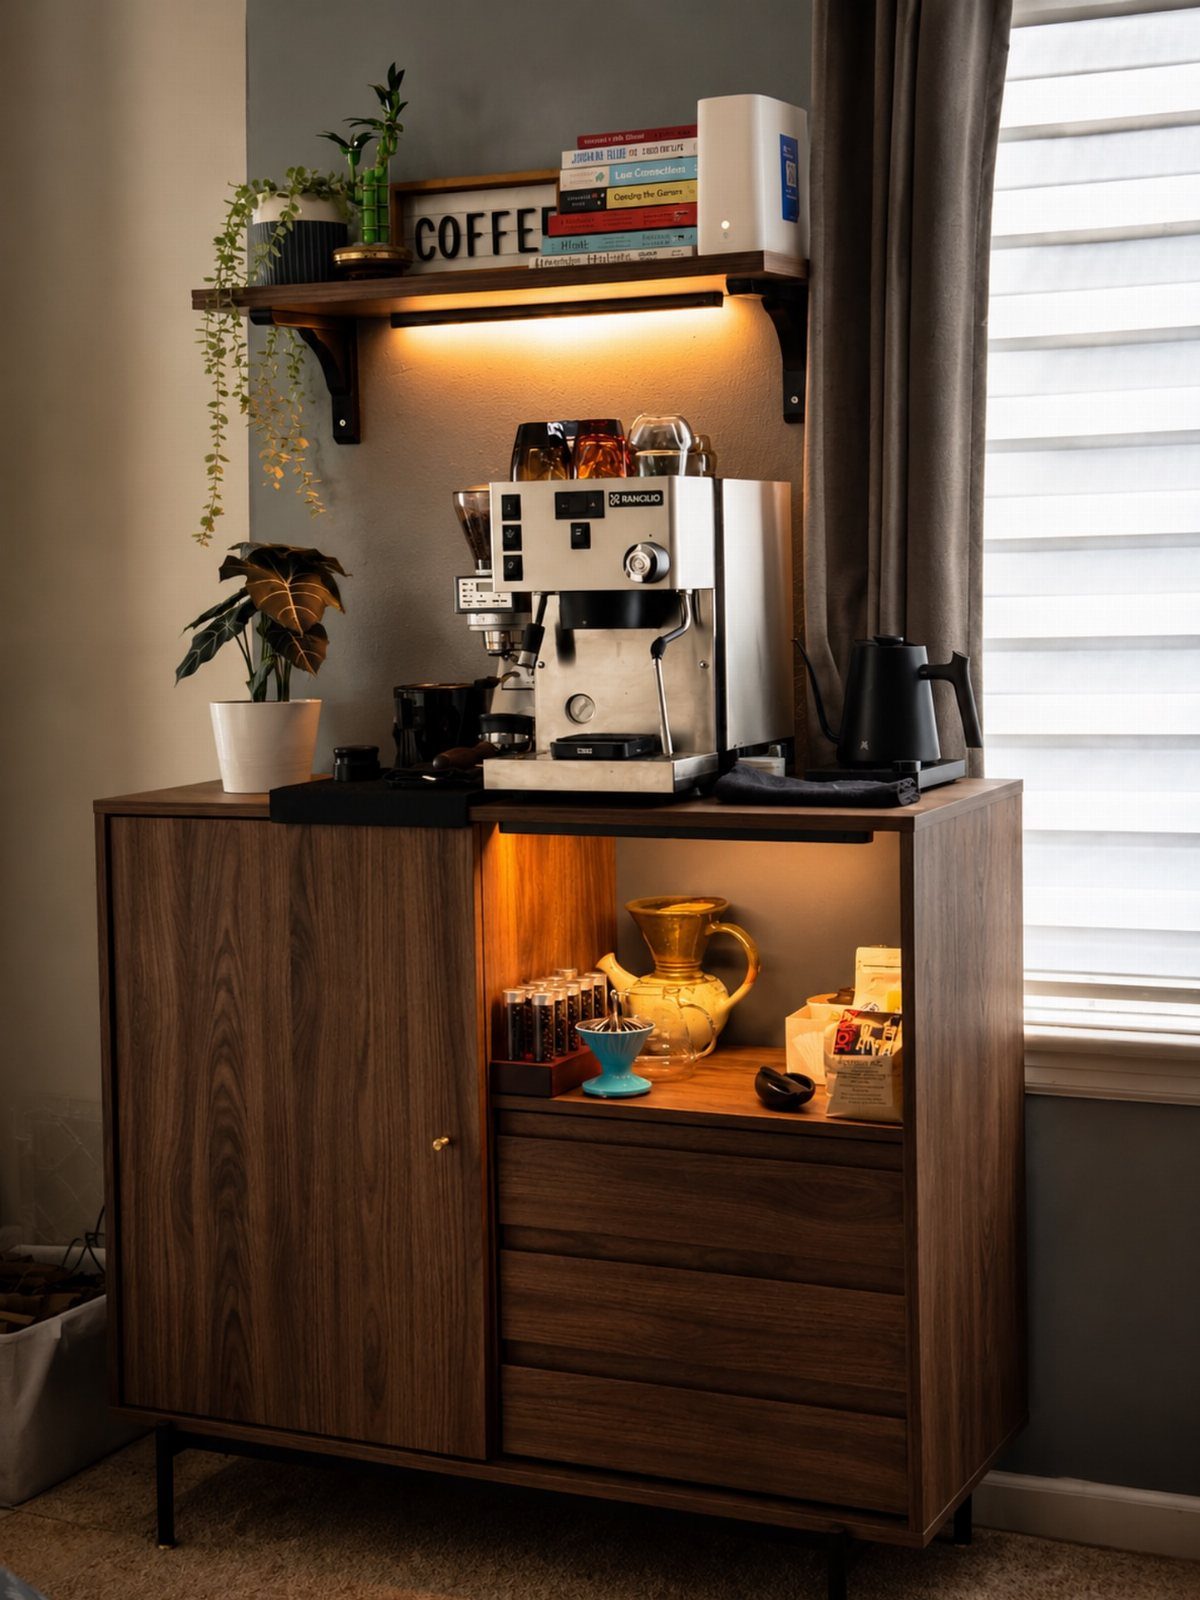
Turning a plain cabinet into a polished coffee station comes down to lighting, hardware, and one or two deliberate details. A floating shelf with under-cabinet lighting adds function and makes the setup feel intentional instead of improvised.
Swap generic knobs for something with weight, and if the cabinet finish feels flat, consider a darker stain or paint to give it presence.
I keep décor minimal here; a small sign or a few books work, but too many items on the shelf compete with the coffee gear and make the station harder to use.
If the cabinet originally had doors, removing them opens up access but also means everything inside stays visible, so keep it organized.
6. Kitchen Cart Station
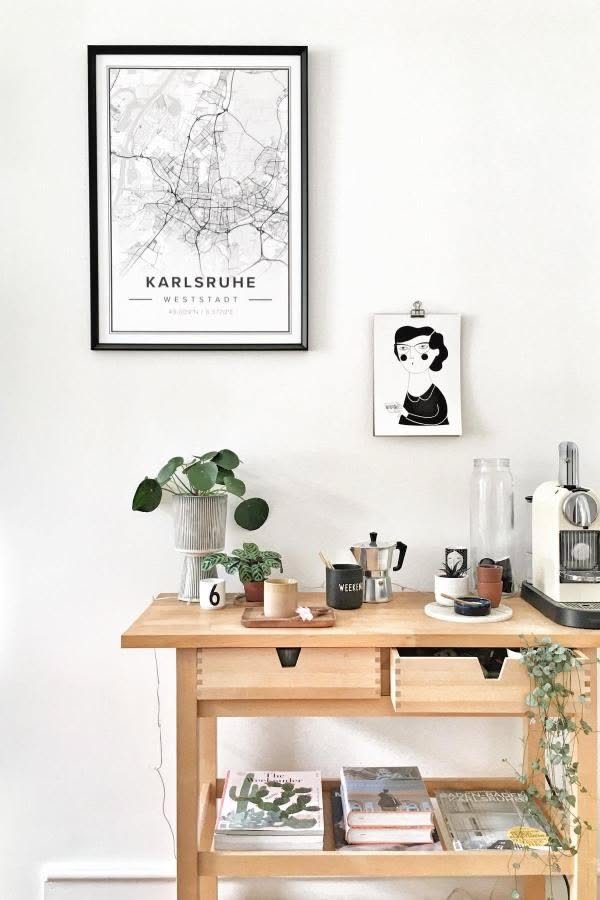
A kitchen cart works as a coffee station when your counters are full or you need the setup to move between rooms.
The open shelves let you store mugs and supplies without opening a door, and the wheels mean you can roll it out of the way when you need the floor space back.
I recommend a cart with at least one solid shelf for the machine, since vibration during brewing can shift lighter items on a slatted surface.
Keep the top clear except for the machine and kettle; anything else crowds the work area and makes it harder to clean up spills. If the cart feels wobbly, lock the wheels or replace them with furniture glides.
7. EKET Coffee Corner
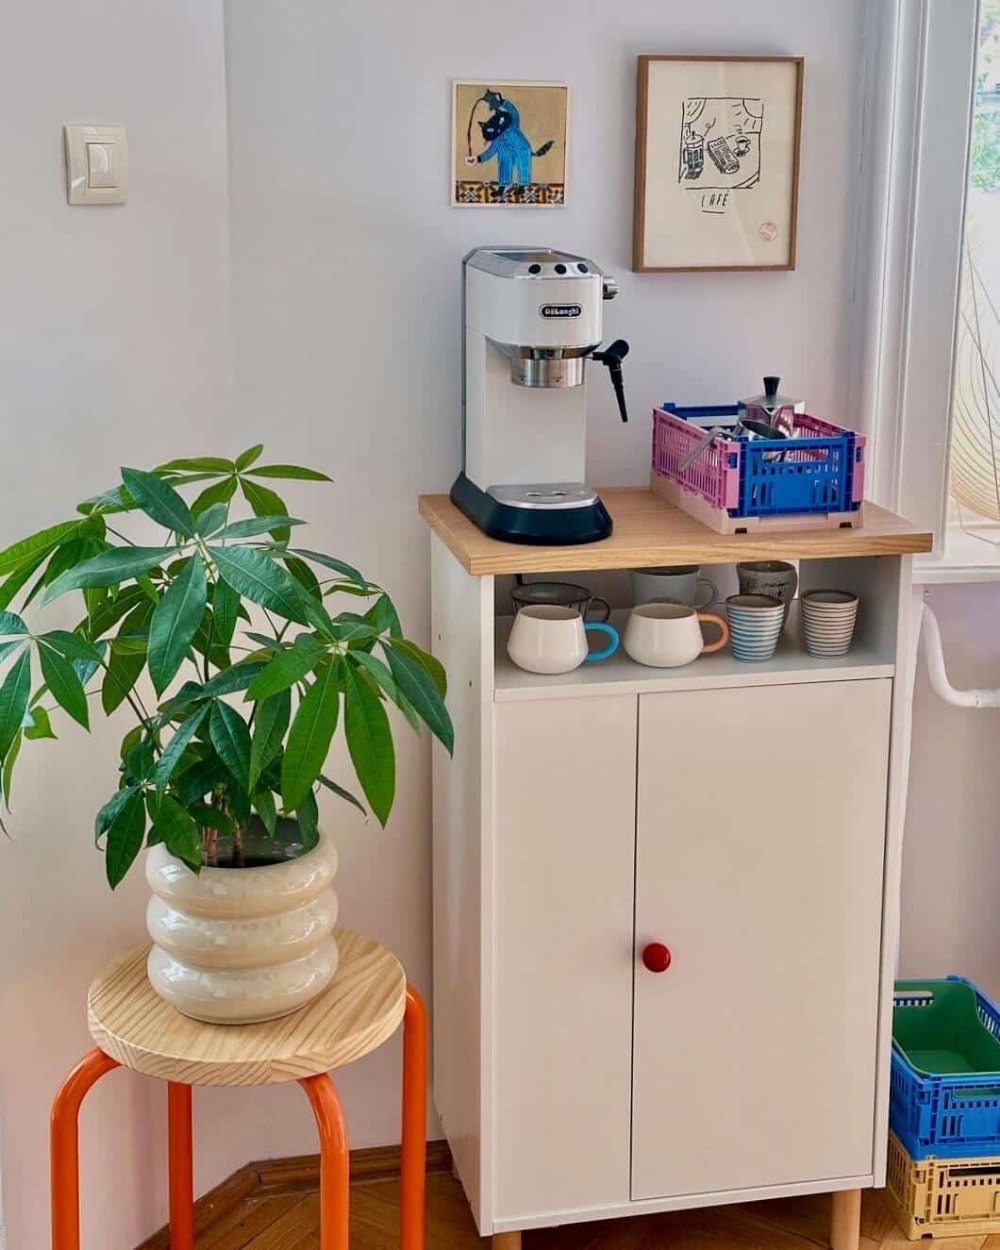
EKET cubes work well for a freestanding coffee setup because you can stack them to the height that suits your space, and the modular format means the station can grow or shrink as your needs change.
Add a wood or butcher-block top to give the surface warmth and make it feel less like storage cubes.
The open-front design keeps mugs and supplies in reach, but anything that looks messy will stay visible, so this suits a setup you can keep tidy. If you’re renting, the whole setup moves with you.
8. Walnut Coffee Bar
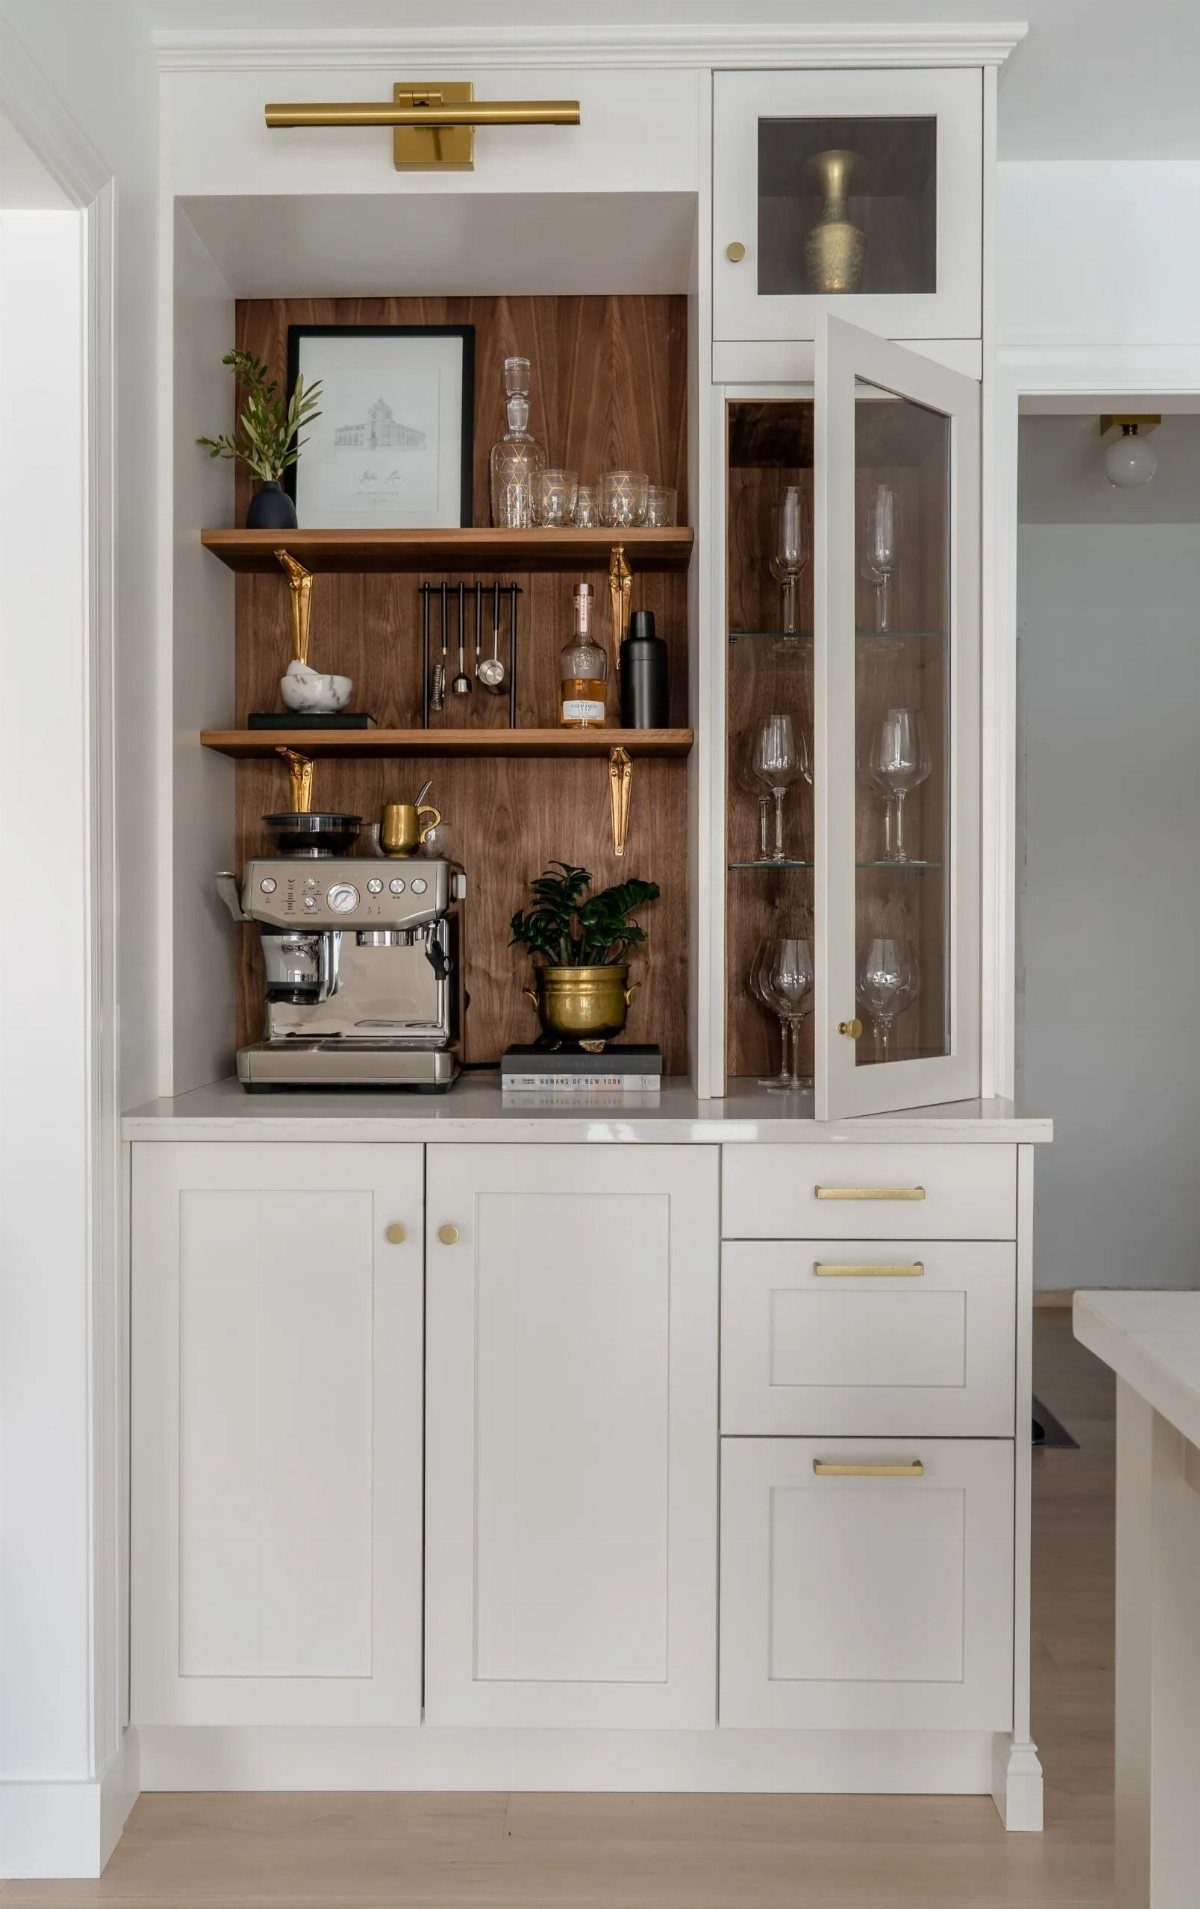
Walnut shelving against white cabinets adds warmth without the weight of dark cabinetry on every surface. The contrast keeps the coffee bar from blending into surrounding cabinetry, and the wood tone pairs well with white or light gray kitchens.
I usually recommend walnut when the room already has warm floors or wood trim, since it ties the finishes together. Keep the shelves shallow so they don’t push into your work space when you’re standing at the counter.
9. Shaker Coffee Nook
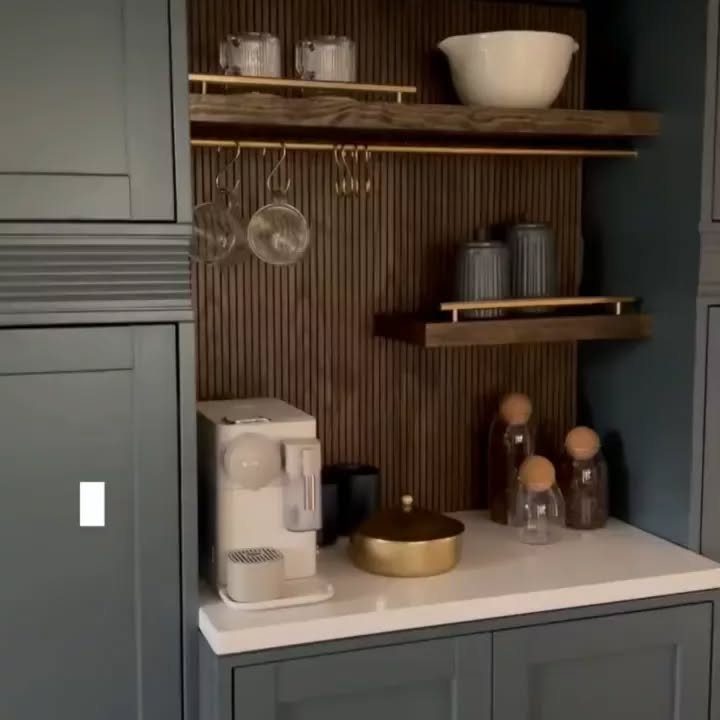
Gray shaker cabinets with wood slats and gold accents give you a coffee nook that feels finished without looking too decorative.
The slatted backsplash adds texture and hides the wall if you don’t want to tile, and the gold shelf brackets lift the palette without adding a new color.
I like this approach in kitchens with limited square footage where you need the coffee area to feel like part of the design instead of an afterthought.
If you’re installing the slats yourself, space them evenly and seal the wood so spills wipe clean.
10. Glass-front Coffee Bar
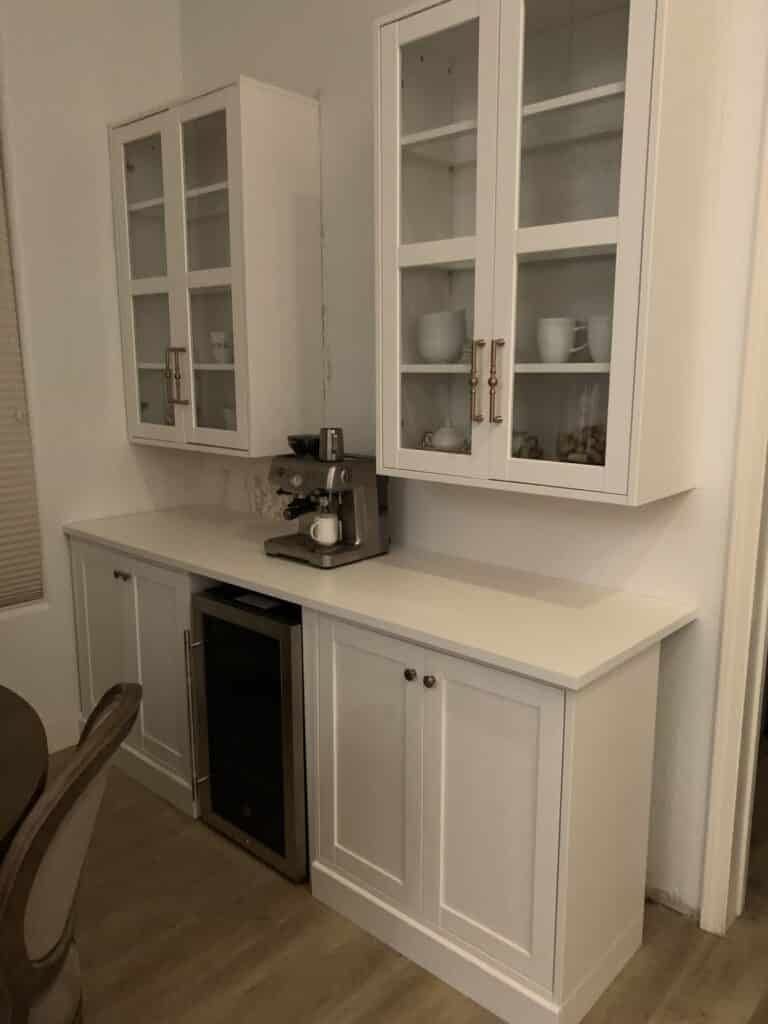
Glass-front cabinets let you see what’s inside without leaving everything open to dust, which works well if you store glassware or matching canisters that look good on display.
The setup suits a coffee bar that sits in or near the main kitchen, since the cabinets keep the look consistent with surrounding cabinetry.
If you’re using IKEA cabinets, swap solid doors for glass inserts; the frame stays the same, and the cost is low. Keep the contents organized, since messy shelves will show through the glass.
11. Small Kitchen Coffee Station
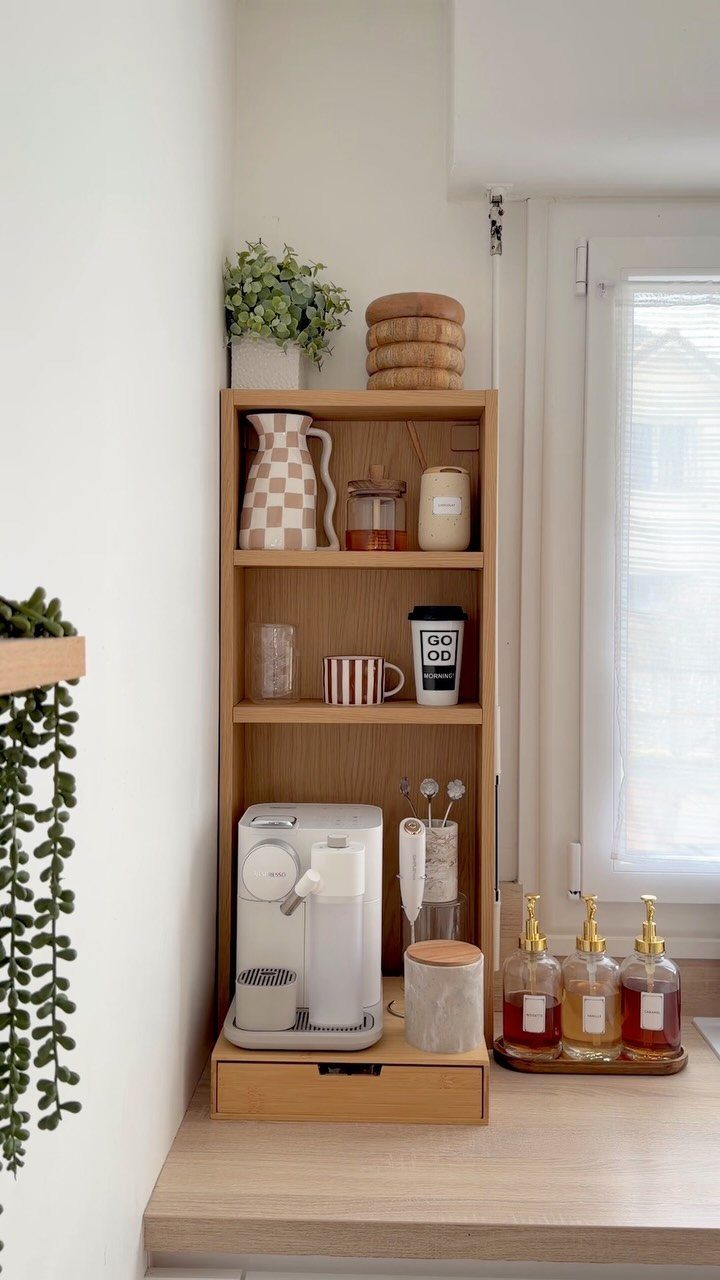
A narrow shelving unit turns a small corner into a coffee station and leaves counter space and walkways clear.
The open shelves keep mugs and supplies visible, and the compact footprint works in a kitchen where every inch of counter is already spoken for.
I recommend a unit with at least 3 shelves so you can separate the machine, mugs, and pantry items like coffee and filters.
If the shelves are adjustable, set them to fit your tallest items without leaving too much empty space above.
12. Coffee Bar with Shelves
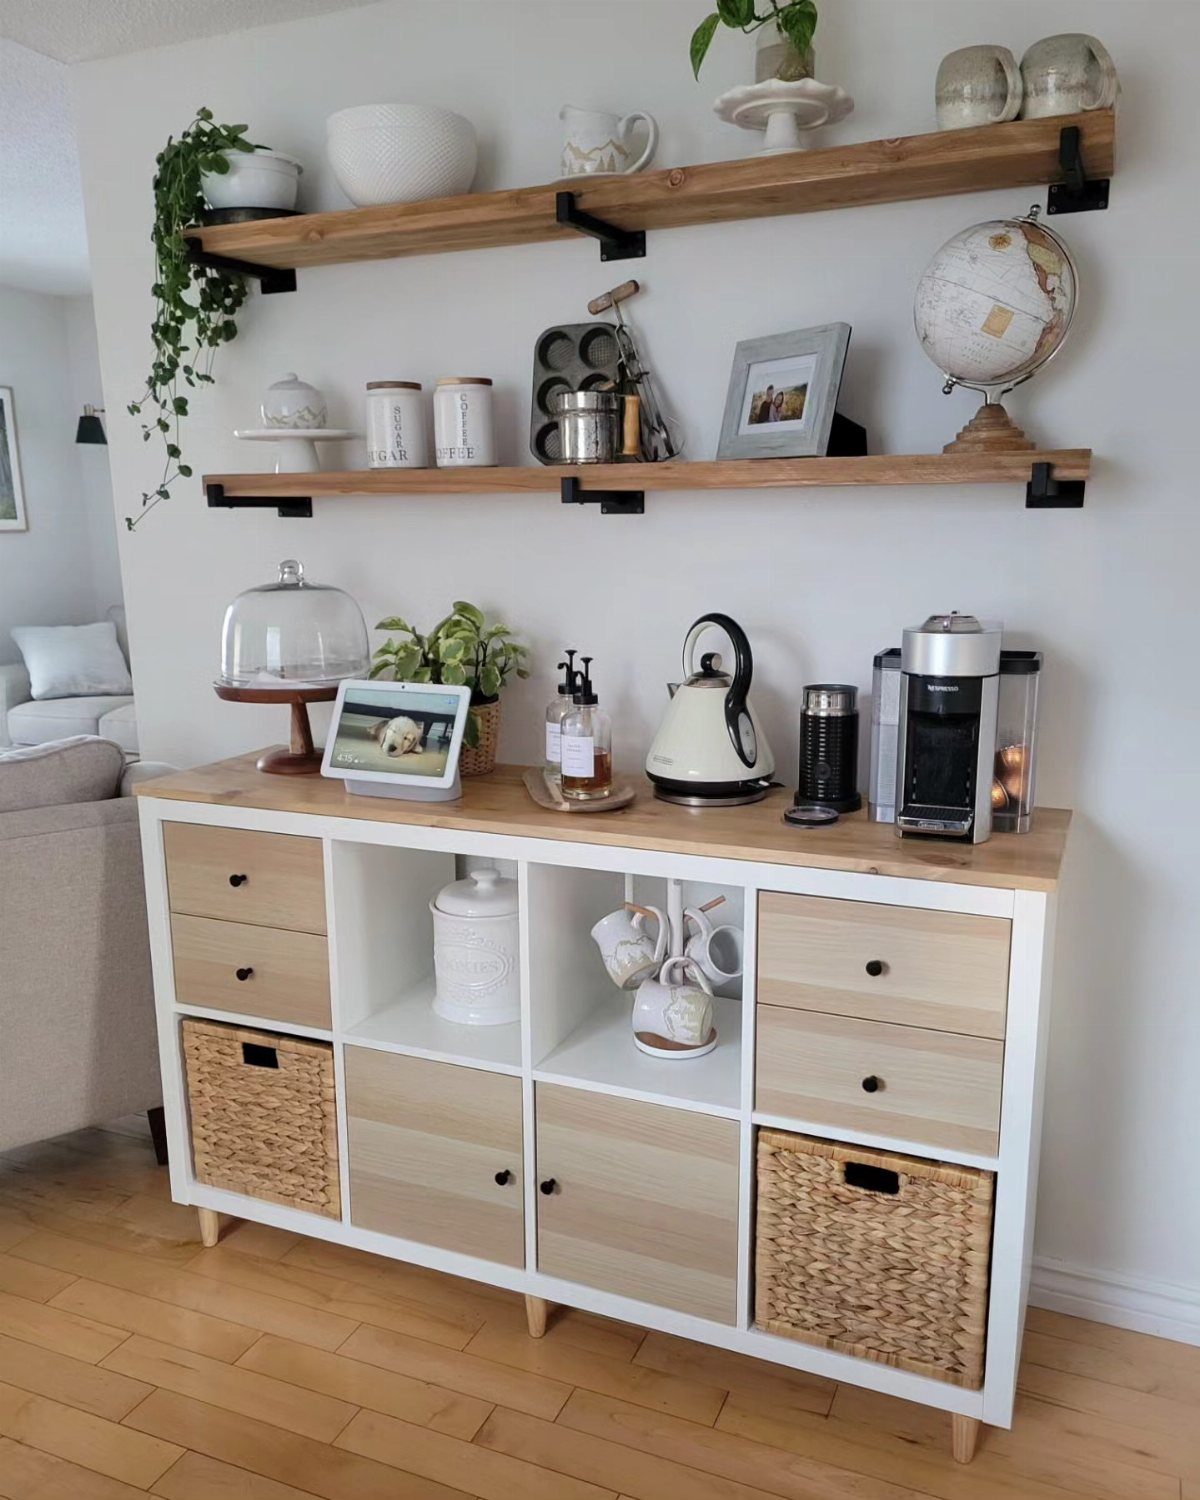
A cabinet with floating shelves above gives you closed storage for items you don’t want on display and open shelves for everyday mugs and décor.
The two-zone setup keeps the coffee bar from feeling cluttered, and the shelves break up the wall without adding bulk.
Mount the shelves at a comfortable height for reaching mugs; too high and you’ll need a step stool, too low and they crowd the counter.
If the cabinet doesn’t have a finished top, add a wood surface or stone slab so the machine sits on something that can handle heat and moisture.
13. Slatted Coffee Cabinet
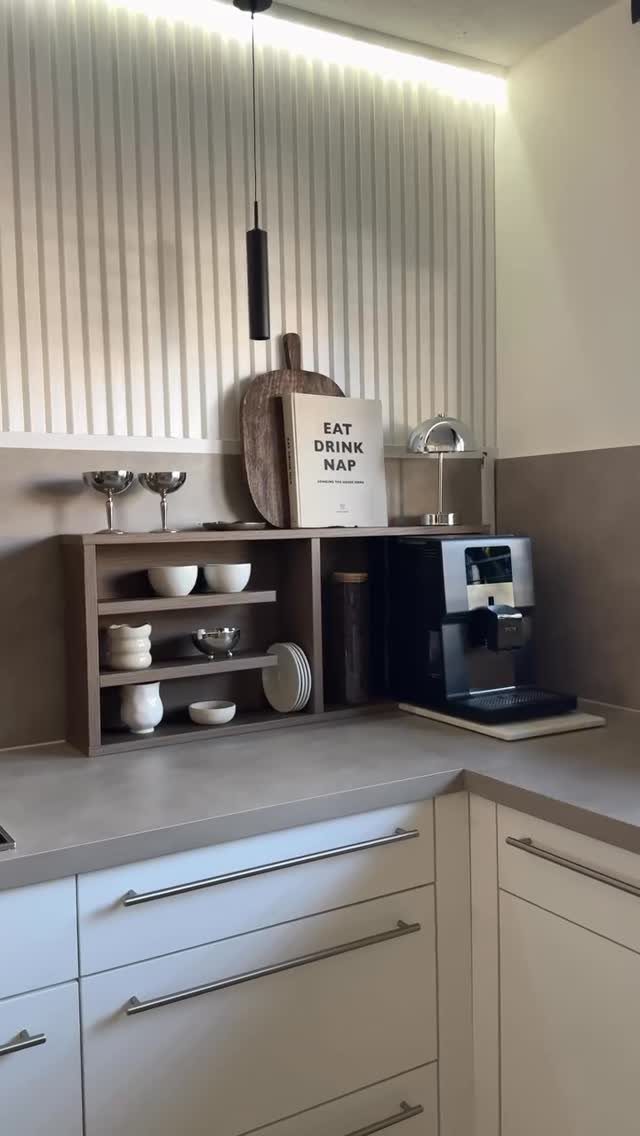
Vertical wood slats behind the coffee machine add texture and give you a backsplash that hides the wall without tile.
The slats run floor to counter or just behind the machine, and the pattern carries the eye upward in a way that feels deliberate.
I recommend sealing the wood so steam and splashes wipe off without staining. Space the slats evenly, and if you’re mounting them yourself, use a spacer block cut to the gap width so the layout stays consistent.
The slats need plain walls around them; too much pattern elsewhere and they compete instead of anchoring the station.
14. Coffee Bar with Hooks
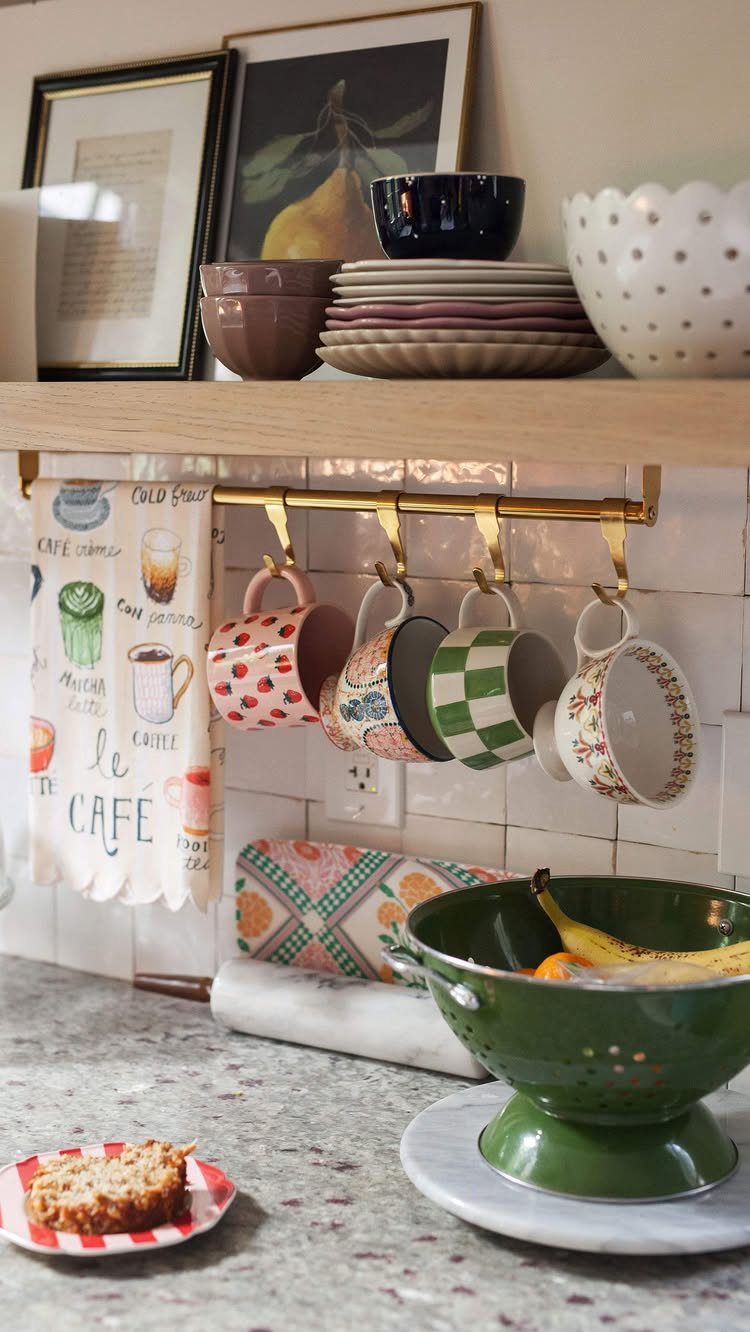
Hooks beneath a shelf or cabinet let mugs hang within reach and free up shelf space for canisters and supplies.
A rail with S-hooks or a simple rod with cup hooks works, and the mugs become part of the display instead of stacking behind cabinet doors.
Mount the rail low enough that the mugs clear the counter when they hang but high enough that you don’t bump them while working.
15. Coffee Station with Lighting
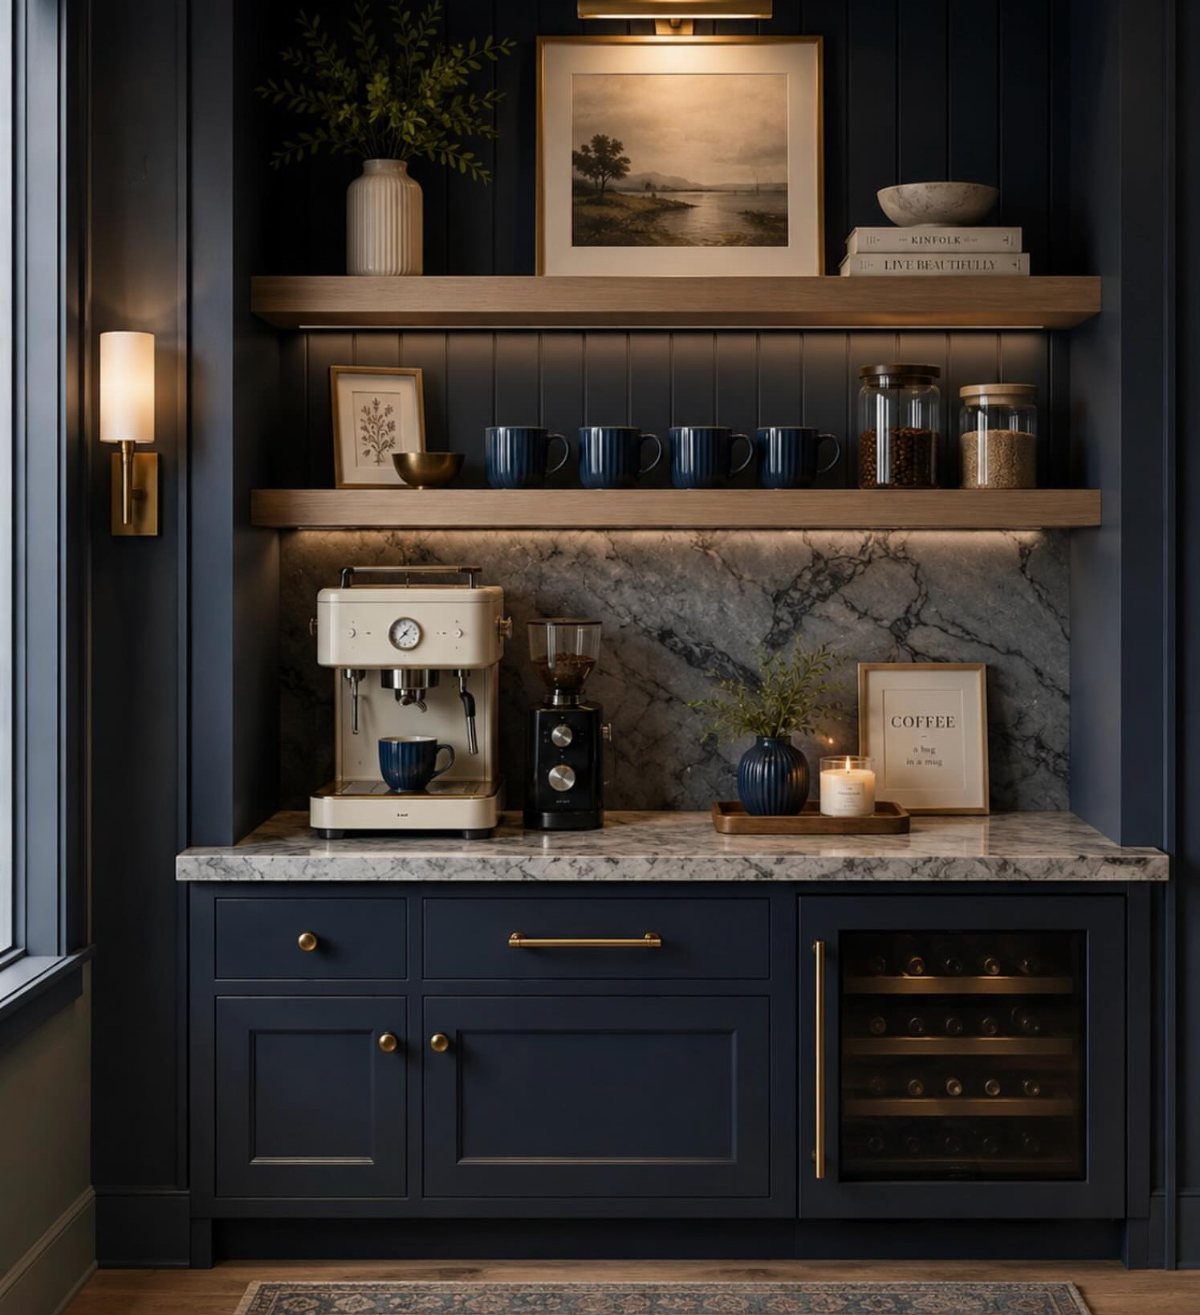
Lighting beneath a shelf or inside a cabinet makes the coffee station usable in the morning without overhead lights and gives the setup a finished look.
LED strip lights work well because they stay cool and mount with adhesive backing, and plug-in versions avoid hardwiring if you’re renting.
I recommend warm white so the light doesn’t feel clinical. Place the strip toward the front edge of the shelf so it lights the counter below instead of casting shadows.
If the cabinet has a glass door, interior lighting makes the contents visible and turns the station into a feature when the door is closed.
16. Coffee Bar with Gold Rails
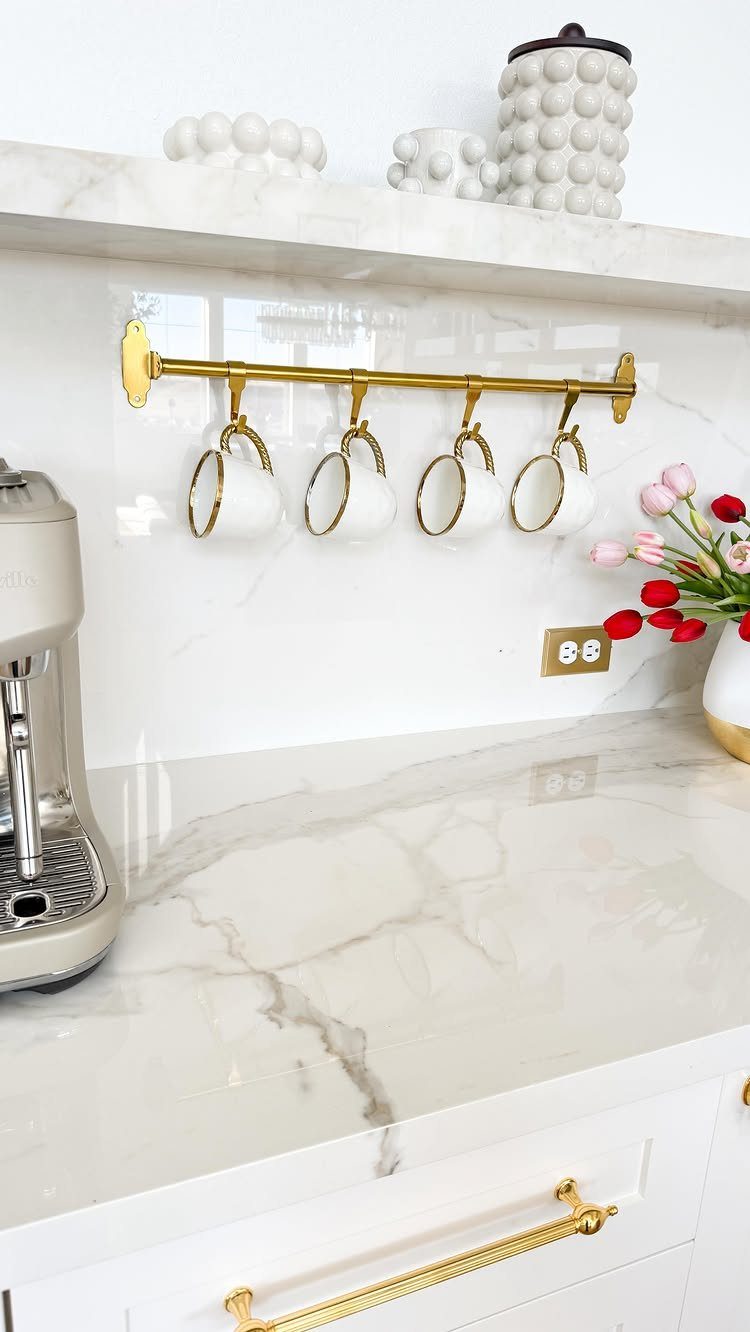
A gold rail on the underside of a floating shelf holds mugs where you can reach them and adds a warm metallic accent without changing the cabinet finish.
The rail mounts with screws or brackets, and S-hooks let you adjust how many mugs hang.
I like this in kitchens where the cabinetry is white or light wood, since the gold gives the coffee bar a deliberate look without adding weight.
Make sure the rail is deep enough that mugs hang clear of the counter; too shallow and they tilt or hit the backsplash.
17. Freestanding Coffee Cabinet
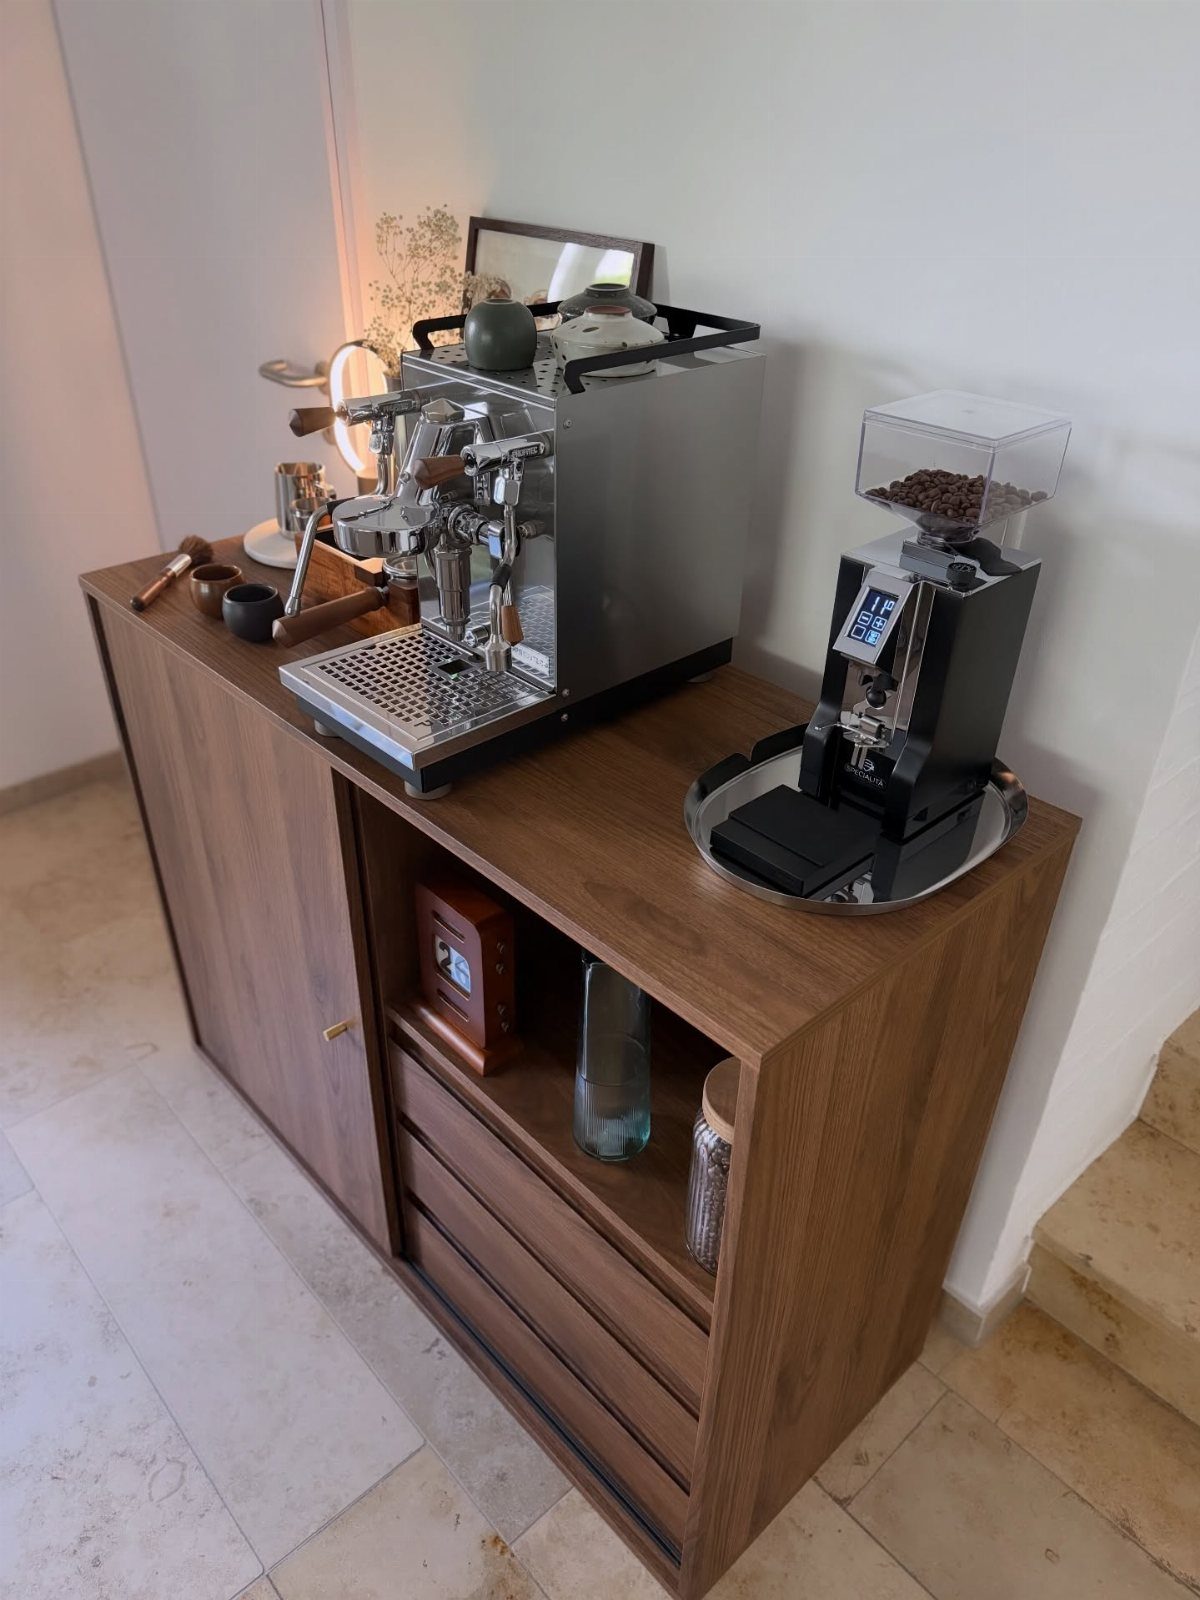
A freestanding cabinet turns any corner into a coffee station without mounting shelves or modifying the kitchen. The cabinet gives you a stable surface for the machine and storage below for beans, filters, and backup supplies.
I recommend a unit with at least one drawer so small items stay organized instead of sliding around on a shelf. A freestanding coffee cabinet works well in rentals or small kitchens where counter space is already claimed.
18. Coffee Cabinet with Wall Storage
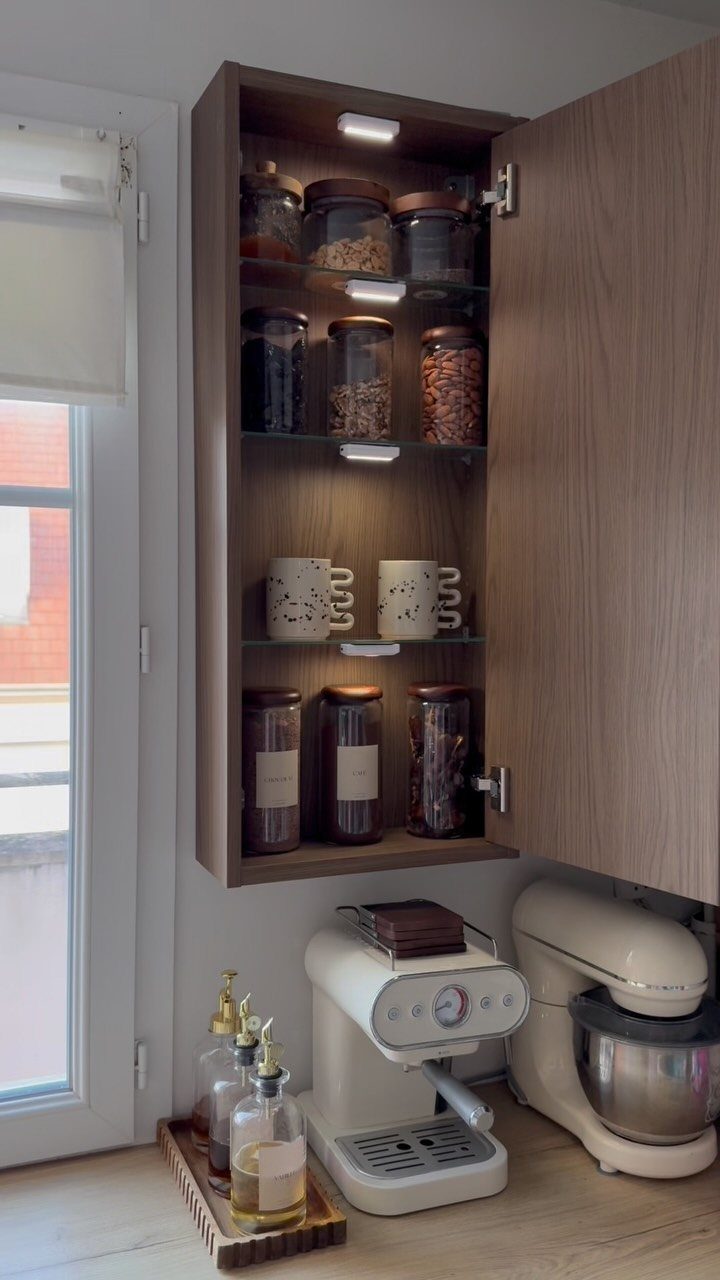
Pairing a counter with a wall-mounted cabinet keeps supplies visible and contained without giving up floor space to a freestanding unit.
The cabinet holds mugs and canisters at eye level, and the counter below supports the machine and gives you room to work.
Mount the cabinet low enough that you can reach the top shelf comfortably. If the cabinet originally had a door, removing it opens up access but means everything inside stays on display, so stick to matching containers and tidy rows.
19. Coffee Cabinet with Woven Baskets
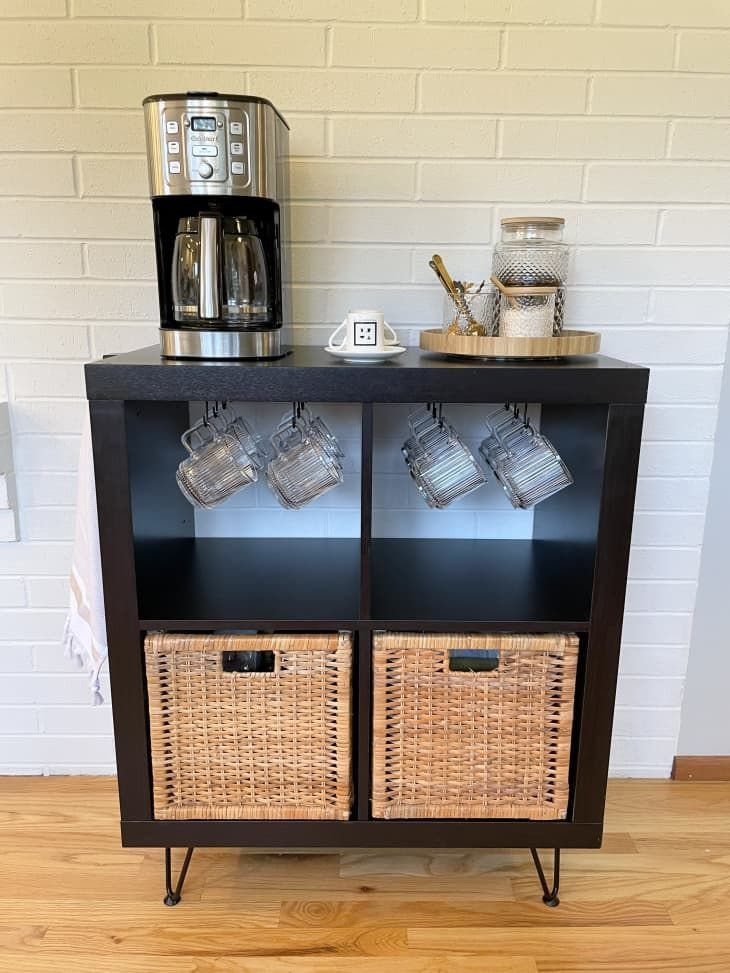
A dark cabinet with open cubbies gives you storage on 2 levels: the top holds the coffee machine, and the cubbies below keep supplies out of sight in woven baskets.
The baskets slide out when you need to restock and stay closed the rest of the time, which works well if you don’t want canisters and filters visible.
Choose a cabinet height that puts the machine at a comfortable working level. If the cubbies are sized for IKEA storage boxes, wicker baskets in the same dimensions will drop in without gaps.
20. White Coffee Cabinet Setup
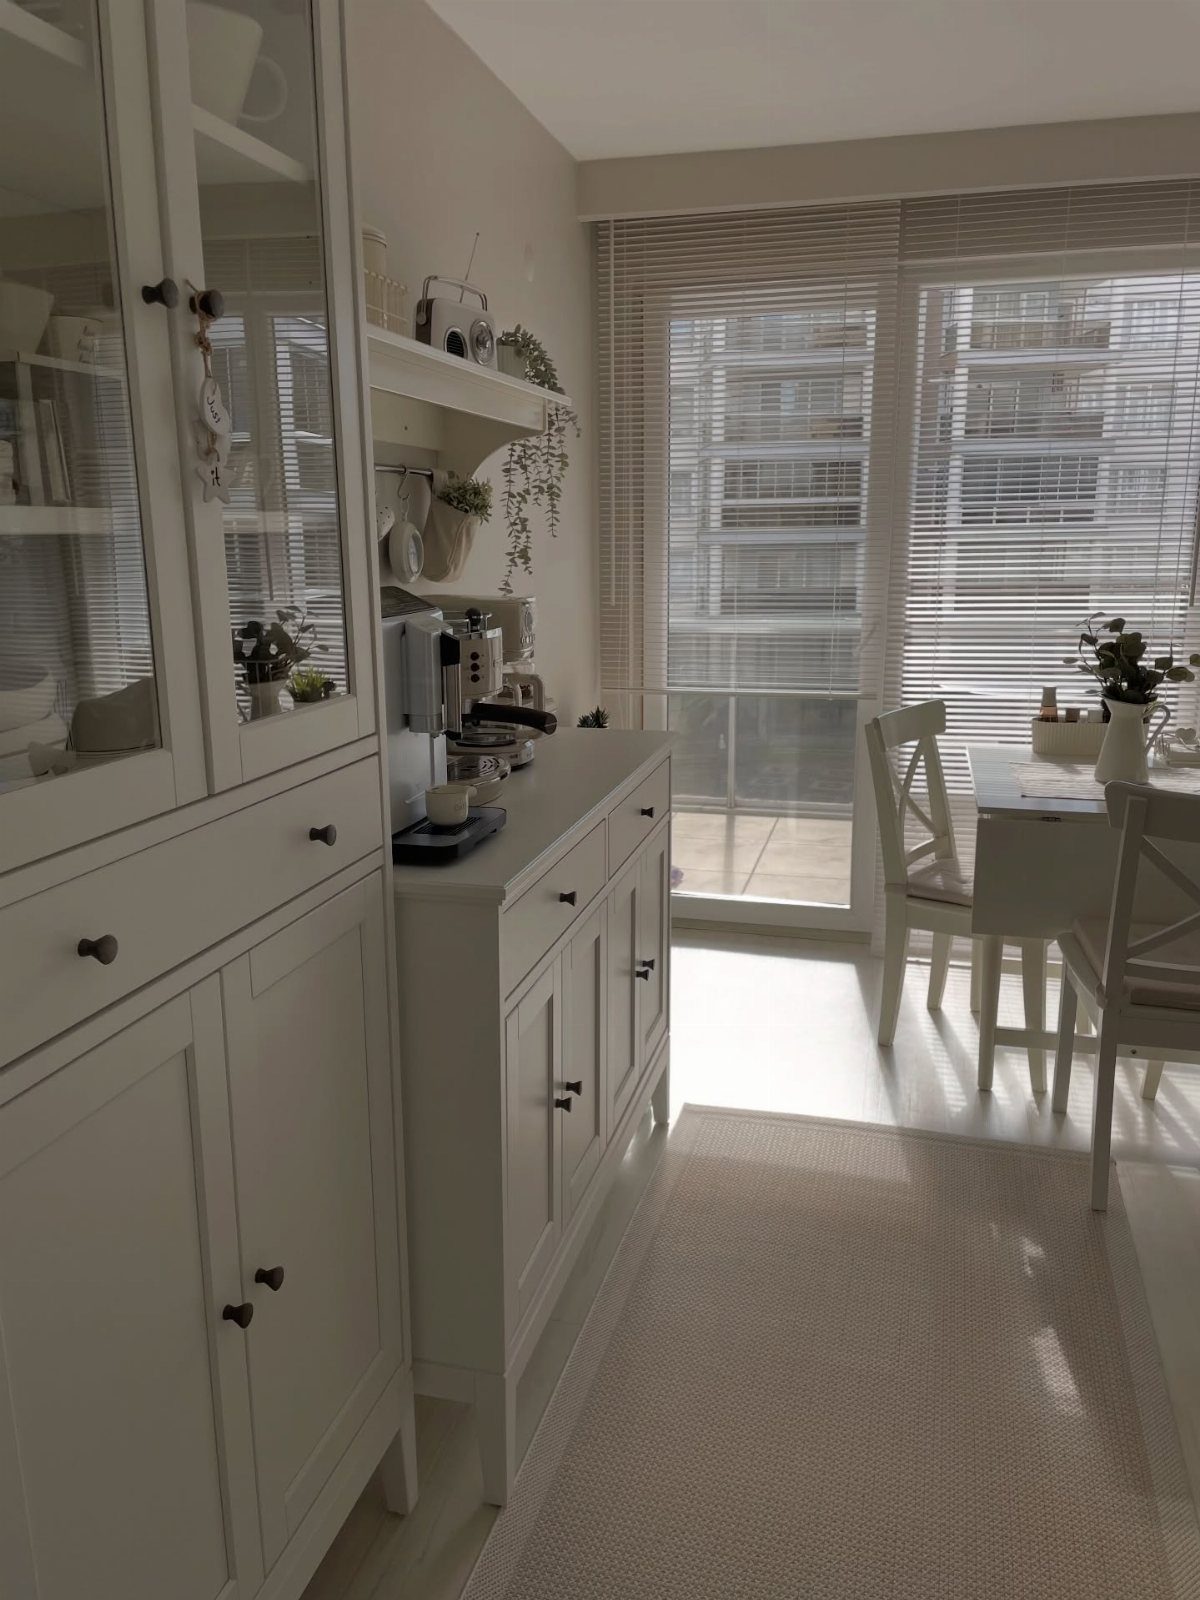
A white cabinet with a light wood top holds a coffee machine and accessories without taking up much visual weight in a small kitchen or open-plan space.
The wood top adds warmth and gives the machine a stable surface that handles heat and moisture better than laminate.
A small shelf above keeps a few mugs or a plant in reach, and the white finish ties into surrounding cabinetry if the kitchen is already light-toned.
This setup works best when the rest of the room stays simple, since the coffee station reads as part of the kitchen instead of a separate feature.
21. Red IKEA Cabinet Coffee Bar
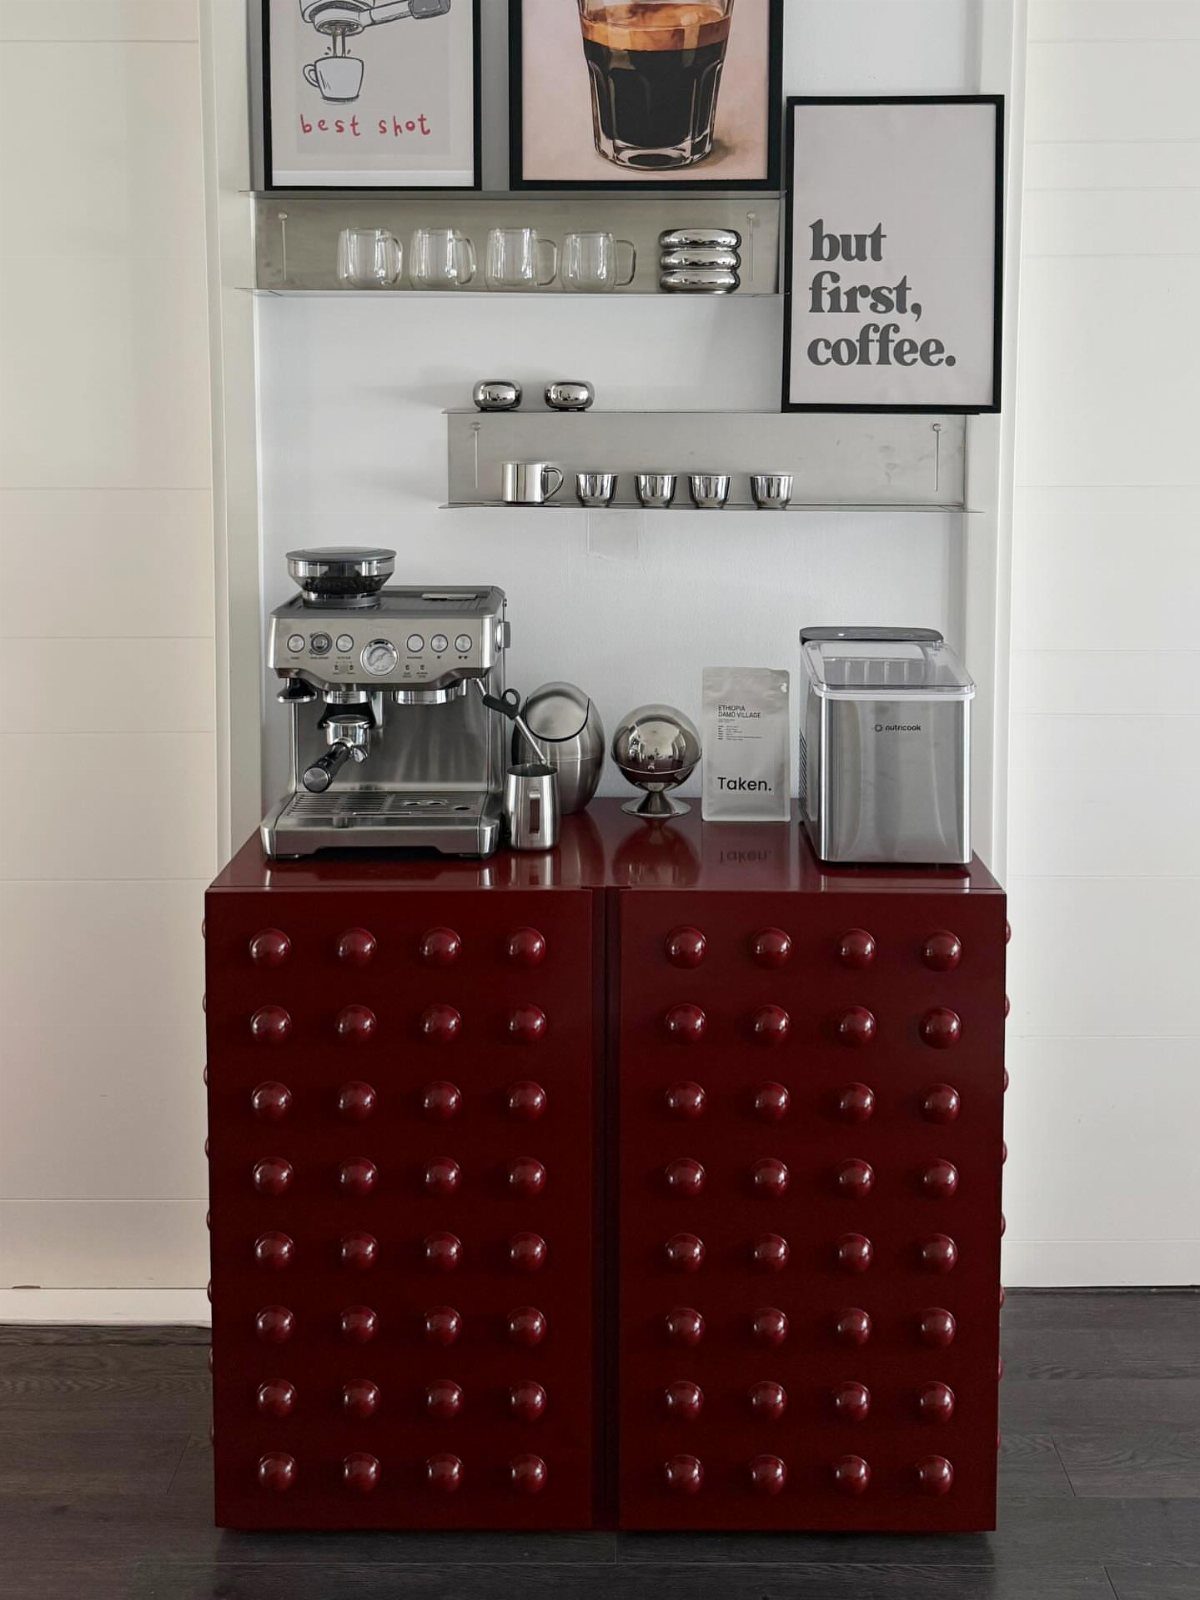
Two red metal cabinets side by side give you a bold coffee station with storage inside and a wide top for the espresso machine and accessories.
The color makes the setup a feature in a neutral kitchen, and the metal construction handles the weight of a heavier machine without sagging.
Wall shelves above hold extra mugs and keep the setup from feeling bottom-heavy. If you’re using IKEA metal cabinets, check the interior height before you buy so your tallest canisters fit.
The red works best when the rest of the kitchen keeps a simple palette, or the station will compete with too many colors at once.
22. SKÅDIS Pegboard Coffee Station
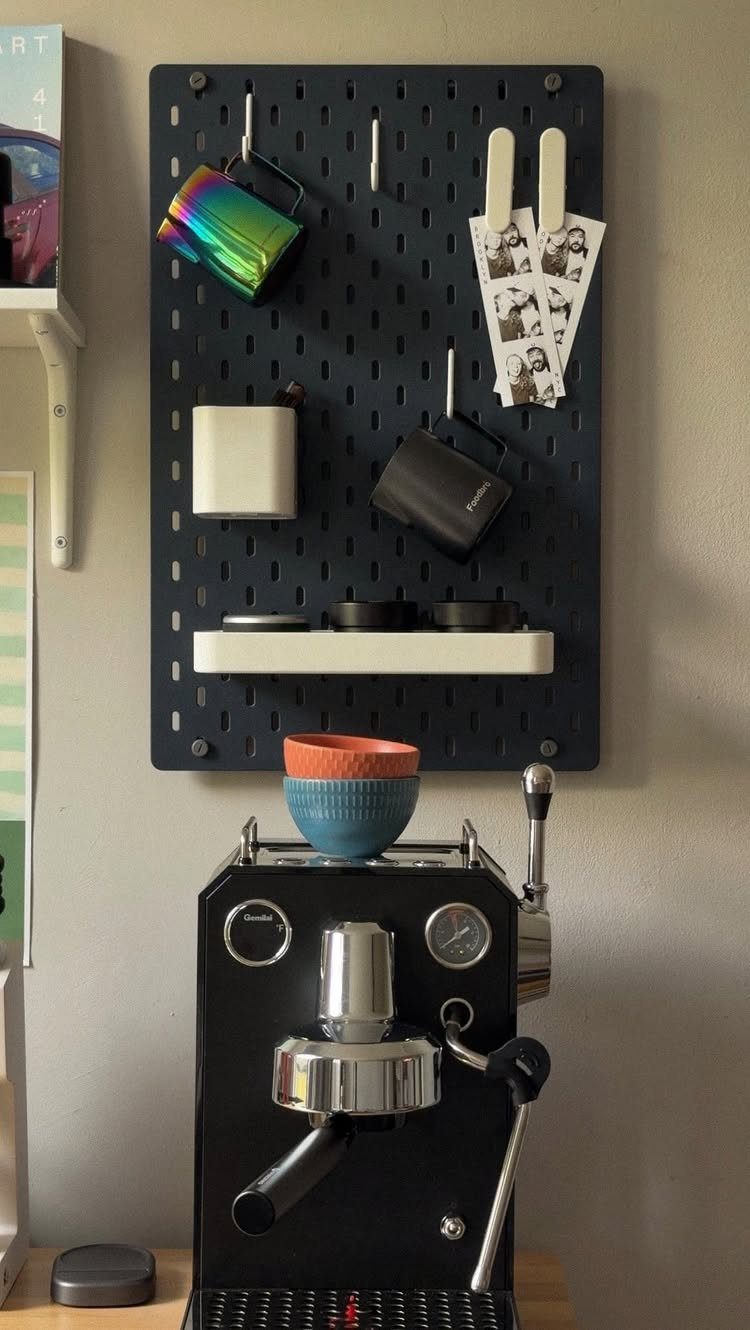
A SKÅDIS pegboard mounted above the coffee machine holds mugs, a storage container, and small items like photos or notes within arm’s reach.
The pegboard accessories let you add hooks and shelves where you need them, and the layout changes without new holes in the wall.
The setup works in a rental or a tight kitchen where drilling multiple holes isn’t an option, and the whole thing moves with you when you leave.
Keeping the Coffee Area Tidy
Store coffee, filters, and sugar in one spot so you’re not searching cabinets every morning. A two-tier lazy Susan keeps bags and canisters rotating within reach, and small bins corral pods or tea sachets that otherwise scatter across shelves.
Wall hooks or a mounted rail put mugs in plain view and free up shelf space for items that don’t hang.
If you’re using a drawer for coffee gear, add a divider tray so spoons, scoops, and thermometers stay separated instead of sliding into a pile.
Clean the drip tray and wipe down the machine after each use.
Dried coffee and milk residue build up fast, and once they harden, they take real scrubbing to remove. A damp cloth and 30 seconds each morning keeps the station looking deliberate instead of neglected.
Limit décor to one or two items. A small plant or a single framed print works, but a crowded shelf competes with the coffee equipment and makes the whole setup harder to keep clean.