I’ve seen enough faucet finishes fail to know what works: you can’t skip prep. Start by cleaning with lime remover and Comet, then sand with 150-grit paper and mask everything. I recommend using oil-based Rust-Oleum with a rust-inhibiting primer; spray application is more effective than brushes. Apply thin coats and wait between layers, sealing with a clear topcoat. Avoid heavy applications and remove silicone beforehand to prevent peeling. The longevity of a finish often hinges on these practical details.
Assess Your Faucet: Is It Worth Painting?

Why spend over $200 on a brand new faucet when you can rejuvenate the one you’ve got for a fraction of that cost?
Painting works best on faucets that are structurally sound. If yours leaks or drips, fix those issues first; paint won’t resolve plumbing problems. Check the material as well. Brass, chrome, and bronze respond well to proper prep and primer. I assess whether my faucet’s finish is peeling or just dull. Peeling is a good sign; that rough surface actually aids adhesion when I prep correctly.
If your faucet’s bones are good, painting can yield significant results. I’ve seen oil-bronze finishes last for years with careful application. This approach offers considerable value.

Tiny rust Tiny scratch causes substantial damage: SYOAUTO rim repair kit can seal away the scratch to prevent future corrosion. If you have a black rim, this product will save you a lot of heartache. We know ugly chip will mark drive you crazysubstantial damage: SYOAUTO touch up paint for rims can seal away the scratch to prevent future rust.

MATTE BLACK WHEEL TOUCH UP PAINT - Rim scratch repair kit easily removes dents, scratches and surface damage from wheels to prevent rust and corrosion. The curb rash repair kit black rims puts a protective coating on the surface of your wheels to make them look brand new.
FAUCET REBUILD KIT is ideal to repair a leaky faucet and stop the dripping water
Clean and Degrease Your Faucet Thoroughly

Before you start applying that primer, your faucet must be completely clean. I learned this through experience. My faucet prep strategy involves using a damp cloth to wipe away dirt and grease. Next, I use lime-based cleaners like Lime-A-Way, followed by Comet, to remove calcium buildup that could affect your paint job. Scrub carefully with a sponge, rinse thoroughly, and dry completely. For stubborn grease on brass or textured surfaces, steel wool can help create a surface that allows paint to adhere better. Finally, brush away any dust or flaked paint. A completely dry faucet is essential; skipping this step can lead to wasted time and peeling paint.

Weather and corrosion resistant primer bonds tightly to exterior/interior surfaces like wood, metal, concrete, masonry and more to provide excellent adhesion for top coat

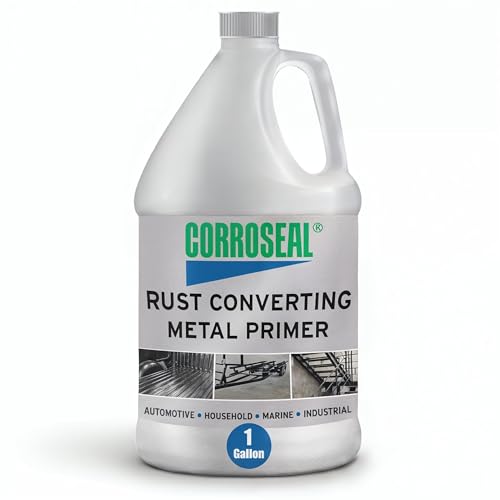
Use on any rusty, metal surface to Instantly convert rust to a flat black, paintable surface that is protected and prevents future rust
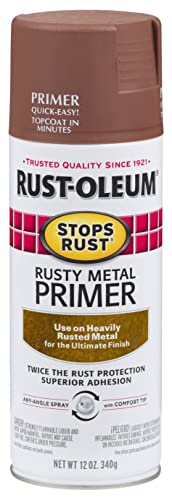
Use to prime exterior or interior heavily rusted metal surfaces only
Sand the Surface for Better Paint Adhesion

I won’t skip this step, as it’s where many faucet painting projects go wrong. I always grab my 150-grit sandpaper to roughen up those surfaces because paint won’t adhere to something slick. For tougher materials like brass, I use steel wool to improve adhesion. It can be tedious on narrow valve areas where I need a tiny mouse sandpad tip, but it makes a difference. Once I finish sanding, I wipe everything down with a damp cloth and let it dry completely. Dust floating around during priming can lead to a sloppy finish.

Ideal for creating a shiny metallic finish on any interior metal, wood, concrete or masonry projects

Ideal for use on glass vases, jars, framed glass, table tops, candle holders and more

Ideal for use on interior/exterior surfaces including wood, plastic, plaster, metal, masonry and unglazed ceramic
Roughening Surfaces With Sandpaper
Once you’ve cleaned your faucet thoroughly, it’s time to roughen the surface. This step in surface preparation is crucial. You’ll want to grab either fine-grit sandpaper or steel wool; this step significantly improves your paint’s adhesion.
| Grit Type | Best For | Technique |
|---|---|---|
| 150–220 grit sandpaper | General faucet surfaces | Light, even strokes |
| Steel wool | Brass and tough finishes | Circular motions |
| 220-grit sandpaper | Final smoothing | Gentle finishing passes |
I sand in consistent, even motions across the entire fixture—no low spots allowed. This creates the “key” paint needs to grip properly. After sanding, I remove every speck of dust with a damp cloth and dry thoroughly. This process is essential for a successful paint job. Your faucet deserves the best, and ensuring proper preparation will enhance the final result.
Steel Wool Preparation Method
Why does steel wool outperform sandpaper on certain faucets? Tougher surfaces like brass require a more aggressive approach, and steel wool excels in this area. Here’s my proven method:
- Use steel wool to effectively roughen brass and stubborn finishes.
- Work in circular motions across the entire surface for consistent adhesion.
- Target intricate crevices with small tools; a mouse sandpad works perfectly.
- Remove all dust and flakes with a damp cloth afterward.
This step distinguishes quality paint jobs from mediocre ones. Steel wool creates superior texture compared to sandpaper alone, especially on high-use fixtures. The roughened surface enhances the grip of primer and paint, ensuring they adhere properly. After sanding, I always dry everything thoroughly. Skipping this preparation can lead to frustrating results later.
Mask Off Surrounding Areas and Fixtures
How many times have I watched paint overspray ruin a perfectly good countertop? Too many. That’s why masking is essential; it’s your best friend in this process. I cover everything surrounding the faucet with plastic sheeting and drop cloths. Next, I apply painter’s tape, specifically Frog Tape or quality yellow tape, around delicate edges to minimize bleed and achieve crisp lines. For tight gaps and grill openings, I use small masking tape and tweezers for precise placement. Around tubs, I hang masking film from the ceiling, cut holes for fixtures, and tape it down. Once the final coat dries completely, remove everything carefully. Peel slowly to avoid damaging the fresh paint. This protection step may not be glamorous, but it significantly impacts the quality of the final result.

Works on virtually any surface including wood, plastic, metal, fiberglass, concrete, wicker, vinyl and more
Direct To Metal Application - No Additives Needed

Pre-reduced, ready-to-spray lacquer
Choose the Right Primer for Metal Surfaces
Now that your faucet is surrounded by protective barriers, it’s time to focus on primer. Skipping this step can lead to your paint job peeling off in chunks within six months.
Here’s what works best for metal surfaces:
- Zinser BIN offers exceptional adhesion and dries quickly.
- Spray primers provide thin, even coverage that brushes often struggle to achieve.
- Paint-and-primer combos save time when you’re in a hurry.
- Light coats prevent pooling while maximizing durability.
I always apply primer in multiple thin layers rather than one thick coat. The goal is to create a microscopic grip that helps the topcoat adhere better. Test any primer on a hidden area first; this preparation work helps prevent future peeling issues.

CAULK REMOVAL MADE EASY: Lift Off Caulk Remover uses a patented, water-based formula that is biodegradable to safely remove sealants, expansion foams, silicone caulks, construction adhesives and two-part epoxies.

100% Waterproof and Weatherproof: This 100% silicone formula offers protection from water damage, providing a reliable seal in areas exposed to harsh weather

Effortless Sealant Removal: Designed for ease of use, this tool simplifies the process of removing old or unwanted sealant without hassle.
Select Paint Designed for Metal and High-Traffic Areas
I’ve learned that you need paint specifically formulated for metal. Rust-Oleum oil-based enamel or their matte finish custom shop automotive spray paint outlasts every other product I’ve tried on bathroom faucets. These oil-based options provide the toughness necessary for faucets in high-traffic areas where constant water exposure and daily handling would damage lesser paints quickly. Cleanup requires mineral spirits and more effort than latex, but that superior durability is worth the extra time when you want a faucet that will last for years.

Rim touch up paint:Rim scratch repair kit easily removes dents, scratches and surface damage from wheels to prevent rust and corrosion

Tiny scratch causes substantial damage: SYOAUTO rim repair kit can seal away the scratch to prevent future corrosion. If you have a black rim, this product will save you a lot of heartache. We know ugly chip will mark drive you crazy

【Material】: All-metal sturdy construction. Mixing valve is made of solid brass, which has the characteristics of no rust and long life, SUS304 stainless steel shower head and self-cleaning silicone nozzle, anti-clogging, easy to clean, anti-oxidation and corrosion-resistant.
Oil-Based Paint Benefits
Oil-based paints, such as Rust-Oleum oil-rubbed bronze or traditional enamel options, provide the durability that faucets require. These finishes withstand daily wear where water-based alternatives often fall short. Here are the key benefits:
- Superior adhesion on metal surfaces when prepped properly with sandpaper or steel wool.
- Hard-wearing protection ideal for high-traffic faucet areas that demand longevity.
- Professional appearance that resists chipping better than lesser options.
- Flexibility to pair with metal-specific primers for excellent results.
Cleanup requires mineral spirits and patience, but the effort results in long-lasting finishes. Apply thin, multiple coats to avoid drips and brush marks. Whether you choose a primer-first approach or a paint-and-primer-in-one, you are investing in faucets that endure. This quality focus is commendable.
Rust-Oleum Product Options
When I settled on oil-based paint for my faucets, I knew I couldn’t just grab any can off the shelf; I needed something formulated specifically for metal surfaces that would withstand constant use. That’s when I discovered Rust-Oleum’s lineup. I have had solid results with their Painters Touch Ultra Cover and their Matte Finish Custom Shop spray, both designed for metal and built to endure the daily wear and tear on faucets. Pair whichever Rust-Oleum paint you choose with a quality primer, as it significantly enhances adhesion on metal. I apply thin coats of paint rather than one thick layer, allowing each to dry completely between applications. This method provides durability without drips. Finding these products at Lowe’s is convenient, though O’Reilly Auto Parts occasionally offers better availability.
Durability On High-Use Surfaces
Painting a faucet differs significantly from painting a bedroom wall, and that distinction is crucial for achieving durable results.
High-use surfaces require a solid strategy. Here’s what works:
- Spray paint outperforms brushes on faucets. Sprayed finishes from Rust-Oleum have shown to last for years longer than brush applications.
- Primer is essential. A rust-inhibiting primer provides the adhesion your faucet needs to withstand daily water exposure.
- Light, multiple coats are more effective than one thick coat. This technique helps prevent drips and enhances durability where it counts.
- A topcoat seals everything. I always apply a clear coat for additional protection against cleaning products.
You will likely need touch-ups eventually. However, with spray primer, quality spray paint, and a protective topcoat, you can expect years of solid performance on your most-used fixtures.
Apply Light, Even Coats to Prevent Drips
Why do so many DIYers end up with paint pooling at the base of their faucet like some kind of abstract art installation? They are spraying too heavy. Shake your spray paint thoroughly, then apply thin, light coats instead of one thick layer. This is essential for achieving professional results.
I use a two-coat strategy. The first coat must dry completely before I spray again. For textured areas around the tap, I employ q-tips and masking tape to prevent excess buildup. Multiple light coats provide even coverage without drips. This primer-and-paint approach requires patience, but it leads to successful faucet painting.
Paint, prime and convert rust in one step - water based rust converter with latex metal primer

Primer spray paint is designed to protect heavily rusted surfaces

【CONVERTS RUST INTO A PROTECTIVE COATING】Transform existing rust into a durable protective coating that helps isolate moisture and oxygen from metal surfaces. This rust converter and metal primer helps slow future corrosion while improving the appearance of lightly to moderately rusted metal.
Allow Proper Drying Time Between Each Coat
You’ve nailed those light coats, but many DIYers make a common mistake: they apply the second coat before the first one is actually dry.
I learned this the hard way. Rushing your drying time between coats can ruin everything you’ve built. Here’s what I do now:
- Wait the full time. Most spray paint needs at least an hour minimum, but I’ve found two days provides better durability.
- Check for tackiness. I touch a hidden spot with my finger; if it’s sticky, it’s not ready.
- Don’t tape early. I wait a full day before masking anything off the faucet.
- Account for humidity. Moisture can significantly extend drying time.
Your patience is essential. Rushing this step can lead to peeling and tackiness that will be problematic later.

TWO-CAN SYSTEM – Dupli-Color Shadow Chrome Black-Out Coating is a two-can paint system that creates the popular look of black chrome on polished metal or chrome surfaces for cars, trucks and motorcycles.
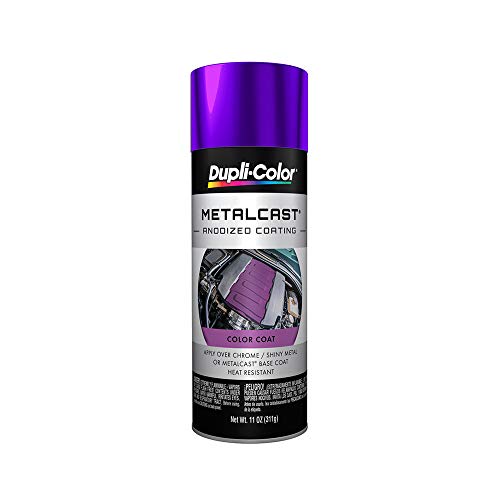
AUTOMOTIVE PAINT – Dupli-Color Metalcast Anodized Spray Paint turns ordinary chrome pieces into a bright, transparent-colored metallic finish in an easy one-step process.

Works on virtually any surface including wood, plastic, metal, fiberglass, concrete, wicker, vinyl and more
Spray Paint for Faster, Smoother Coverage
If you’re serious about achieving a factory-finish look on your faucet, spray paint is your best option. Spray paint delivers even coverage that a brush cannot match. I start with a quality primer; spray primer dries fastest, though brush primer works if you’re patient. Then I apply two light coats of spray paint, never one heavy coat. This is essential because heavy coats can drip, pool, and ruin the finish. I learned that the hard way. Light, thin layers dry faster and provide a professional appearance. Use Rust-Oleum or similar metal paints designed for this. Be meticulous when masking everything around your faucet; painter’s tape and masking film are important tools. The quality of the finish you achieve is worth the extra setup time.

High Quality Flawless Lacquer: Polar Flawless Clear Lacquer Spray paint provides a professional-grade, clear acrylic coating with quick-drying properties. It’s non-yellowing and delivers a smooth satin finish on both bare and painted surfaces, whether indoors or outdoors.
Durable Semi-Gloss Protection: Enhance the longevity of your paint job with a clear, non-yellowing semi-gloss finish that resists chips, stains, scratches, and peeling for years of protection.
Hand-Paint Details With a Small Brush
Spray paint works well for flat surfaces, but those tight crevices around the faucet base require a regular-sized paintbrush with a short handle to reach the areas that spray can’t access. For stubborn edges and hard-to-reach spots, I use Q-tips, which help maintain clean tape lines and prevent paint bleed that can ruin the job.

PAINT REMOVAL MADE EASY: Lift Off’s patented, water-based formula that safely removes old and new latex paint, acrylics, latex enamels, stencil paints, and more
【Permanent Hold & Shine】: Topwey Diamond Painting Sealer prevents diamond beads from falling off and ensures a permanent hold, a glossy finish, and keeps your artwork clean and vibrant. Keep your masterpiece shining like new for years to come!

Softens Caulk for Easier Removal Helps break down and soften caulk and sealants to make removal easier during repair and renovation projects.
Reaching Tight Crevices
How do you tackle those infuriating gaps between the faucet base and sink without creating a paint-clogged mess? Spray painting and brush-on techniques both demand precision when addressing tight crevices. Here’s what works:
- Q-tips or thin-tipped tools – I dab paint into narrow gaps after laying down a light base coat.
- Small brushes with short handles – These reach spots standard brushes can’t access, providing control around taps.
- Ultra-thin coats – I apply multiple layers instead of heavy ones to avoid drips in recessed areas.
- Tacky removal technique – I wipe excess paint while still wet using a fine brush, reducing visibility.
Sand nearby surfaces beforehand. Wipe dust away with a damp cloth. These steps effectively eliminate the overflow problem I used to battle constantly.
Q-Tip Application Technique
Those cotton swabs in your bathroom cabinet are a useful tool for Q-tip application on faucets. These little swabs can reach spots my brush simply can’t—tiny grooves, corners, and decorative details. I dip my Q-tip lightly into thin coats of paint, avoiding overload for better control. One swab covers about a half-inch before I switch to a fresh cotton swab. I dab rather than brush, building thin coats with precision paint taping for better results. This technique prevents overflow onto chrome or porcelain. For tight angles, I twist the swab slightly, using its tapered end like a miniature brush. It has transformed how I handle intricate faucet work, resulting in clean edges and professional-looking details.
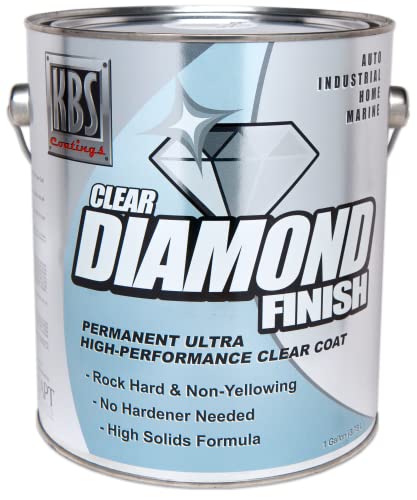
Seal Your Painted Faucet With a Clear Topcoat
Want to know what separates a faucet paint job that looks great for a year from one that actually lasts? A clear topcoat sealer makes the difference. Here’s what I’ve learned:
- Wait for complete dryness before applying your topcoat; rushing this step can ruin finishes.
- Lightly scuff the surface to improve adhesion and prevent peeling over time.
- Choose compatible products; match your topcoat type (oil-based or enamel) to your base paint.
- Protect against moisture and wear from daily use and cleaning agents.
I have applied topcoats same-day or on separate occasions, and both methods work effectively. That protective layer shields your work from bathroom humidity, soap, and constant handling. Adding this step transforms your faucet from a temporary fix into something durable.
Common Mistakes: Heavy Coats, Silicone, and Overspray
I’ve seen too many faucet projects fail in the final stretch, often for the same three reasons. First, people tend to apply heavy coats and then wonder why their finish drips like melting ice cream. It’s important to use light coats instead; multiple thin layers are more effective than one thick layer. The second mistake is not removing silicone beforehand. That residue sabotages adhesion and leads to peeling issues. The third mistake is overspray, which can damage surrounding surfaces. It’s essential to use painter’s tape consistently. I learned the importance of planning your spray order, masking everything adjacent, and applying light coats patiently. Addressing these three issues can significantly improve your project’s outcome.
Clean Your Painted Faucet: Avoid Harsh Chemicals
How do you keep that fresh paint job from turning into a peeling disaster? It’s all about cleaning smart.
Here are some key insights from my experience:
- Use gentle cleaners only. Mild soap and hot water work best; avoid aggressive chemical sprays that can damage your finish.
- Light scrubbing works best. Soft cloths and minimal pressure will help preserve that paint job you worked hard on.
- Avoid harsh chemicals completely. One slip with a solvent-based cleaner can cause your paint to peel away.
- Dry thoroughly after cleaning. Water spots and chemical residue can negatively affect adhesion.
Your painted faucet requires careful treatment. It’s a delicate investment, so skip the industrial cleaners for better long-term results.
Plan for Touch-Ups or Know When to Replace
Even with meticulous cleaning and careful maintenance, your painted faucet won’t stay pristine forever, and that’s okay. Touch-ups are inevitable, especially in high-traffic bathrooms where wear occurs quickly. I keep clear topcoat on hand for quick fixes, reapplying thin coats where my faucet shows stress marks.
Sometimes touch-ups work brilliantly; other times they don’t. If I notice persistent chipping or edge peeling despite solid prep and priming, I stop trying to fix it. Replacement is often more effective than endless spray paint cycles that yield diminishing returns.
I track what actually lasts—oil-based Rust-Oleum with light coats performs well in my experience. By scheduling re-evaluations every few months, I can catch problems early. It’s important to recognize when you’re expending effort without results. This approach improves home maintenance.