I’ve secured countless gazebos, and skipping concrete anchoring invites disaster.
First, inspect your slab for cracks and ensure it’s solid.
Mark holes at least 3–4 inches from the edges, using diagonal measurements for accuracy.
Drill with a carbide bit perpendicular to the surface.
Install wedge anchors flush, then torque bolts to specification.
Monthly tightening and storm checks ensure everything remains secure.
Get the specifics right, and you’ll be prepared for hurricane season.
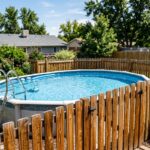
Step 1: Check Your Gazebo Frame and Concrete Slab

Why do so many people skip this step and regret it later? Rushing straight to drilling can lead to significant issues.
First, I inspect my gazebo frame carefully, checking that all base plates have proper anchor holes and that the legs sit level and square. This foundation is crucial. Next, I examine the concrete slab itself. I look for at least 4 inches of solid concrete, completely free of cracks or crumbling patches. Edge distance is critical; I keep my measurements well away from slab edges.
I also scout for hidden dangers like post-tensioning lines or radiant heating systems before considering drilling into concrete. This preliminary assessment determines whether I will use wedge anchors or alternative methods. This upfront work prevents costly mistakes and ensures a secure installation.

【304(18-8) Stainless Steel】Levanco wedge anchors are 100% 18-8 (304) Stainless Steel, with the highest corrosion resistance and durability. It's the best choice for you to use them in marine, saltwater and other humid environment.
【304(18-8) Stainless Steel】Levanco wedge anchors are 100% 18-8 (304) Stainless Steel, with the highest corrosion resistance and durability. It's the best choice for you to use them in marine, saltwater and other humid environment.

Step 2: Mark Anchor Holes on Your Concrete

How you mark your anchor holes determines everything that comes after, and I learned this the hard way. I start by aligning my base plates precisely on the concrete, then trace through each mounting hole with a marker. I keep those hole marks at least 3–4 inches from the edge; this distance is important because it helps prevent cracking in the future. I always verify my layout is square using diagonals to confirm the concrete slab is true. Before I drill, I inspect for expansion joints and existing cracks; I never drill across them. I check that my concrete markings are clear and visible. Getting this step right ensures your masonry drill work goes smoothly, and your gazebo remains secure for years.

ICC-ES Approved: ESR-2251 certification for use in uncracked concrete. Meets building codes for structural applications and heavy-duty machinery

Wedge Anchors Specifications - Diameter - 3/8", Length - 3-3/4", Qty - 20 pieces

[Premium 304 Stainless Steel]: Our wedge anchor is crafted from high - grade 304 stainless steel. The 304 stainless steel ensures that the 3/8 concrete anchors will maintain its integrity and strength over time.
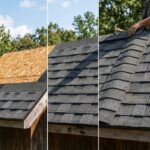
Step 3: Drill and Install Concrete Anchors

Once your hole marks are crisp and verified, grab your carbide masonry bit and start drilling those holes. This step is crucial for ensuring a stable gazebo during windstorms.
Drill each hole ¼ inch deeper than the length of your wedge anchors, keeping the masonry bit perpendicular to the slab. Then, insert the wedge anchors and tighten them flush with the concrete surface. Rushing this process can lead to significant issues.
Before finishing, verify that your base plates are level and flat. Also, check the slab thickness; a minimum of 4 inches is necessary to prevent the anchors from pulling through under load. This attention to detail distinguishes experienced installers from novices.

PROFESSIONAL CARBIDE DRILL BIT SET:This masonry drill bit set includes 12PCS carbide drill bit, suitable for cement, brick, ceramic, tile, wood, plastic, marble, etc

【10PCS Masonry Drill Bit Set】Includes 10 commonly used sizes from 5/32" to 1/2" for different drilling needs. A practical carbide drill bit set for installing wall anchors, screws, shelves, fixtures, bathroom hardware, kitchen accessories, and general home repair projects.

2 cutter carbide tip of masonry drill bit set maximizes carbide surface contact for longer bit life.
Step 4: Bolt Down Your Anchors Securely
This is where I’ve seen too many installers get sloppy, and I’ve made the same mistake myself. You’ve got your wedge anchors seated flush, so the next step is critical: bolting everything down with proper torque. Always check the manufacturer’s specifications; guessing is not an option. Hand-tighten your nuts first, then use a torque wrench to reach the exact specification. This ensures load distribution across your base plates and prevents plate twisting that could cause issues later. I’ve learned that under-tightened anchors loosen over time, while over-tightened ones can crack concrete. After torquing, verify that your base plate alignment remains square, as concrete anchors can shift slightly during tightening. It’s also important to inspect quarterly for corrosion resistance issues and any loosening. This step determines whether your gazebo remains stable or becomes unstable over time.

Material Of 4x4 Post Base: Made of Solid Steel, Black Powder Coated, Rustproof and Strong.

Solid Steel - The post bracket of this column is made from solid steel. Black premium powder coating. Absolutely rustproof.

Material Of 4x6 Post Base: Made of Solid Steel, Black Powder Coated, Rustproof and Strong.
Step 5: Keep Your Concrete Anchors Tight
Getting your anchors tightly secured in Step 4 is just the beginning. Concrete anchors require ongoing attention beyond their initial installation.
| Maintenance Task | Frequency |
|---|---|
| Tighten nuts | Monthly |
| Inspect corrosion | Biannually |
| Check plate flatness | After storms |
I check my anchors regularly because loose connections can compromise wind resistance and load transfer. I use torque specifications when available, as they provide essential guidelines. After storms, I recheck stability immediately. Inspecting for corrosion allows me to address rust before it weakens the grip. Biannual walkthroughs help catch issues early, ensuring holes are clean and properly seated.
Your gazebo’s security relies on this step. Make it a priority.

Install Concrete Anchors with Consistency: Designed to set wedge anchors and drop in anchors securely using an SDS Plus hammer drill.
Designed for Wedge Anchors: Specifically designed to set concrete wedge anchors securely and evenly.

SDS-Plus Shank Compatibility - Works with all standard rotary hammers