I’ve watched too many DIYers skip the fundamentals. Shingling a shed roof boils down to five critical steps. First, grab architectural shingles; they will outlast three-tabs by years, and measure your deck accurately. Second, prep that deck and install the drip edge properly. Third, lay underlayment with the correct overlap to stop water intrusion. Fourth, nail shingles row by row using chalk lines as your guide. Finally, cap the ridge strategically so wind-driven rain doesn’t sneak underneath. Get these steps right to avoid costly repairs down the road. Stay tuned for the specifics that will enhance your technique.
Choose Your Shingles and Measure the Roof Deck

How do you choose the right shingles without overspending or risking a roof that won’t withstand the next storm? Three-tab shingles are a budget-friendly option for Alabama sheds, but architectural shingles are my preference; they last 25-30+ years and perform better in high winds.
To measure each roof plane, I multiply length by width and then double that for a simple gable roof to find the total square footage. It’s essential to measure the roofing felt and roof deck with precision. I add 10-15% to account for waste and starter shingles. Then, I convert square footage to roofing squares by dividing by 100. Finally, I calculate the number of bundles needed, estimating around 33 square feet per bundle. I always purchase shingles from the same production lot to ensure color consistency across the roof deck.

PACKING SIZE:Package includes 8 pieces Brown 3-Tab asphalt shingles,size of each piece 39.4" by 13.1" and cover approximately 12.8 square feet;
READ AND UNDERSTAND THE SIZE BEFORE PURCHASING: 8 strips per package. Each = 1 INCH x 35.25 INCHES

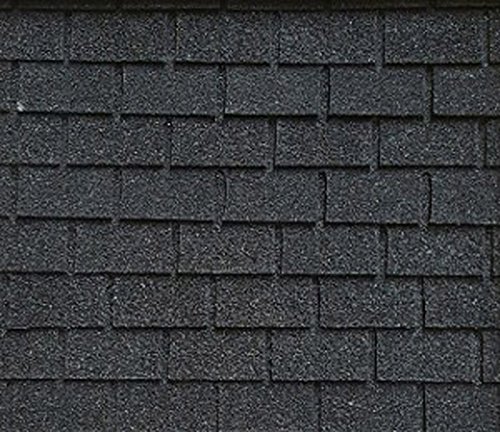
𝐏𝐫𝐞𝐦𝐢𝐮𝐦 𝐌𝐚𝐭𝐞𝐫𝐢𝐚𝐥𝐬: The roof shingles is made of premium asphalt, glass fiber, and colored stone materials, which are waterproof, heat-resistant, wear-resistant, and not easy to crack or deform, ensuring a long service life and reducing the frequency of replacement
Get Your Deck Ready and Add Drip Edge

Before you nail down a single shingle, ensure your roof deck is ready for the job. I’ve learned this lesson after discovering soft spots that should have been caught earlier. I inspect thoroughly for damage or rot, pressing my weight across the entire surface. Once the deck preparation is solid, I install eaves drip edge with the flange flat against the deck, nailing every 10–12 inches. Then I roll underlayment horizontally from bottom to top, overlapping each row by 4–6 inches. This water barrier goes over the drip edge, which is essential for protecting against moisture intrusion. I secure everything with capped roofing nails. This methodical approach to deck preparation and drip edge installation ensures your shed roof shingle installation is durable and effective.

{High Quality} - Made from 26 Gauge Steel painted or Stainless Steel - Painted Steel options are painted with a baked-on 40 year paint finish. - Copper options are 16 ounce pure copper.


Complete Second-Stage Folding (90°-180°): This HTSL25E2 eaves seam bender performs the final stage of roof edge folding — turning a 90° bend into a clean, tight 180° hem. Delivers a secure, professional drip edge finish every time.
Lay Down Underlayment and Your Starter Strip

Getting the underlayment down right is crucial for a roof that lasts, as opposed to one that will leak in just a few years.
Here’s my process for nailing this installation:
- Roll horizontally from bottom to top, overlapping each row by 4–6 inches as you move up the roof deck.
- Secure with capped nails down the center of each row, ensuring the next layer will cover your fasteners completely.
- Overlap the underlayment onto your drip edge so water flows forward, preventing it from sneaking behind.
I always ensure my roofing felt sits flush against the deck before anchoring it firmly. Position your starter strip nails strategically; you are creating a water-shedding system that will protect your shingle installation for decades. Getting this right ensures long-term durability for your roof.
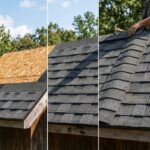
Shingle Your Roof Row by Row
With your underlayment secured, it’s time to start shingling, as this process transforms your roof from a bare deck into actual protection. First, I snap horizontal chalk lines—one at twelve inches up from the starter strip, then every five inches after. These lines help maintain uniformity in the rows. I align the bottom edge of my first shingle with the starter strip, then nail it down using four to six nails per shingle. Each subsequent row overlaps the one below by about five inches; this overlap is essential for effective water shedding and wind resistance. Finally, I cut tabs off shingles to create ridge cap pieces, bending them over the ridge and securing them so the next cap covers each nail. This method ensures a consistent and reliable shingling process.

EASY INSTALLATION - Features a 7.2 in. width for starter shingle course. Saves time, labor, and material costs for efficient roofing projects. Ideal for asphalt shingle and peel stick roofing.
7.2 inch width starter shingle course

NOTE: Listing is for 8 Black 3-Tab Shingles, This is NOT a full bundle of shingles. Will Cover Approximately 12 Square Feet of Roof. Each Shingle is 39.4” by 13.1”
Cap the Ridge and Check Your Work
How does your ridge look so far? Let’s focus on capping that peak. Follow these steps to complete the task:
Let’s focus on capping that peak with strategic nail placement and proper overlapping to block wind-driven rain.
- Start at the windward end, bending your first ridge cap piece over the peak and securing it firmly on both sides.
- Nail strategically; place them about 1 inch from each edge, roughly 5½ inches up from the bottom so the next piece covers them completely.
- Overlap each subsequent ridge piece by 5 to 6 inches, maintaining a straight line and blocking wind-driven rain from sneaking underneath.
Do not skimp on the final piece. Leave those nails exposed and seal them generously with roofing cement. This extra step will prevent leaks in the future. Check your alignment as you go; crooked ridge caps indicate poor workmanship.