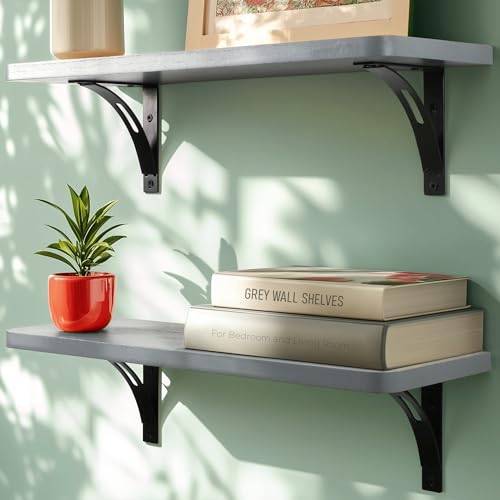
I learned the hard way that floating shelves require precision, not eyeballing. Measure your wall space first, marking obstructions and studs, which are typically 16 inches apart. Space shelves 10–16 inches vertically, adjusting for your room: kitchens need 18–24 inches above counters, while living rooms should have roughly 10 inches above couches. Use a stud finder consistently; drywall anchors can fail. Create cardboard templates before drilling. Mark everything, test your sightlines, and reorganize as needed. Once alignment feels right, proceed with the actual installation.
Measure Your Wall Space and Map Shelf Locations

How many times have I measured a wall, skipped the planning step, and drilled holes only to realize I’d completely botched the spacing? Too many. That’s why I insist on grabbing my tape measure and actually mapping things out first.
I measure the available wall space—both width and height—noting every obstruction: outlets, switches, anything that might interfere with my floating shelves. Then I mark my spacing guidelines. I typically space shelves 10–14 inches apart, positioning the first one at eye level, around 4–5 feet up.
I locate wall studs, which are usually 16 inches apart, because my brackets must align there for proper support. I create cardboard templates, sketch pencil marks, and even use painter’s tape. This simple template layout prevents costly mistakes. Measuring twice and drilling once helps avoid frustration every time.
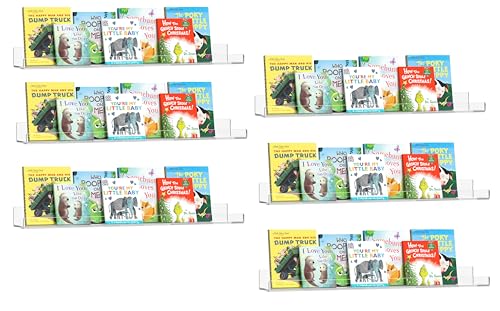
Stylish for Your Home Library: HBlife acrylic floating shelves allow you to claim wall space that typically goes unused and turn it into an artful, savvy storage solution for...
Adjust Spacing for Kitchen, Bathroom, or Living Room Needs

Where you install your shelves is just as important as how you space them. I learned this by hanging kitchen shelves too high and watching my dishes gather dust instead of staying accessible. In kitchens, I place shelves 18–24 inches above countertops with 15–21 inches between them for practical dishware storage. In living rooms, I keep shelves roughly 10 inches above couches and stagger them 12–16 inches apart for visual balance. I always align with wall studs for proper weight capacity and use a level with pre-marked templates to nail the layout. Eye-level placement around 4–5 feet works well. The purpose of your room determines everything; measure thoughtfully and plan deliberately to achieve effective floating shelf arrangements.

GREAT SPACE SAVER: The kitchen organization and storage cabinet is moveable, you can use it turned like a 3 tier rustic corner shelf or you can straighten it out and use it as a regular tiered shelf. Versatile design can surprise your by adding about 30% more space for your countertop.

Expandable & Stackable Countertop Organizer: The length of this cabinet organizer can be adjusted from 15.7" to 25.6" depending on how you want to arrange your space. Kitchen Countertop Organizer in size:15.7 to 25.6 * 8.7* 9.8 inches, Shelf riser also can be easily stacked up to a 2 tire kitchen organizer.

【Natural Bamboo,Premium Quality】Crafted from high-quality natural bamboo,each piece is meticulously selected to ensure toughness and clarity of grain. With the combination of its natural material and exquisite craftsmanship, the bamboo rack can stand the test of time in the process of use.
Start With 10 to 16 Inches Between Floating Shelves

Once you’ve determined the placement of your shelves in your room, it’s time to focus on the vertical spacing. This is where many people encounter difficulties. Start with 10 to 16 inches between floating shelves. This range allows for varying item heights without overcrowding.
For displays with multiple shelves, I recommend a core range of 12 to 16 inches. This creates consistent vertical intervals that establish a natural rhythm on the wall. Use a level and templates to accurately mark these measurements before drilling into wall anchors and stud placement; avoid eyeballing. If you’re showcasing taller items or artwork, aim for the 16-inch spacing. Visual balance is important for an appealing arrangement.


Well-designed Floating Shelves: Our white floating shelves for wall are made of MDF Laminate. These wall shelves can organize daily sundries to tidy your space, display your art pieces on the wall to decorate your home, and make it full of aesthetic flare.

𝐌𝐨𝐝𝐞𝐫𝐧 & 𝐌𝐢𝐧𝐢𝐦𝐚𝐥𝐢𝐬𝐭 𝐒𝐭𝐲𝐥𝐞 – Featuring clean lines and a rustic finish, these wall-mounted shelves 𝐚𝐝𝐝 𝐚 𝐦𝐨𝐝𝐞𝐫𝐧 𝐭𝐨𝐮𝐜𝐡 to any room, suitable 𝐟𝐨𝐫 𝐛𝐚𝐭𝐡𝐫𝐨𝐨𝐦, 𝐛𝐞𝐝𝐫𝐨𝐨𝐦, 𝐥𝐢𝐯𝐢𝐧𝐠 𝐫𝐨𝐨𝐦, 𝐤𝐢𝐭𝐜𝐡𝐞𝐧, 𝐎𝐟𝐟𝐢𝐜𝐞, 𝐋𝐚𝐮𝐧𝐝𝐫𝐲 𝐑𝐨𝐨𝐦, 𝐚𝐧𝐝 𝐛𝐨𝐨𝐤 𝐝𝐢𝐬𝐩𝐥𝐚𝐲
Locate Wall Studs to Plan Horizontal Placement
Finding wall studs is essential for a successful installation. I grab my stud finder and locate the center of each stud, which are typically spaced 16 inches apart (or 24 inches on some walls). I mark those spots with a pencil, creating lines across the wall for accurate alignment.
I prioritize hitting studs for mounting points rather than relying solely on drywall anchors. If my bracket locations don’t align with the studs, I either install into multiple studs or add blocking behind the wall.
I drill pilot holes at each location. Keeping them level and evenly spaced helps prevent tilt. This horizontal placement strategy ensures my shelves remain secure for years. Studs serve as the backbone of any sturdy installation.

Works on wallpaper & fabric: depth range of ¾-in through drywall and works on surfaces covered in wallpaper and fabric

TIPS: 1. Calibration is necessary before using the stud finder function. 2. Laser level is manual-leveling, not self-leveling, please use the two bubble vials for accurate horizontal, vertical and cross lines. 3. Two bubble vials only work and light up when the Laser Mode is active, not in the detection mode. 4. Self-adhesive strips are not suitable for dusty, coarse surfaces, wallpaper, or drywalls, etc. Replace the strips if they are dirty or not sticky. 5. Class II laser safety product, output < 1mW. 6. Note: NOT designed for use on LATH and PLASTER WALLS. Works best on DRYWALL and WOOD WALLS

EASY TO USE: The StudBuddy is the world's simplest magnetic stud finder tool. The StudBuddy works with all drywall construction by using powerful magnets to locate the screws in the studs.
Visualize Your Layout With Paper Templates Before Drilling
Why do so many people drill holes first and ask questions later? I’ve made that mistake, and creating paper templates before drilling significantly improves your approach to spacing floating shelves correctly.
Creating paper templates before drilling significantly improves your approach to spacing floating shelves correctly.
I cut cardboard to match your exact shelf dimensions and position them on the wall, testing sightlines and balance without causing permanent damage. Here’s what I always do:
- Mark stud centers with pencil for confident bracket placement
- Label intended heights for books, plants, or decor to confirm spacing decisions
- Reorganize templates freely until consistent alignment feels right
- Transfer measurements directly to wall studs when satisfied
This visualization process helps avoid costly mistakes. You can confirm shelf height, spacing, and overall harmony before committing to a single hole. It is a smart investment for your floating shelves project.
Wall Shelves for Wall Storage Set of 2 – The size of the Willowy wall shelves is 17" x 6" x 0.6". This set of 2 Willowy wall shelves for bathroom or bedroom offers extra storage space in the bathroom, guest bathroom, kitchen, bedroom, or living room. You can install them anywhere you like—let’s make life simpler.

Smart Wall Storage for Small Spaces – Measuring 17" x 6" x 0.6", these compact shelves are perfect for maximizing unused wall space. Ideal for tight corners, next to vanities, or above desks and beds, each unit is built to hold up to 50lbs.

Hanging Shelves for Wall Spaces – Maximize wall space with these 17" x 6" Paulownia wood shelves, ideal for bedrooms, entryways, or compact rooms.