I’ve resized plenty of rugs, and it’s doable if you’ve got sharp tools, patience, and a solid binding plan. You’ll need a utility knife, straight edge, painter’s tape, and quality binding material; Instabind works great. Mark your cut lines carefully from the back, cut slowly, and immediately bind those edges with hot glue or self-adhesive tape to prevent fraying. The binding is crucial for achieving a professional-looking finish. Get your technique right, and you’ll save significantly compared to replacing the rug.
Why Resize a Rug Instead of Buying New

Resizing a rug allows you to preserve something you already cherish while minimizing waste. It alleviates the guilt of replacing a perfectly good item. Additionally, it helps maintain your existing decor without the hassle of searching for new matches.
The key is to apply edge binding after trimming to prevent fraying. This finishing touch elevates your DIY project, making it look polished and professional. As a result, your “almost perfect” rug becomes the ideal fit for your space.

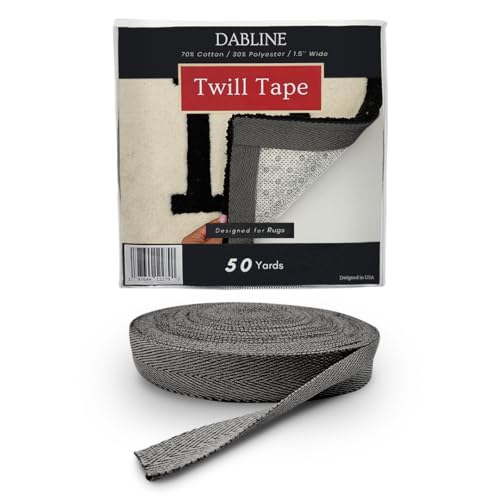
Regular style Instabind is an easy to use DIY binding that is perfect for binding carpet edges in your home. This is perfect for the homeowner wanting to get a professional looking bound rug without the high prices of sending it out to a professional. Instabind will give you a professional look without the visible stitching that can detract from the overall appeal of a professionally bound rug.

Regular style Instabind is an easy to use DIY binding that is perfect for binding carpet edges in your home. This is perfect for the homeowner wanting to get a professional looking bound rug without the high prices of sending it out to a professional. Instabind will give you a professional look without the visible stitching that can detract from the overall appeal of a professionally bound rug.

Wear-Resistant Material: This trim is made of PVC material, which is very wear-resistant and can effectively protect the edges of your carpet, preventing them from wearing out and tearing
Rug Types That Can and Cannot Be Cut

Rag and jute rugs are risky. They are not suitable for resizing because they shed excessively and resist binding treatments.
Vintage rugs can work if handled properly. Trim from the back to minimize shedding, then apply proper edge binding, either Instabind or professional binding, to prevent fraying. Straight cuts are essential. Strong binding is crucial. Pay attention to these details, and you can achieve a workable result.
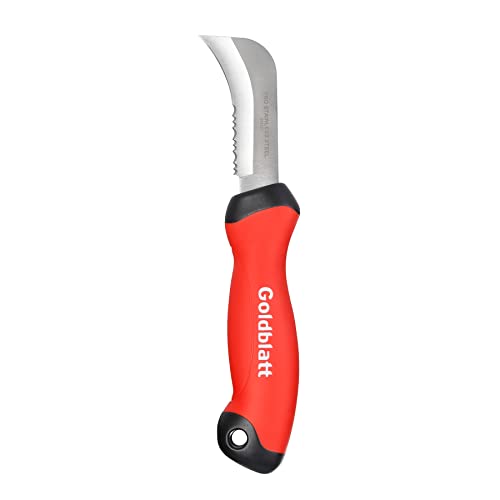
Serrated & Dual Honed Edge Blade: Serrated blade for easy cutting and trimming; Precisely dual honed edge and hollow-ground for reduced binding for maximum cutting leverage for great sharpness; Total length 8-7/8 inch. Weight 120 grams

10 Pack Hook Blades fit most standard utility knives and box cutters. The best Hook replacement blades for our Home Planet Gear Box Cutter Retractable Utility Knife

Strong heavy-duty utility knife retractable – wider blades for easy cutting and comfort grip handle
DIY vs. Professional: When to Do It Yourself

So, should you grab your rotary cutter and go for it, or call in the pros?
I’ve tried DIY binding, and it’s messier than it looks. Here’s what I’ve learned:
- Cost comparison – DIY might save you money initially ($1.50/linear foot), but prices jump fast ($3/linear foot once you factor in supplies).
- Time investment – Measuring, cutting, applying edge binding with Instabind, hot-gluing, and trimming loose fibers requires significant effort.
- Durability concerns – Professional binding offers polished, finished edges using colored samples; DIY results can vary widely.
- Complexity reality – Binding is genuinely trickier than it seems; community feedback confirms hiring locals like H&R Carpets is often more effective.
Choosing a professional will yield durable results, attractive trim options, and a higher quality finish for your rug.
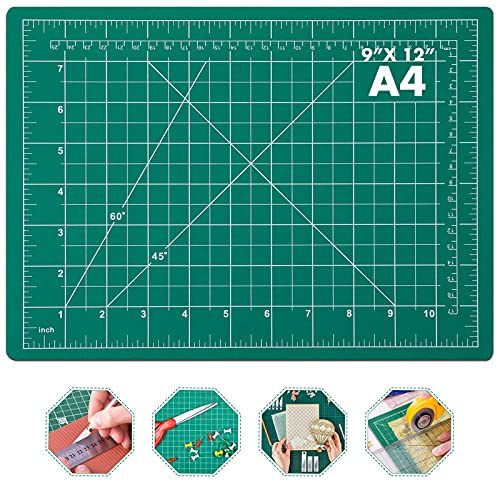
【SEWING CUTTING MAT】Aneuzs self-healing cutting mat protects your work surface. Compatible with rotary cutters and straight blades, won't hurt the cutter blade and keep the blade sharpness. Ideal for artist, crafters, quilters, engraver and hobbyists

【SEWING CUTTING MAT】Aneuzs self-healing cutting mat protects your work surface. Compatible with rotary cutters and straight blades, won't hurt the cutter blade and keep the blade sharpness. Ideal for artist, crafters, quilters, engraver and hobbyists

【Bulletproof Your Table & Blades】5 layer construction: two special self-healing surfaces reseals deep cuts like magic, keeps your cutting mat stay smooth for 5X longer life, say goodbye to frequent replacement! The cut-resistant interlayer guards against blade penetration, ensuring long-lasting protection for your worktable. Safe for rotary cutters and all standard blades
Essential Tools for Cutting a Rug
What separates a clean, professional-looking cut from a ragged, disaster-prone hack? The right tools. I’ve learned this the hard way; you don’t want to skimp here.
| Tool | Purpose | Why It Matters |
|---|---|---|
| Sharp utility knife | Trims edge binding precisely | Prevents pile damage |
| Self-healing cutting mat | Provides protected cutting surface | Keeps cuts accurate and clean |
| Straight edge/ruler | Guides even cuts | Maintains symmetry and alignment |
Painter’s tape is excellent for marking cut lines; it has saved me from countless mistakes. A hot glue gun and duct tape are essential for reattaching binding afterward. These tools are investments in achieving results you can be proud of. With quality tools working together, cutting your rug becomes manageable.

Built-in lip catches on cutting mat to prevent slipping
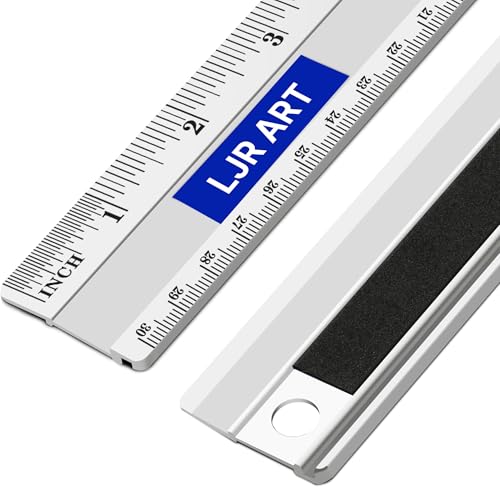
DUAL UNIT MEASUREMENT SYSTEM – This 12 inch ruler features both inch and centimeter scales, allowing precise measurement for drafting, drawing, and technical work across art, office, and classroom settings.

PERFECT STRAIGHT CUTS – This straight edge cutting tool works as a circular saw straight cut guide, delivering clean and precise results on plywood and sheet materials
How to Measure and Mark Your Cut Lines
Now that you’ve got your tools lined up, it’s time to figure out where you’re cutting. Getting your measurements right prevents costly mistakes.
Here’s my process:
- Use a straight rug edge as your guide for symmetry.
- Mark your new dimensions around the entire perimeter with painter’s tape.
- Plan four cuts to reduce width evenly on both sides.
- Double-check measurements twice before cutting once.
I place my rug on a cutting mat, then apply painter’s tape along my cut lines. This tape creates precise visual guides to follow confidently. The painter’s tape won’t damage your rug, and it holds steady during cutting. This simple step has saved me from disaster more times than I’d like to admit.

✅[DUAL POWER OUTPUTS] RoMech hot glue guns offer dual temperature setting, feed glue at your pace. The simple power switch allows quick temperature adaptation for all your projects. 60W is suitable for crafting projects and delicate materials, maintains 300°F heating temperature and 0.35 oz/min flow rate. 100W is ideal for wood and heavier material, heats up fast at 410°F and higher 0.53 oz/min flow rate.

✔ Fast Preheating - 20w glue gun features a fast 1 minutes warm up time; Infused with a PTC ceramic heating system, mini hot glue gun heats up and releases glue within 1-2 minutes and then keep the temperature constant automatically

Can reach 380 degrees F for optimal bonding with metal, wood, ceramics, and other porous and non-porous materials
Plan Your Edge Binding Strategy Before Cutting
Before making that first cut, it’s essential to consider your edge binding. Planning your strategy is crucial before you start trimming. The binding is your rug’s lifeline. I determine where to cut on all four sides, aiming for equal reductions to maintain balance. I use painter’s tape to mark straight line cuts, which prevents accidental slicing into the binding’s loop. Then, I trim the binding from the back first, reducing its width without damaging it. Once I’ve removed the excess, I align the new edge with the existing binding and temporarily secure it with duct tape to ensure everything fits straight. Finally, I consider finishing those exposed edges professionally, possibly with Instabind, to achieve a seamless look.

Regular style Instabind is an easy to use DIY binding that is perfect for binding carpet edges in your home. This is perfect for the homeowner wanting to get a professional looking bound rug without the high prices of sending it out to a professional. Instabind will give you a professional look without the visible stitching that can detract from the overall appeal of a professionally bound rug.
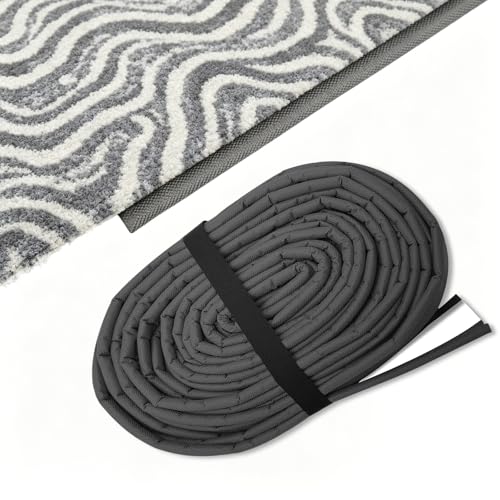
Made of durable Oxford fabric that is waterproof and wear-resistant.
BOOST YOUR RUG'S VALUE: Enhance your rug's appeal and sale value with a professional and clean finish, ultimately boosting its sale value and overall market appeal.
Keep Your Floors Safe While You Cut
Your floor and your sanity depend on what you put under that rug before making your first cut. I learned this the hard way. Here’s how I protect my floors:
- Layer a cutting mat underneath the rug’s entire work area for cushioning and grip.
- Add cardboard or plywood beneath the mat for extra floor protection against sharp tools.
- Use painter’s tape to secure everything in place so nothing shifts mid-cut.
- Keep the setup elevated slightly to prevent glue or fibers from seeping onto wood or tile.
Spending ten minutes on setup saves you from expensive repairs later. Friends have ruined beautiful hardwood by skipping this step. Protect your investment, both the rug and your floors.

ERGONOMIC: The heavy duty carpet knife is made of zinc alloy with soft TPR grip, which offers stable and comfortable control.The lightweight carpet knife is made of ABS plastic and its ergonomic handle provides firm grip for precision cutting.

Heavy-Duty Utility Knife : Aluminum alloy design with rust-free powder-coat makes the box cutter durable and lightweight (3.2 oz), passing the 1.5m drop test. SK5 razor blades through 1922 °F heat treatment are up to 64 HRC. For long-lasting, extremely durable cuts and slices on boxes, plastic packaging, and straps

Two 10 Pack Big Hook Blades fit most standard utility knives and box cutters. The best Hook replacement blades for our Home Planet Gear Box Cutter Retractable Utility Knife
How to Cut Straight and Avoid Common Mistakes
I’ve learned that marking your cut lines with painter’s tape is essential. I’ve seen too many rugs end up with crooked edges because someone relied on their eye instead of using a straight edge as a guide. I plan four evenly spaced cuts to trim width symmetrically from both sides, measuring twice before I touch the blade, as you cannot un-cut a rug. The biggest mistake I made early on was rushing the binding; it’s important to take your time aligning it with the existing edge. Use duct tape to hold it temporarily, then seal it with hot glue for a clean finish that distinguishes professional work from amateur results.

SELF-HEALING DESIGN: Made of 5-layer PVC material, Unique self healing properties protects your craft knives, straight cutting blades, rotary cutter and work surface. Re-seals after every cut.

EXTRA LARGE CUTTING SURFACE: Perfectly sized for cutting full widths of fabric, extra-large squares, and long strips with ease

SELF HEALING ROTARY MAT - Our rotary mat is self-healing, it reseals surface cuts for a continually smooth cutting surface. Using a self-healing cutting mat extends the life of your blade and protects the surfaces of your work area.
Marking Precise Cut Lines
How do you keep a straight line when armed with nothing but scissors and hope? Marking is everything; it’s where I separate success from disaster.
Here’s my approach:
- Place your rug on a self-healing cutting mat for stability and protection.
- Use painter’s tape along your planned cut lines to create crisp visual guides.
- Measure twice, mark twice—I cannot stress this enough for even width reduction.
- Deploy a long straight edge to ensure accuracy across the entire rug.
I measure from the center outward, marking new dimensions before using scissors. The painter’s tape acts as a safety net, keeping lines crisp and preventing my hand from wandering. Those few extra minutes spent marking precisely can save hours of regret later. It is the difference between a professional-looking rug and a mangled mess.
Avoiding Common Cutting Errors
Even with perfect markings and a steady hand, I’ve watched perfectly good rugs get butchered by a single careless mistake, and most of them happen right when you think you’re home free. Don’t rush the actual cutting. Slow, deliberate strokes from the back prevent accidental shedding and protect your edge binding investment. I’ve seen people nick their fringe in those final inches, which is devastating. Also, never skip the underlayment beneath your rug. Without it, you’ll slip, shift, and ruin your alignment completely. Finally, the biggest error is waiting to bind that fresh edge. Procrastination can lead to fraying. Reattach binding immediately with something like Instabind before fraying starts. Taking thirty extra minutes upfront can save you from complete redo’s later.
Fixing Uneven Cuts and Fraying After the Blade
When I first started cutting rugs to size, I would finish my cuts thinking the hard part was over, only to watch in horror as the exposed edges unraveled like cheap yarn within hours.
Here’s what I learned:
- Apply edge binding immediately after trimming to seal those vulnerable fibers before they spiral out of control.
- Use hot glue to stabilize everything and lock the binding firmly in place.
- Trim loose fibers and glue strings for a clean, seamless edge that looks professional.
- Work from the back during cutting to minimize shedding and protect the integrity of the pile edge.
Addressing fraying promptly prevents the need to redo entire sections. Your rugs and your mental well-being will benefit.

Made in the Japen by Shinwa Measuring Instruments

Premium Cutting Tools: Turn most circular saws, jig saws, or trim routers into precision, edge-guided tools

High-quality tool: The Victor aluminum cutting ruler is a high-quality tool made of durable aluminum. It is durable and resistant to wear and damage.
Binding Your Cut Rug Edges to Prevent Fraying
The moment you finish cutting your rug, those exposed fibers need immediate attention. Rug binding is essential if you want a polished, finished look.
I use binding material like Instabind and hot glue; this combination works effectively. I align the new binding with my existing edge binding and use painter’s tape to mark precise cut lines. This helps keep everything straight and professional-looking.
The trick is to cut slowly from the back and let that binding hang slightly over the edge during gluing. This significantly reduces shedding.
While professional binding services are available, with the right materials and a bit of patience, DIY binding can be successfully accomplished on many rugs.

INCLUDES 30 PREMIUM CLEAR GLUE STICKS & FAST 2-MIN HEAT-UP: Get started right away with a full pack of 30 high-quality, clear PVC glue sticks (100*7mm). Enjoy longer-lasting bonds compared to standard sticks. Heats up ready for action in just 1-2 minutes and maintains a constant temperature for reliable performance

【Fast Heating】This mini hot glue gun heats up and releases glue within 1-3 minutes, fits φ0.28inch(7mm) glue sticks(Please note that the size of the hot glue gun and sticks set is small, please confirm the size of the glue gun and glue stick before purchasing).

[RAPID HEATING & SAFETY] ROMECH Mini glue gun offers quick preheating in just 2-3 minutes and comes bundled with 30 glue sticks (0.28"/7mm diameter), providing an ample supply for your instant crafting or repair needs. The CE-certified hot glue gun has a built-in security fuse that prevents overheating and ensures safe use.
Glue Your Edges to Prevent Fraying
- Hot glue works fast. I apply it directly along cut edges for immediate adhesion.
- Self-adhesive tapes secure bound edges; they are reliable when you’re learning.
- Test on scrap first. You don’t want surprises on your actual rug.
- Let it cure completely. Patience prevents peeling later.
I learned that Elmer’s glue and Fray Check weren’t effective for me. Hot glue provides speed without the mess, while adhesive tapes offer reliability. Layering both methods creates edges that won’t unravel. Your resized rug deserves a durable finish.
Maintaining Your Resized Rug Over Time
I’ve learned the hard way that cutting a rug doesn’t end when you finish binding the edges; that’s really just the beginning of keeping your work looking sharp. It’s important to develop a regular inspection routine, checking those bound seams every few months for separation or wear. Reapplying glue or touching up the binding can prevent major unraveling issues later. With proper cleaning practices, periodic edge checks, and prompt repairs, your resized rug will hold up beautifully for years.
Cleaning And Care Practices
Maintaining your freshly resized rug demands consistent attention. Skipping these steps can lead to costly issues. I’ve learned this through experience, and it’s simpler than you might think.
Here’s what I do regularly:
- Vacuum gently with soft settings, avoiding aggressive passes over newly bound edges per linear foot; your stitching will thank you.
- Inspect binding seams regularly for loose glue or separation, then re-secure immediately to prevent further problems.
- Keep moisture away since excess dampness weakens adhesive and invites mold under the binding.
- Use hot glue closer to your edge during maintenance, keeping everything flush and preventing bulky seams that catch shoes.
These practices help preserve your investment. Neglect can lead to beautiful resized rugs being destroyed, and such outcomes are preventable.
Preventing Fraying And Wear
Why do so many people skip edge binding after cutting their rugs? I used to think it was unnecessary too. Then my freshly cut rug started unraveling like a sweater, and I learned my lesson the hard way.
Edge binding is essential if you want your resized rug to last. I apply hot glue while keeping the binding slightly overhanging the edge; this simple technique minimizes fraying dramatically. After the glue sets, I trim any loose fibers and stray glue strings for a polished finish.
Whether I choose Instabind or professional binding measured by the foot, the investment pays off immediately. Your rug deserves protection, and that one rug project without binding taught me everything I needed to know.
Long-Term Durability Considerations
Most people think edge binding is the finish line; you glue it down, trim the loose bits, and you’re done. However, this is just the start of ensuring long-term durability. Here’s what matters for keeping your resized rug looking fresh:
- Match your binding materials to your rug’s pile and backing; mismatched binding suggests a DIY job.
- Inspect seams quarterly for separation or fraying you might have missed initially.
- Consider professional binding if you want a polished, durable finish; it is worth the investment.
- Rotate your rug annually to distribute wear evenly across traffic zones.
I have seen cheap binding unravel within months. Investing in quality edge binding materials and proper application techniques can transform your cut rug from a temporary fix to a lasting piece. Future maintenance will be much easier with these considerations in mind.
When Professional Rug Resizing Makes Sense
Since I’ve had my share of DIY rug edge mishaps, I’ve realized that professional resizing often proves to be a better investment, particularly when considering the costs of a poorly executed job. If your rug is made from delicate wool or intricate weaves that might unravel, hiring a professional is advisable. Binding specialists typically charge $1.50 to $3 per linear foot and provide polished results in just a few days. They can perfectly color-match edges, which DIY glue cannot achieve. However, if you’re confident in your skills and working with sturdy materials, you can cut your costs significantly. The key question to ask yourself is whether you can accept imperfections or if you require flawless results.