The standard shower curtain size is 70 inches wide by 72 inches long; that’s what works for most bathrooms. Assuming this fits your space can lead to issues with excess fabric or water splashing everywhere. Your actual bathroom layout is important. Always measure wall-to-wall width, add 12 inches for fullness, then measure from the rod to the floor and subtract 8 to 10 inches. Taking five minutes to measure accurately is more effective than guesswork, and there are several factors to consider to get it right.
What Is a Standard Shower Curtain Size?

Have you ever stood in front of a shower curtain rack unsure if you’re picking the right size?
The standard shower curtain size is 70 inches wide by 72 inches long. This is the baseline that most bathrooms require, as it fits most tubs and shower stalls seamlessly.
Width and length can vary, with options ranging from 54 to 78 inches wide and 70 to 84 inches long, depending on your bathroom layout. However, I prefer the 70×72 combination. It’s commonly used in hotels and stocked by landlords, so it’s a reliable choice.
The simplicity of standard dimensions means they fit standard rods and rings without complications. This eliminates guesswork when it comes to installation.

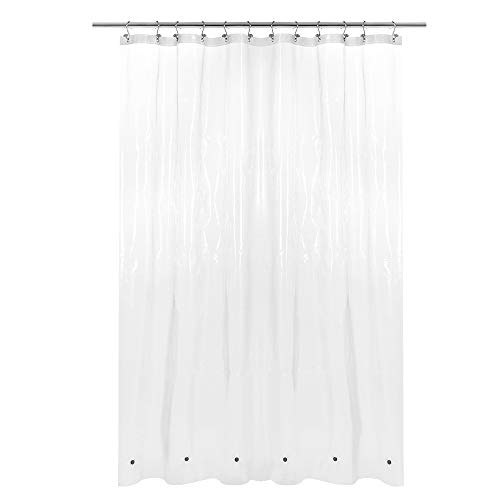
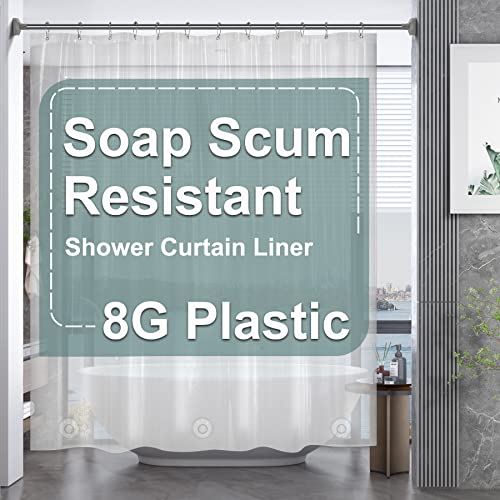
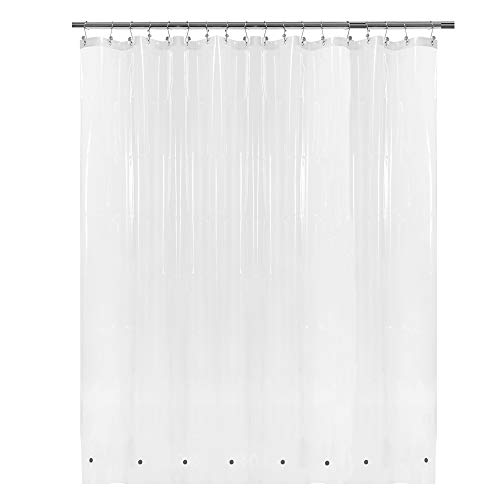
Keep Your Bathroom or Caravan Dry - Our premium PEVA shower curtain liner is waterproof, protecting your decorative shower curtain and keeping your bathroom floor dry, shampoo and soap residues never leaking out.
High Quality: Natural than plastic one, no chemical smell, pvc free. It can be used as shower curtain liner or shower curtain for your bathroom

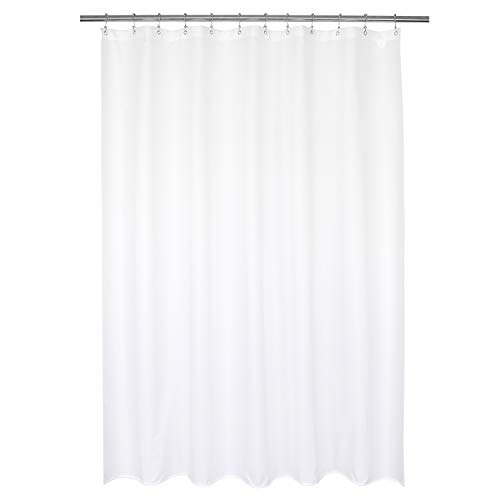
SOFT & 100% WATERPROOF: This shower curtain liner is made of premium fabric with the ultimate waterproof coating tech, making it completely water proof but still soft feeling
Why Your Bathroom Layout Determines Your Size

Your bathroom’s dimensions are crucial, and I learned this by installing a 70×72 curtain in a compact stall shower that needed something narrower. The bathroom layout fundamentally determines the appropriate shower curtain size. I found that stall showers require slimmer curtains—around 54 inches wide and 78 inches long—to prevent bunching and wasted fabric. In contrast, larger bathrooms call for a fuller look; I typically add about 12 inches to the wall-to-wall measurement for proper drape and visual appeal. For ceiling-high installations, 84-inch lengths are necessary to avoid pooling on the shower floor. Extra-wide bathrooms can accommodate 108-inch options effectively. Always measure first and make no assumptions. Your unique space deserves curtain dimensions that complement its specific architecture.

PREMIUM PEVA: Made from heavy duty PEVA material. This extra long stall shower curtain liner is no chemical odor, PVC-free and BPA-free
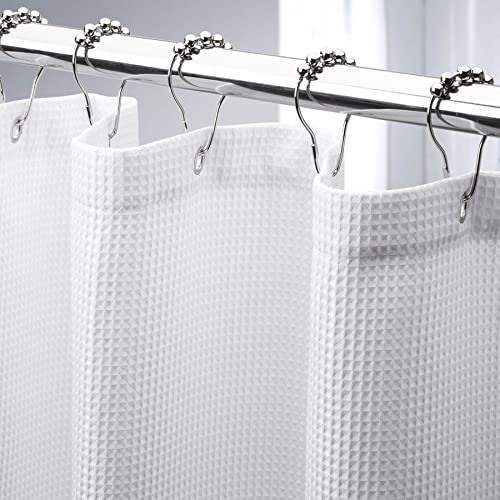
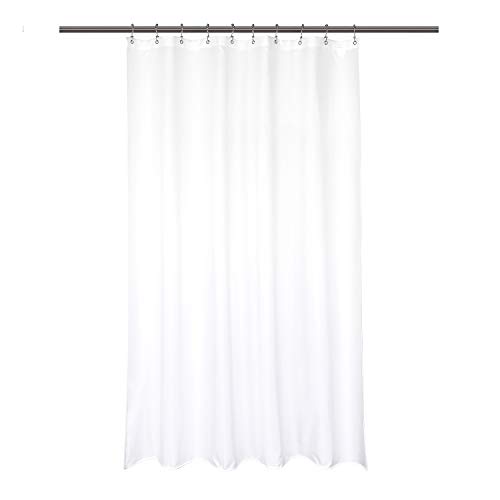
Superior quality - AmazerBath white shower curtain is made of heavy-duty polyester fabric. 240GSM (Gram Per Square Meter), about 0.55 pounds heavier than normal 90GSM fabric shower curtains. It is soft and comfortable to touch, no smell, no-blowing, withstands moist bathroom. Premium quality ensures long-lasting use.

Hotel quality protection & compact fit: This single-pack 54 x 78 inches shower curtain liner is precision-sized for narrow stalls, RVs, and compact bathroom spaces. It provides effective water-resistant protection to keep your decorative curtain dry and floors safe, featuring a premium fabric build for a hotel-grade feel. (Hooks not included)
Step 1: Measure Your Wall-to-Wall Width

I’ve seen many people grab a curtain without measuring, which can lead to issues. To avoid this, measure straight across from wall to wall at the opening of your shower and jot down that number. Then, add 12 inches to create a relaxed, gathered look that helps prevent water from escaping. Those extra inches can significantly improve the appearance and functionality of the curtain, ensuring it provides proper splash control.

Keep Your Bathroom Dry - Our premium PEVA shower curtain liner is waterproof, protecting your decorative shower curtain and keeping your bathroom floor dry, shampoo and soap residues never leaking out.

Lightweight and waterproof: The shower curtain liner is lightweight, which is easy to wipe. The smooth shower liner is waterproof and draines quickly, keeping your bathroom dry and clean.
Long waffle shower curtain - This 72x84 Inches long shower curtain fits taller ceilings, it could be too long for standard bathtubs and shower stalls. Please measure before purchase.
Wall-to-Wall Measurement Technique
Why do most people skip this essential first step and end up with a gappy, unflattering shower curtain? I’ve been there, grabbing whatever size seemed close enough. That was a mistake.
I measure wall-to-wall with a tape measure, capturing the full span across my opening. No shortcuts. I write down that number because I will definitely forget it.
Then I add 12 inches. This is key. That extra width gives your curtain the relaxed, elegant drape you want. Without it, you will have gaps showing your shower walls.
I then compare my result to the standard widths: 72 or 84 inches. I pick whichever sits closest to my wall measurement plus 12.
Five minutes of precision can save months of shower frustration.
Recording Accurate Width Dimensions
Grab your tape measure; this single step determines whether you’ll enjoy your shower curtain or regret it every morning.
I measure wall-to-wall horizontally across my shower opening, corner to corner. I write down the exact number—let’s say it’s 60 inches. Most people stop there, but I add 12 inches to that measurement for proper curtain fullness. This results in 72 inches, which happens to be a standard size.
The extra 12 inches prevents water gaps and ensures my curtain closes properly without straining. I’ve learned through experience that skimpy curtains can lead to splash issues.
My width measurement now aligns with standard options like 72 or 84 inches, ensuring compatibility with typical rods and hardware. Record everything clearly for future reference.
Adding the Twelve-Inch Buffer
Since most shower openings require more fabric than expected, measure your wall-to-wall width and then add 12 inches. I learned this from experience; my first curtain left awkward gaps on both sides. That 12-inch buffer is essential for a polished look.
| Wall-to-Wall | Plus Buffer | Recommended Width | Why It Works | Result |
|---|---|---|---|---|
| 60 inches | +12 inches | 72 inches | Standard option | Fuller drape |
| 72 inches | +12 inches | 84 inches | Premium coverage | No gaps |
| 66 inches | +12 inches | 78 inches | Custom fit | Best aesthetics |
The shower curtain width is important because proper folds create a relaxed, professional appearance. Your 12-inch buffer allows for beautiful drape, preventing crowding when drawn closed. This calculation can significantly enhance your bathroom experience.
Step 2: Measure From Rod to Floor
How’s your measurement process going? Let’s focus on an essential step for your curtain decision: measuring from the rod to the floor.
Here’s what works best:
- Grab your tape measure and extend it straight down from your rod to the floor, ensuring no angles or guessing.
- Subtract 8–10 inches from that total to account for hanging rings and natural gaps.
- Standard 72-inch curtains fit well for most setups, but always verify your specific measurements first.
- Choose 84 inches if you have higher ceilings or longer tubs to avoid that awkward floor-touching situation.
Measure twice, buy once. This rod-to-floor measurement directly determines your curtain length. Getting it right ensures your standard shower curtain fits properly.

Floor to Ceiling Extra Long Shower Curtain Liner - This 72x108 inches extra long shower curtain liner is meant for super tall-ceiling bathrooms, it could be too long for regular use, please measure before purchase.
Hotel quality protection & extra long fit: This single-pack 72 x 108 inches extra long shower curtain liner is perfect for high ceilings and tall shower configurations. It provides effective water-resistant protection to keep your decorative curtain dry and floors safe, featuring a hotel-grade build for a premium feel. (Hooks not included)
▲Size: 108inches wide by72inches long / 9ft x6ft with 18 holes/metal eyelets.Free of 18 white plastic hooks won't get rust and easy to match all shower curtains. BTW, This versatile shower liner can be used as a standalone shower curtain or as a shower liner for a cloth shower curtain
Standard, Extra-Long, Extra-Wide, and Stall Sizes Explained
I’ve learned the hard way that shower curtain sizing isn’t one-size-fits-all. Picking the wrong dimensions can throw off your entire bathroom setup. You have your standard 70×72-inch curtain, which is the reliable workhorse for most bathrooms. There’s also the extra-long size at 70×84 inches for cathedral ceilings, the extra-wide at 108×72 inches for spacious showers, and compact stall sizes at 54×78 inches for tight quarters. The key is to measure first, as nothing is worse than hanging a curtain only to find it’s pooling on the floor or leaving awkward gaps.

Effortless No-Tool Installation: No tools, no drilling, and no damage to your walls. This spring tension rod sets up in seconds. Simply twist to extend, place it, and release to secure a fit from 31 to 80 inches

Premium PEVA: 3 magnets at bottom for iron-core bathtubs & 12 metal grommet holes, it can be used as a stand-alone shower curtain or shower liner

【Professional 3M Glue】STABLE AND SAFE - We use professional 3M glue to cover super strong stickiness. The 3.15-inch diameter can Bear 60 Pounds without falling off.
Standard Dimensions Overview
Shower curtain sizing isn’t one-size-fits-all. I learned this after hanging a standard curtain in my bathroom, only to find water splashing onto the floor because it was too short for my high ceiling. Standard dimensions are important.
I’ve discovered the following:
- Standard dimensions run 70 inches wide by 72 inches long, suitable for most bathrooms.
- Extra-long curtains measure 84 inches, ideal for higher ceilings.
- Stall shower curtains are 54 inches wide by 78 inches long for compact spaces.
- Extra-wide options reach 108 inches wide by 72 inches long for spacious openings.
The shower curtain size you choose depends on your specific setup. Measure twice, buy once.
Extra-Long And Extra-Wide
Once you’ve nailed down the basics, you’re ready to tackle the real world of bathroom layouts. Most bathrooms aren’t standard. After my ceiling-height disaster, I learned that picking the right curtain means understanding how these four main categories work in real spaces.
Extra-long curtains, measuring around 70 inches wide by 84 inches long, saved my high-ceilinged bathroom. They are perfect for shower/tub combos where standard curtain sizes leave gaps. Meanwhile, extra-wide options, measuring 108 inches wide by 72 inches long, became my game-changer for larger enclosures. I discovered these aren’t just bigger; they are strategically sized.
The key is understanding your specific space before buying. Stall sizes of 54 by 78 inches work well in tight quarters. Matching curtain size to your bathroom is more effective than guessing. Frustration with ill-fitting curtains is common.
Stall Size Specifications
Why do bathroom stalls feel like they were designed by someone who hates water on the floor? Stall shower curtains demand precision; they are not one-size-fits-all situations.
Here are the stall-specific shower curtain size specifications:
- Standard stall width: 54 inches, tight but functional for compact enclosures.
- Typical length: 78 inches, providing solid coverage without excess pooling.
- Width and length balance: Narrower dimensions prevent awkward bunching.
- Real-world performance: These snug measurements contain water better than oversized alternatives.
I initially grabbed an extra-wide curtain for my cramped bathroom, which was a mistake. The stall shower required something tighter. A 54-inch width allows me to move without battling the fabric. Stall specifications are not limitations; they are solutions. You are not compromising; you are choosing smart functionality. Your shower stall deserves curtains that fit.
Standard or Extra-Long: Which Fits Your Bathroom?
How do you determine which size will work in your space? Measuring twice and buying once is essential.
Here’s a straightforward breakdown:
| Situation | Shower Curtain Size | Best For |
|---|---|---|
| Standard bathroom | 70″ × 72″ | Most homes |
| High ceilings | 70″ × 84″ extra-long | Tall spaces |
| Compact shower | 54″ × 78″ stall | Small bathrooms |
| Large setup | 108″ × 72″ | Spacious showers |
Standard sizing is ideal for typical homes; it’s reliable and affordable. If your ceiling is particularly high or you have extra-long tubs, consider the extra-long option. Stall shower curtains are useful for cramped spaces where standard sizes won’t fit. Always measure your rod height first, as this is crucial for a proper fit.

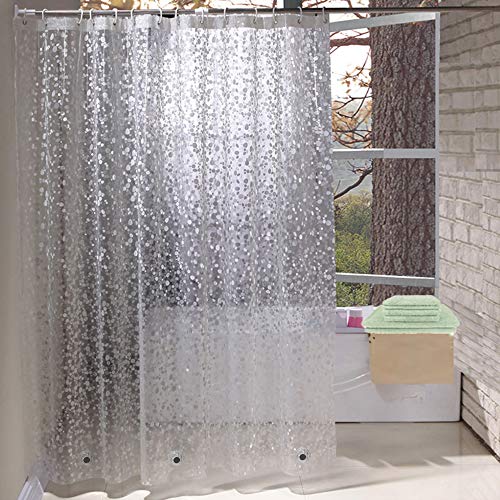
Waterproof and family-friendly material - AmazerBath clear shower curtain liner is made of premium PEVA material, there is no plastic smell. Super smooth surface design is created to resist water and promote water bead formation for swiftly rolling off the shower liner, keeping your floor dry and clean.
6 Magnets at Bottom: Magnetic shower curtain liner for your bathtub, 6 bottom magnets help keep the liner in place

See-through shower liner with 100% waterproof construction: Soft and durable heavyweight PEVA liner is guaranteed waterproof, BPA-free and odor-free (with no plastic smell!); clear liner lets light into your shower
Account for Fullness, Drape, and Floor Clearance
I’ve learned the hard way that using a standard 70-inch curtain without accounting for fullness results in a stretched-thin look. That’s why I always add 12 inches to my shower width for a draped effect. Height calculations are equally important; I stick with 84 inches for ceiling-height bathrooms to avoid pooling water on the floor, which can lead to mildew. I also maintain a 6–10 inch clearance gap to prevent moisture buildup. Get these margins right, and your curtain will look intentional instead of just being there.

Keep Your Bathroom Dry - Our premium PEVA shower curtain liner is waterproof, protecting your decorative shower curtain and keeping your bathroom floor dry, shampoo and soap residues never leaking out.
Hotel Quality: Natural than plastic one, non-toxic & pvc free. It can be used as shower curtain liner or shower curtain for your bathroom
SOFT & 100% WATERPROOF: This shower curtain liner is made of premium fabric with the ultimate waterproof coating tech, making it completely water proof but still soft feeling
Calculating Proper Width Margin
Once you’ve measured your shower opening, don’t just grab a curtain that matches those dimensions; I made that mistake, resulting in a stretched-thin curtain with gaps on both sides.
Here’s what I learned: add 12 inches to your shower’s width measurement. This width margin improves the overall appearance. Your curtain needs room to drape beautifully and fold naturally. When I started following this rule, my bathroom looked much more intentional.
Here’s how I approach it:
- Measure wall-to-wall across your shower opening.
- Add 12 inches to that number.
- Match the result to standard sizes (72 or 84 inches).
- Select whichever standard size is closest to your calculation.
Those standard sizes exist for a reason. They’re designed so fabric cascades with proper fullness, not stretched tight like plastic wrap. Your shower deserves this margin.
Managing Height And Floor Gap
Getting your width right is half the battle. Now, you need to nail the vertical measurement, as this is where many people stumble. I’ve seen too many curtains pooling on wet bathroom floors, creating slip hazards. My rule is to measure from your curtain rod to the floor, then subtract 8–10 inches for proper floor clearance. This gap prevents mildew and maintains a tidy appearance.
Standard shower curtain lengths run 72 inches for typical setups and 84 inches for longer tubs. When using rings, start your curtain drop measurements from where they hook on; this is the only accurate method. I learned this after hanging a curtain that dragged awkwardly. Getting that clearance right enhances the overall look of your bathroom.
Choose Compatible Hardware: Grommets vs. Button-Holes
How is your shower curtain attached to the rod? This detail is more important than many people think. Here’s what I discovered about hardware compatibility:
- Grommets are metal eyelets punched along your curtain’s edge; they slide directly onto rods for a sleek look.
- Button-holes are panel-top openings that accept rings, offering more styling flexibility.
- Liner matching is crucial; ensure your liner fits your curtain size perfectly.
- Ring compatibility determines smooth sliding; pick rings designed for your chosen top construction.
I made the mistake of buying beautiful grommeted curtains with incompatible hardware. Your 72″ panel has 12 button-holes, while 84″ panels have 15. Check Shower Curtain Hardware Edits for specific rod suggestions, and verify everything fits before you commit. Getting this right can significantly enhance your bathroom experience.
Waterproof and family-friendly material - AmazerBath clear shower curtain liner is made of premium PEVA material, there is no plastic smell. Super smooth surface design is created to resist water and promote water bead formation for swiftly rolling off the shower liner, keeping your floor dry and clean.

WHITE SHOWER CURTAINS FOR BATHROOM - looking for a stylish and functional addition to your bathroom? look no further than our shower curtain! measuring 72 x 84 inches, this curtain is perfect for most tub and shower areas, keeping water off your floors and giving you the privacy you need. our latest waterproof technology keeps your bathroom neat and dry.

🛁【Boho Farmhouse Style with Tassel】: This country shower curtain is designed in 3D embroidery plaid style with tassels on three sides, a good combination of bohemian and farmhouse style, elegant and country style. A pretty decorative shower curtain can bring a beautiful look to your bathroom, create a sense of luxury, allowing you to enjoy a luxurious hotel bath at home.
Pick a Liner That Matches Your Curtain Size
Your liner isn’t just an afterthought; it plays a crucial role in protecting your investment. I’ve learned this from observing fabric curtains deteriorate due to moisture exposure. It’s essential that your liner’s shower curtain size and curtain height align precisely with your actual curtain.
| Curtain Dimensions | Recommended Liner Size | Liner Compatibility | Why It Matters |
|---|---|---|---|
| 36×72 inches | 36×72 inches | Matches grommet spacing | Prevents water gaps |
| 72 inches long | Same height or 1-2 inches shorter | Rod fit confirmed | Optimal coverage |
| Non-standard widths | 1-2 inches smaller | Hardware alignment checked | Prevents bunching |
| Heavy fabric curtains | Exact match required | Button-hole compatible | Maximum protection |
I always pair my curtain with a liner; no exceptions. Match those measurements and confirm hardware compatibility to ensure your beautiful curtain lasts for years.

Hotel Quality: Natural than plastic one, non-toxic & pvc free. It can be used as shower curtain liner or shower curtain for your bathroom
8 Magnets at Bottom: Magnetic shower curtain liner extra wide for your bathtub, 8 bottom magnets help keep the liner in place

[LARGE BATHROOM ONLY] - This is Large Size 108" x 72" Shower Liner. It can only fit Large Bathrooms. Suit with straight/curved shower rods. This Curtain can be used along or as a liner for a fabric shower curtain. No more worrying about fitting it with your favorite fabric shower curtain. If you got your favorite fabric shower curtain, this liner should be your best option to choose.
How Material Affects Durability (Not Size)
I’ve learned that your curtain’s actual durability comes down to material choice, not the standard 70×72 dimensions. I once bought a flimsy polyester curtain that disintegrated after three months of daily showers, while a heavier fabric lasted for years. Fabric weight is crucial; the difference between a wimpy 2-3 ounce polyester that will mildew and tear versus a sturdy 8-10 ounce canvas or cotton blend that stands up to moisture is significant. Water resistance is a key factor—whether your curtain is treated with antimicrobial coatings or comes pre-waterproofed determines if you’re fighting mold in six weeks or effectively protecting your bathroom from spray damage.

WATERPROOF SHOWER CURATAIN - Ultra smooth specialty design of LiBa shower curtain liners created to roll off the water and to promote water bead formation so water swiftly rolls off the surface, keeping your bathroom dry and clean. With 3 timeless color options to choose from, use it as a stand-alone curtain for a bright & airy atmosphere, or pair it with your favorite fabric shower curtain.

【Practical Design】Fits Large Shower Curtain Rod Ends Up to 3 Inches in Diameter.Can hold 20 pounds.

【Easy to Install】The adjustable shower curtain rod is available from 51 to 86 Inches.It only needs to adjust the length through the adjustment button,so you can quickly and easily install the tension rod without drilling, screws or any tools.
Fabric Weight And Longevity
Why does one shower curtain fall apart after six months while another lasts for years? The answer lies in fabric weight, measured in GSM (grams per square meter). Here is what I discovered:
- Standard shower curtains use 100-200 GSM polyester, balancing affordability with durability.
- Higher GSM means denser fabric that resists wear, snagging, and mildew better.
- Heavier fabrics drape beautifully and resist wrinkling; however, they require sturdier rods.
- A liner protects your outer fabric from direct water exposure, dramatically extending longevity.
I used to underestimate fabric weight. Upgrading to higher GSM with a quality liner resulted in my curtains no longer deteriorating. Proper care is important; gentle machine washing and air-drying preserve everything much longer than neglecting maintenance can achieve. Investing in weight is worthwhile.
Water Resistance And Protection
How much water is actually soaking into your shower curtain right now? I learned the hard way that most fabrics absorb moisture like sponges, inviting mildew to take over. That’s why I switched to premium polyester and PVC-free materials; they bead water right off instead of soaking it up.
Quick-dry performance is not just marketing fluff. When water beads on the surface, your curtain dries faster, which significantly reduces mildew growth. I’ve noticed my curtain stays fresher longer because moisture doesn’t linger in the fibers.
Adding a liner creates an extra moisture barrier, protecting your outer curtain and greatly extending its lifespan. Proper care is important; machine wash and air-dry to maintain water resistance. Investing in water-resistant materials helps avoid the need for frequent curtain replacements.
Walk-In Showers vs. Bathtubs: Layout Differences
When measuring for a shower curtain, the first consideration is whether it’s a walk-in setup or a traditional bathtub, as they require different approaches.
Walk-ins necessitate a distinct method compared to tubs. Here’s what I’ve learned:
- Rod-to-floor drops matter: Walk-ins need curtains hanging just above the floor, while tub curtains extend 6–10 inches into the basin.
- Width calculations differ: I focus on wall-to-wall width for walk-ins, which is often 1.5–2 times your shower opening, versus just the tub opening width.
- Coverage goals shift: Walk-ins prioritize doorless opening coverage, while tubs focus on splash prevention.
- Standard curtain size varies: Walk-ins typically require 54–108 inches wide depending on your layout, while tubs generally use 70–84 inches.
The measuring approach changes based on your bathroom’s layout. This is an important consideration.
Final Measurement Checklist Before Ordering
Before I click “buy” on that shower curtain, I’ve learned that rushing this step costs money and frustration. My measurement checklist has saved me from countless returns.
First, I measure my space twice. Width matters; standard dimensions run 70 inches, but mine needed 78. Length is crucial too. My clawfoot tub required 84 inches instead of the standard 72.
I photograph everything with measurements written directly on the wall. This is essential.
Next, I verify my curtain size against my specific layout. A walk-in shower has different requirements. I note whether I’m mounting inside or outside the tub frame, as this changes the curtain size calculation significantly.
Finally, I confirm return policies before ordering. Mistakes can happen.
Liner Sizing and Compatibility With Your Curtain
Once you’ve nailed down your curtain size, that measurement checklist is essential. Next, you need to address the liner situation. A beautiful curtain without the right liner can lead to damage from moisture.
A beautiful curtain without the right liner can lead to damage from moisture—protect your investment.
Here’s what matters most for liner sizing and curtain compatibility:
- Match your standard shower curtain size exactly or go 1–2 inches smaller to prevent sagging and bunching.
- Verify rod and roller ring compatibility so everything glides smoothly without jamming.
- Choose liner material wisely; fabric versus vinyl depends on your curtain’s care instructions and mildew concerns.
- Always pair them together because protecting your curtain investment is important.
Getting this right helps avoid issues later.
Getting the Perfect Fit: Measurement Checklist and Next Steps
How did I finally stop wrestling with curtains that bunched up like accordion folds? I created a measurement checklist. First, I measure wall-to-wall width and add 12 inches; this gives me that relaxed look I wanted. Next, I measure from rod to floor, then subtract 8–10 inches. This prevents the awkward dragging-on-tile situation. I’ve learned that shower curtain size is crucial. While many choose standard 72-inch widths, I found that multiplying my measurements by 1.5 to 2 provides a proper fit and fuller draping. For unusual layouts, I note ceiling height and stall dimensions. This measurement checklist transformed my shopping experience. I no longer guess; I focus on precision and confidence.